
For information on all transit, including busses, trams and trains, see the metlink website at http://www.metlinkmelbourne.com.au

As Melbourne is a long-standing system with both mixed-traffic situations as well as separate ROW, it is perhaps an excellent system to compare with Toronto. Some of the grades and tight turning that exist in Toronto also exist in Melbourne. Additionally the system in Melbourne used trolley poles for power pick up in the not-too-distant past, but now uses pantographs, so it is an excellent example of what to expect should this be the future for Toronto.
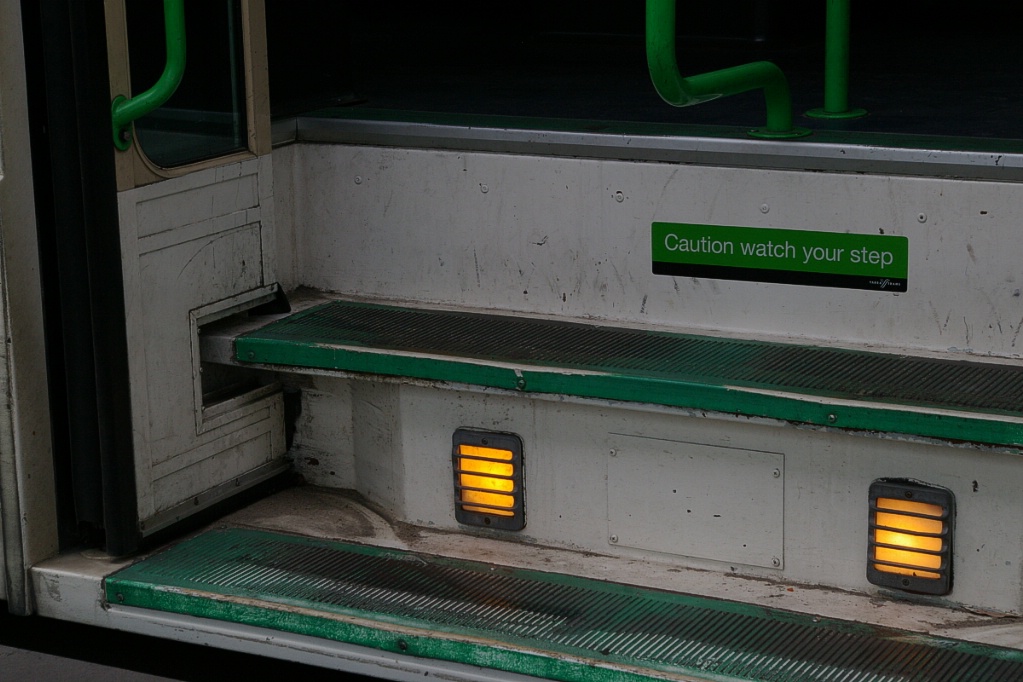
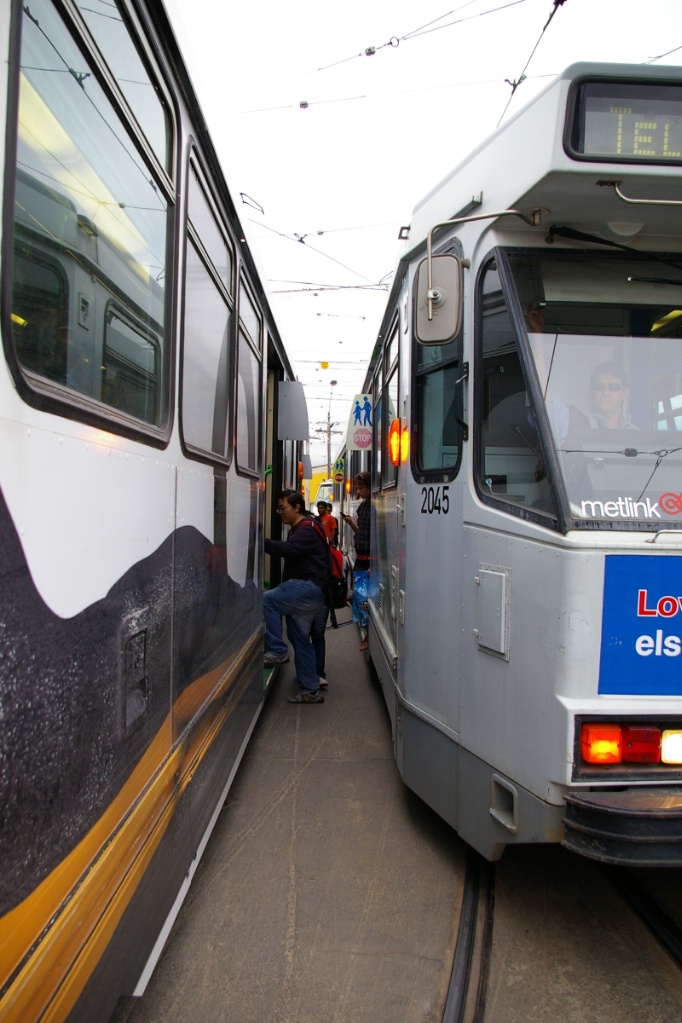
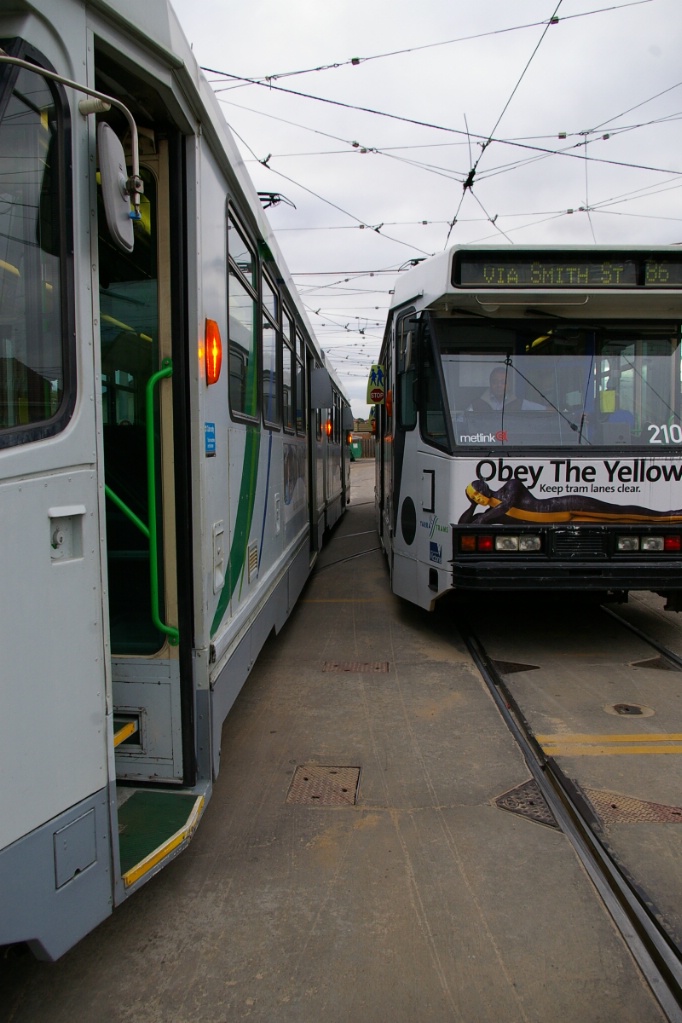
Don't stand on steps before the doors open!
To increase floor space, the run on the steps is short and the doors fold inwards having a cut-out to clear the upper step!
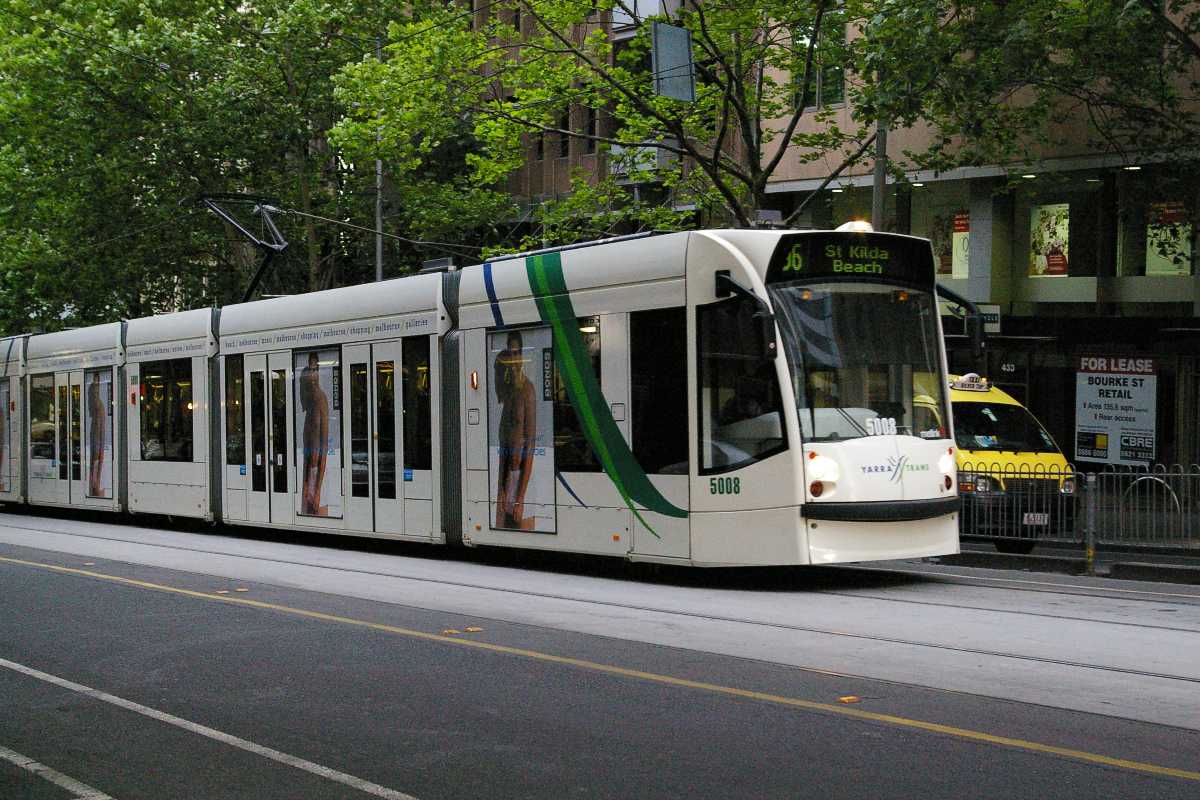
Yarra Trams operates bi-directional streetcar vehicles. Most of the fleet are high-floor vehicles with steps to climb from street level. The fleet also includes three types of low-floor vehicles, including 36 Citadis 202 trams from Alstom, and 59 Combino trams (two models) from Siemens.
Some interesting aspects of the operation:
- all-door loading: fare cards may be purchased at train stations, convenience stores and news stands and are validated on board vehicles, plus 2-hour and day fare media may be purchased from a vending machine on board vehicles
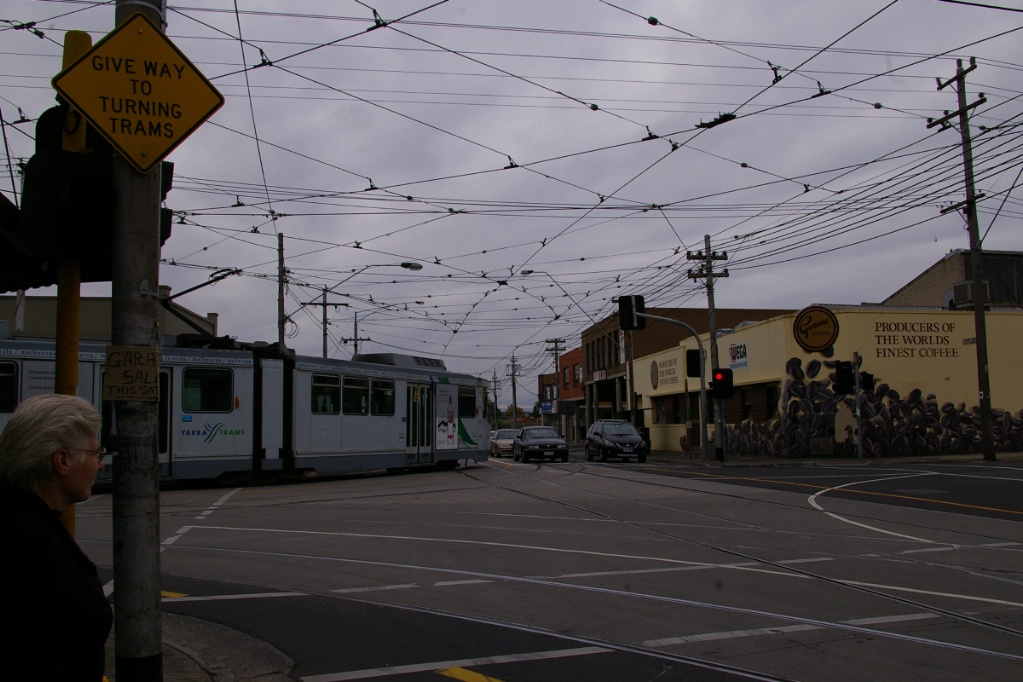
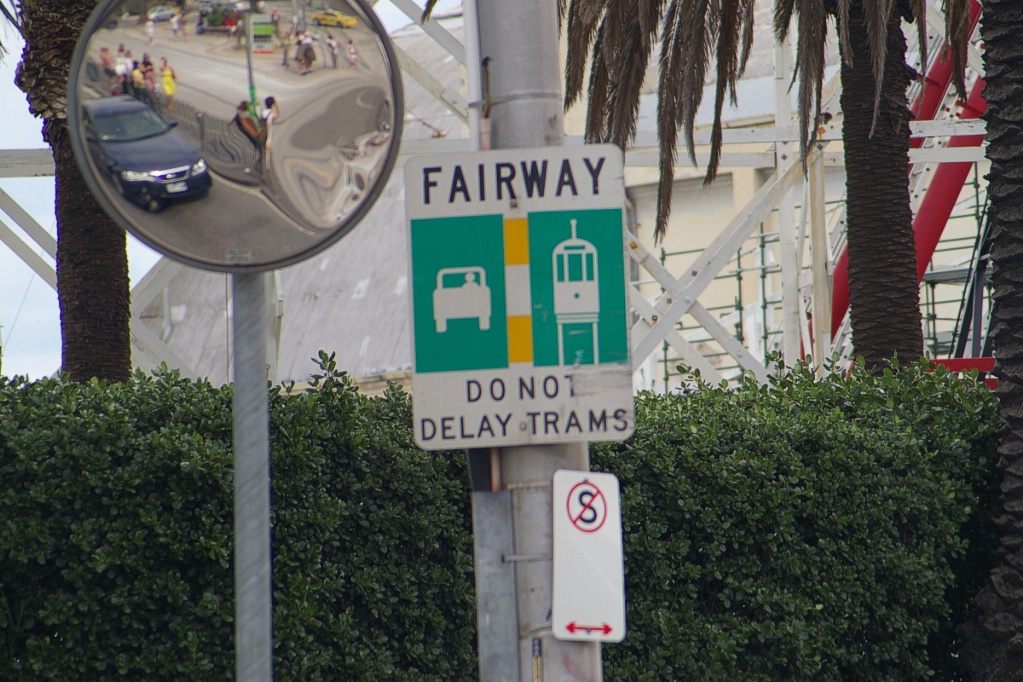
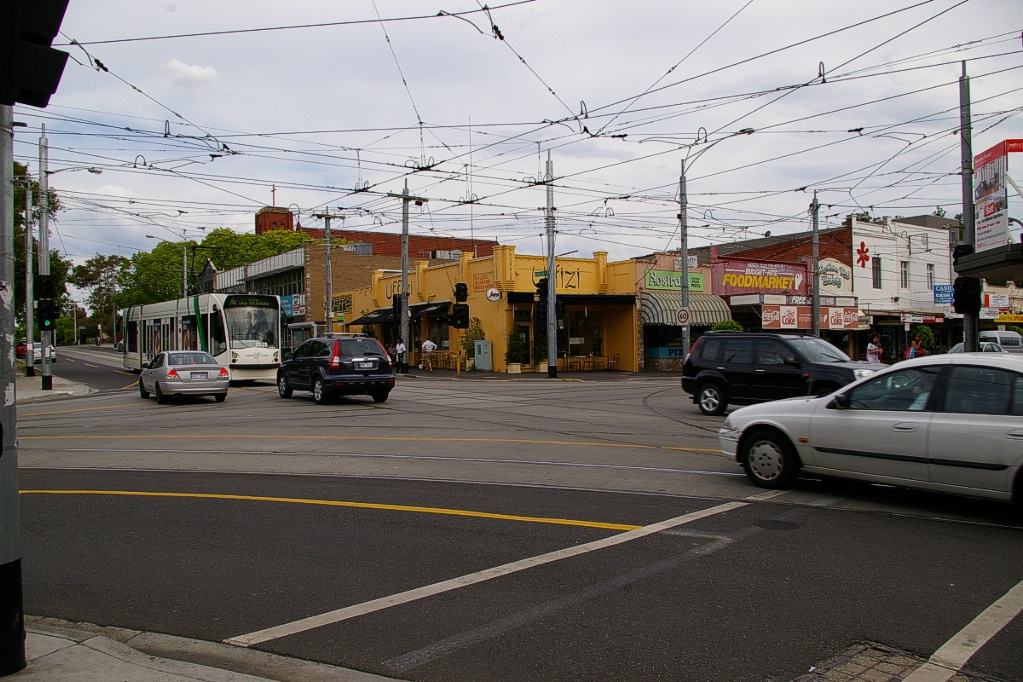
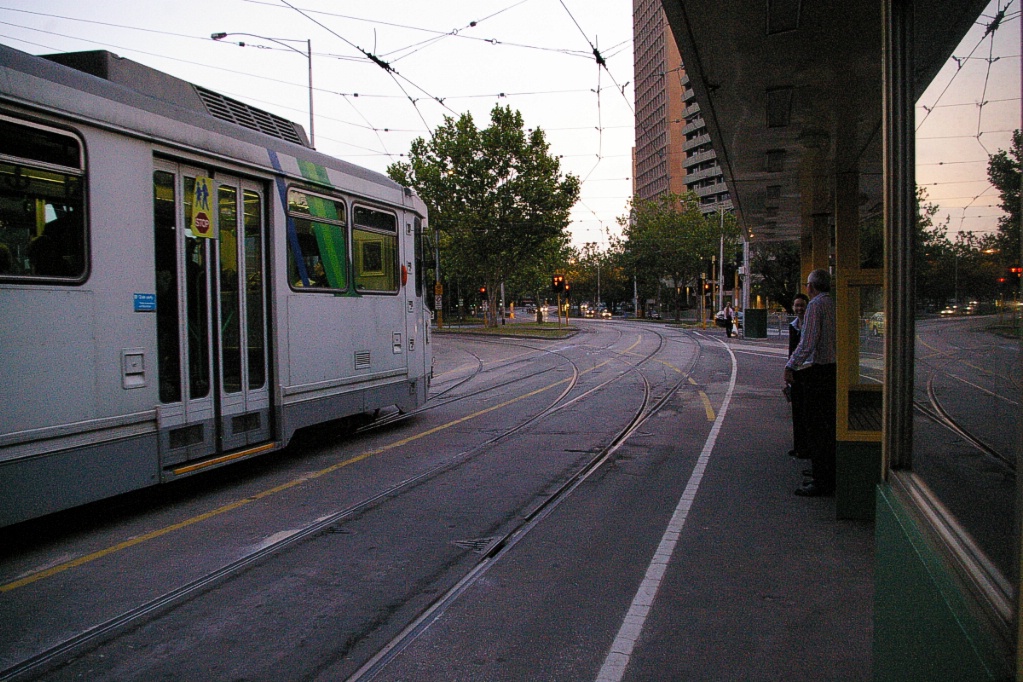
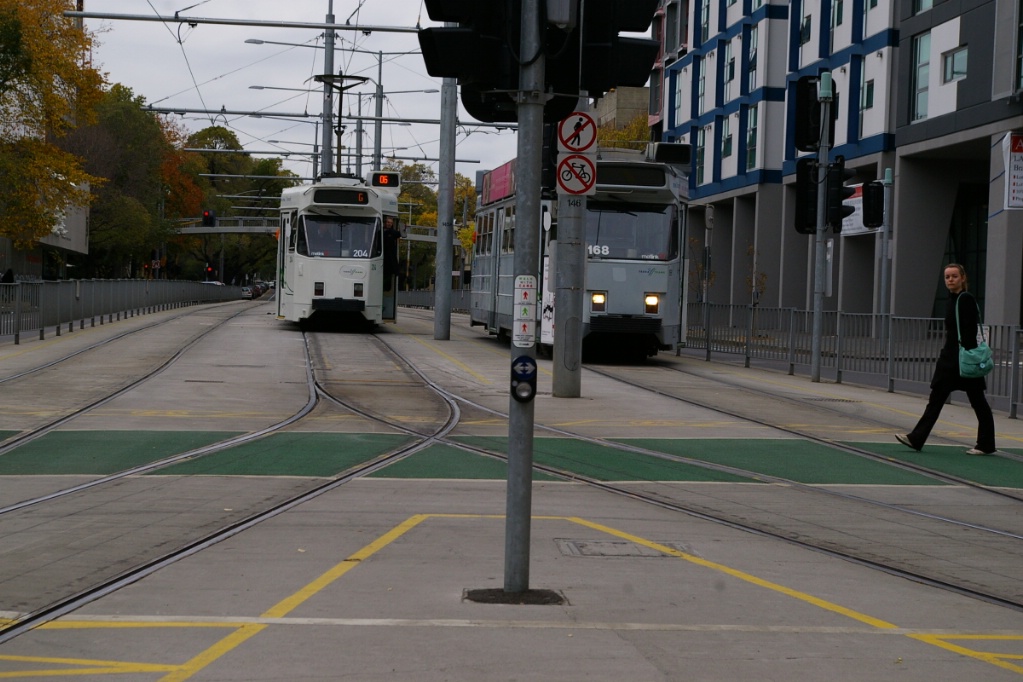
- most track in the CBD (Central Business District) is not physically separated from traffic - yellow lines separating tram lanes from traffic lanes are generally respected
- there is a substantial amount of interlining of routes, especially in the CBD. This results in very frequent service on many downtown streets with multiple options to move around the CBD.
- right turns (Australia is left-hand driving, so this is like our left turns) in the CBD are often implemented as "Hook" turns to eliminate interference with tram operations (see below)
- A fare free "City Circle" route circles the CBD using heritage W Class trams
Tram Classes
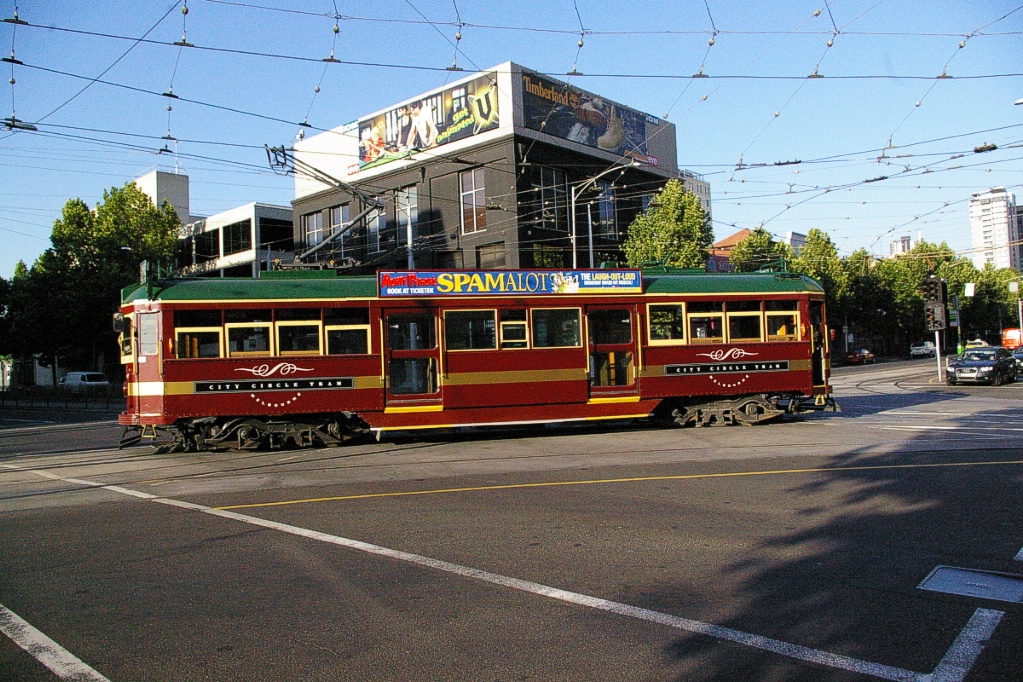
W6
Class tram used on
City Circle route
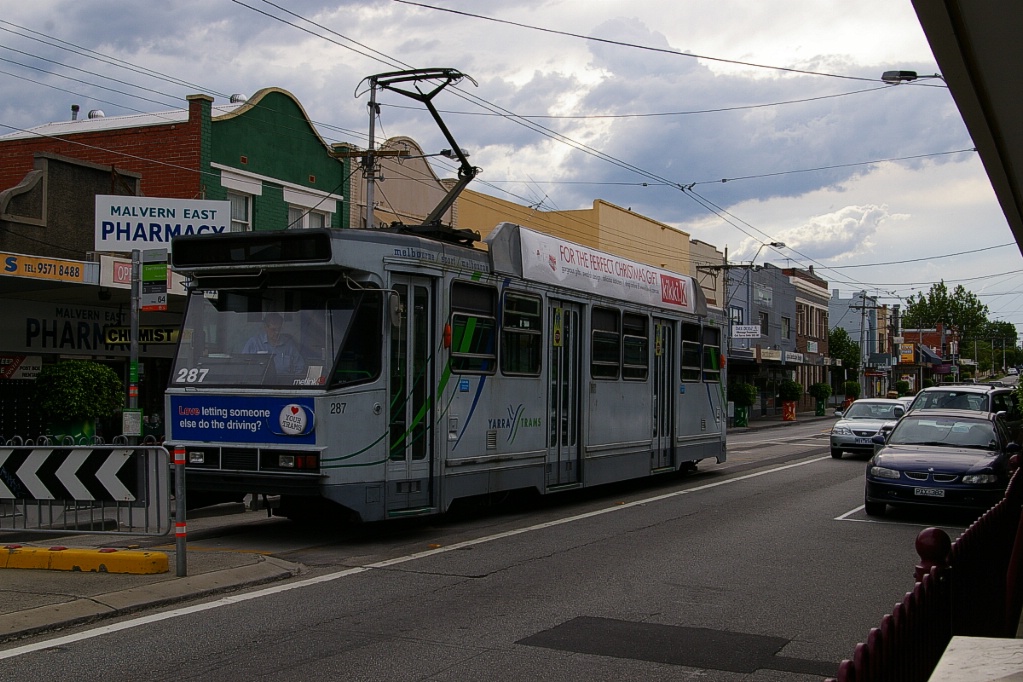
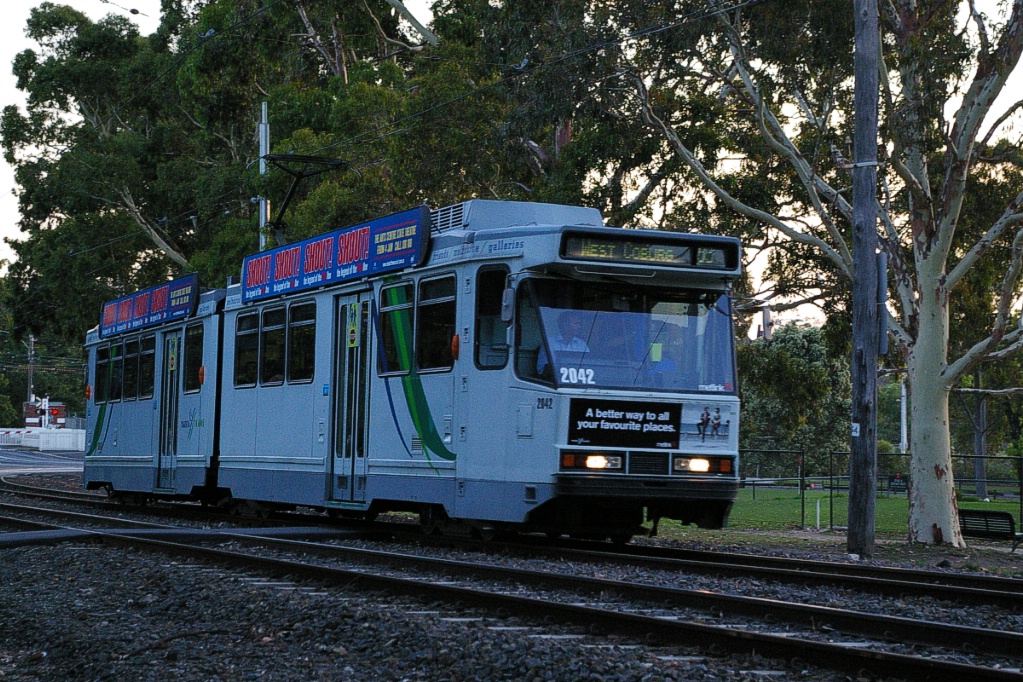
A1
Class tram at
East Malvern on Route 3
| System Highlights | |
Number of routes: |
27 |
Total length: |
approximately 245 km |
| Total stops: | 1770 |
| Loading: | some stops have low in-street platforms, others are street level |
| Fleet: | 493 trams available for regular service, including: |
| 43 M&MTB W Class (SW5, SW6, W6, W7: 14 m, vintage) | |
| 148 Comeng Z Class (Z1, Z2, Z3: 16.6 m, 1 section) | |
| 70 Comeng A Class (A1, A2: 15 m, 1 section) | |
| 2 Comeng B1 Class (similar to B2, without air conditioning) | |
| 130 Comeng B2 Class (23.6 m, 2 sections) | |
| 36 Alstom Citadis 202 C Class (23 m, 3 sections) | |
| 38 Siemens Combino D1 Class (20 m, 3 sections) | |
| 21 Siemens Combino D2 Class (30 m, 5 sections) | |
| Leased fleet: | 5 Alstom Citadis from Mulhouse France (32.5 m, 5 sections) |
| Fare collection: | Self service, barrier free, proof of payment |
| City circle route is free | |
| Fare integration: | Metlink fares integrated with buses, trams, and trains |
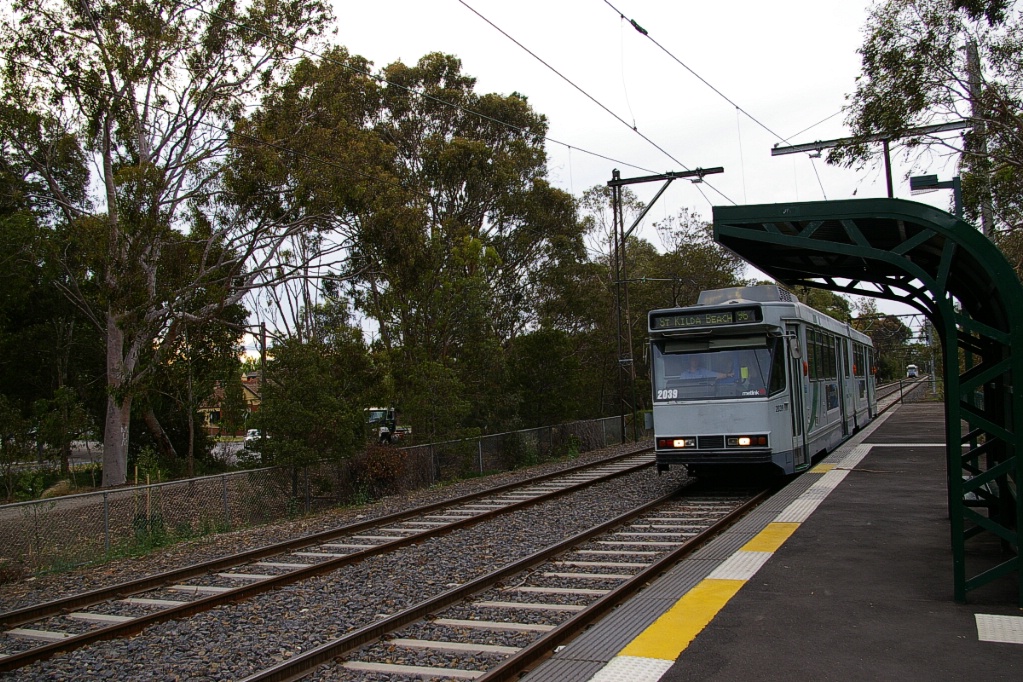
B2 Class tram in St. Kilda
on Route 96
C Class Citadis tram crossing Flinders Street on Spencer Street
running on Route 109 to Box Hill
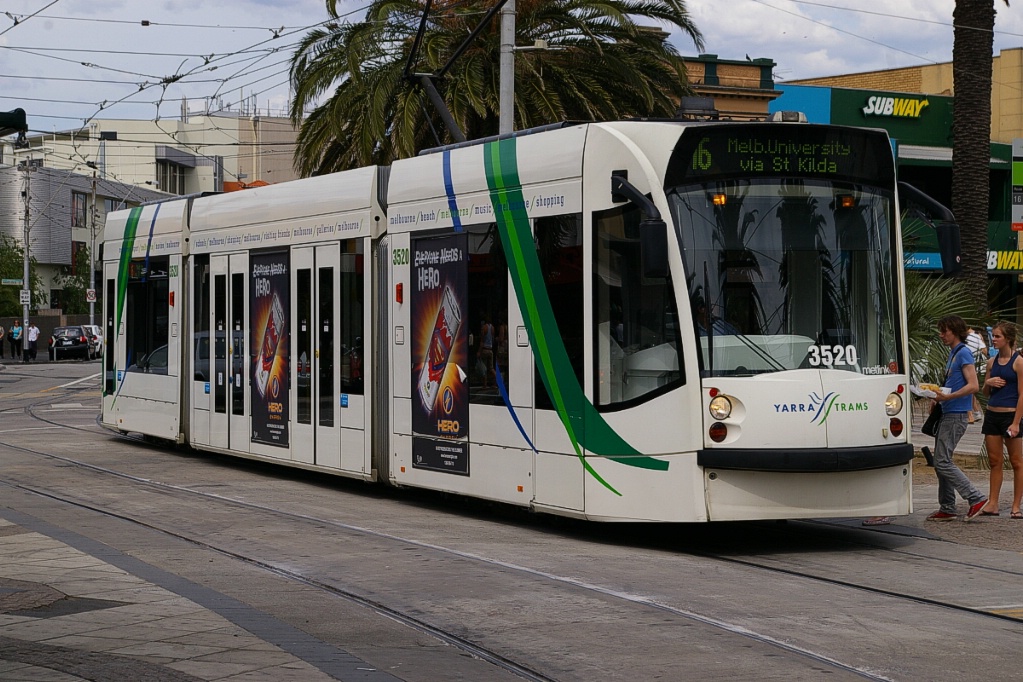
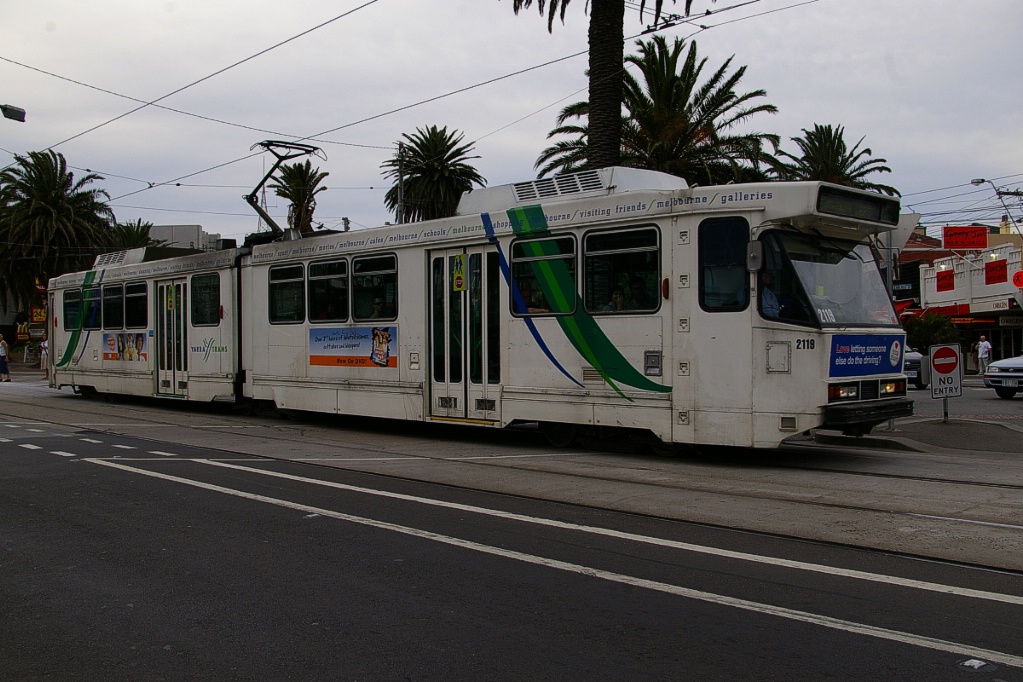
D1 Class Combino tram in St. Kilda
on Route 16
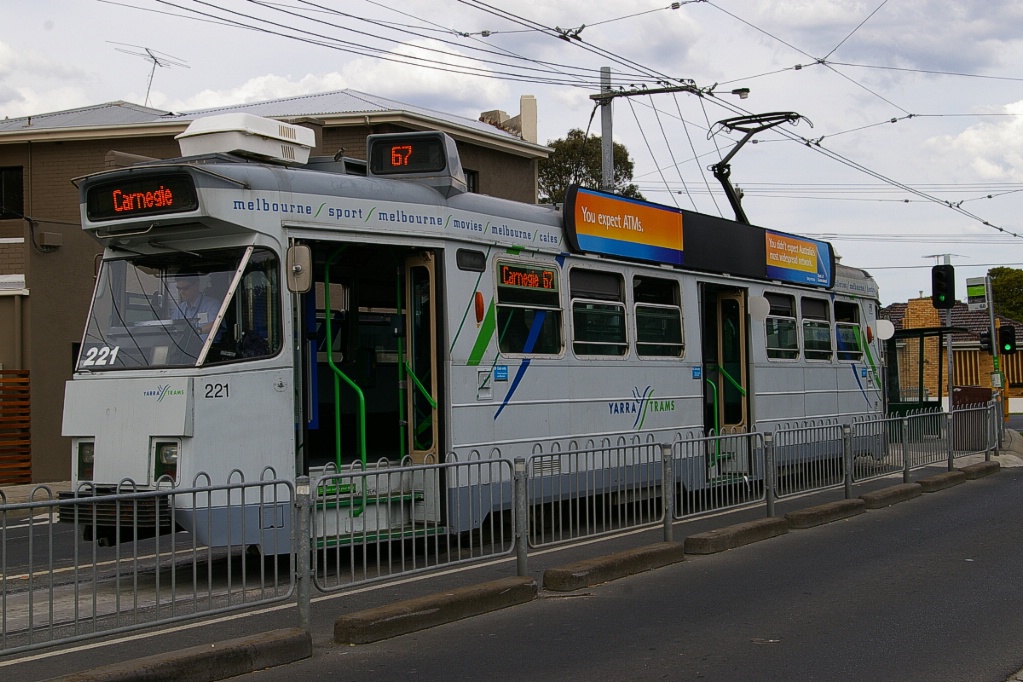
Z3 Class tram at
Carnegie on Route 67

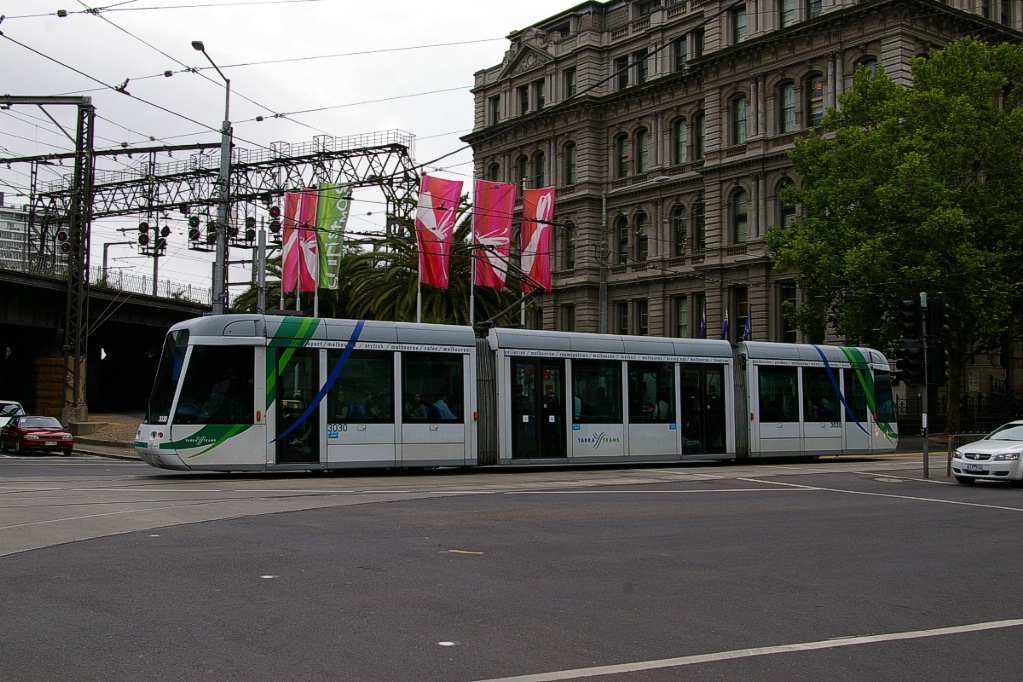
D2 Class Combino tram crossing Flinders Street on Spencer Street running on Route 96 to East Brunswick
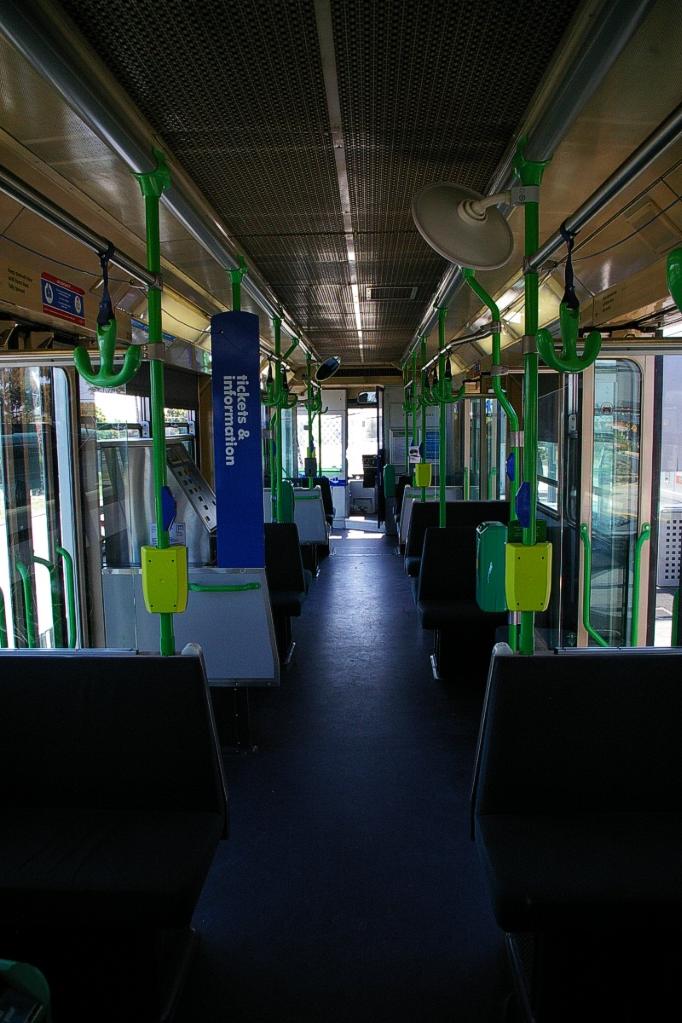
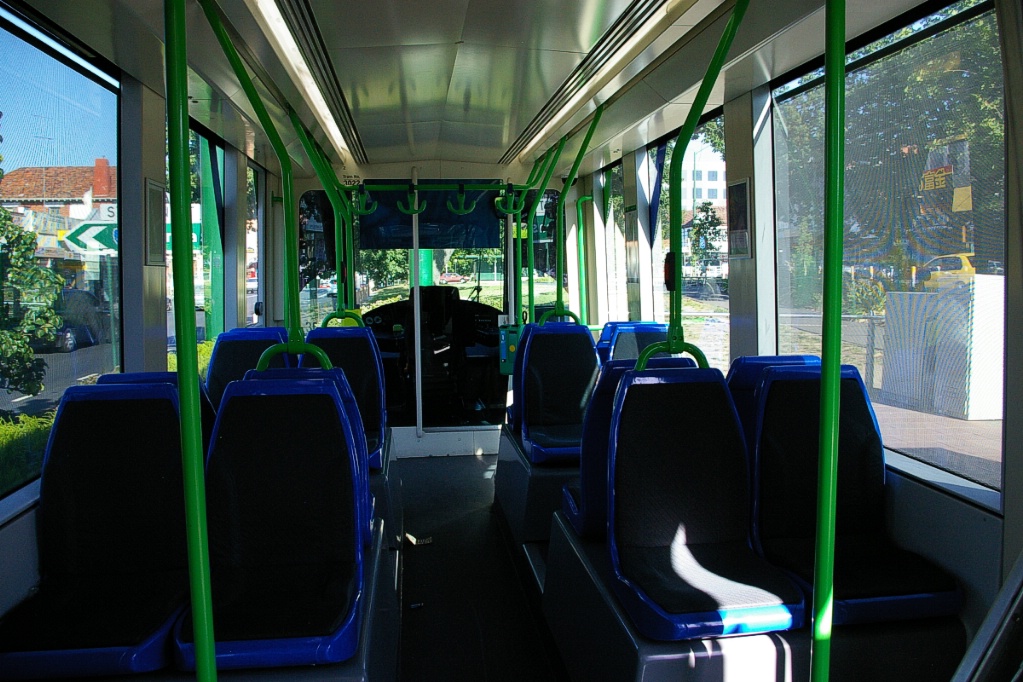
Interior of Class A1 tram
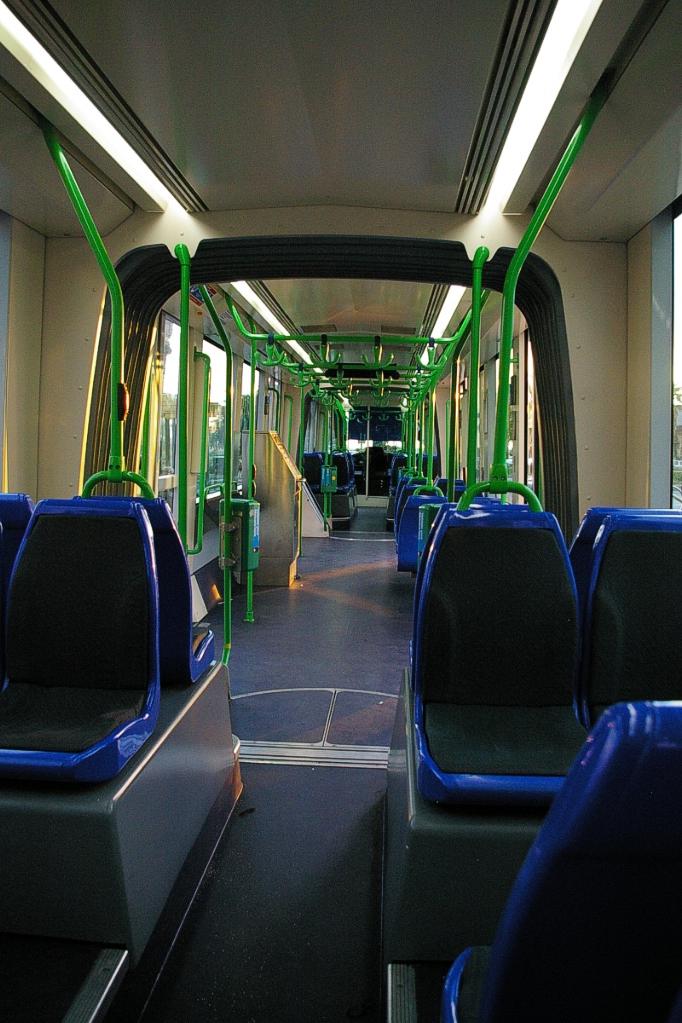
Interior of Citadis tram (#3022)
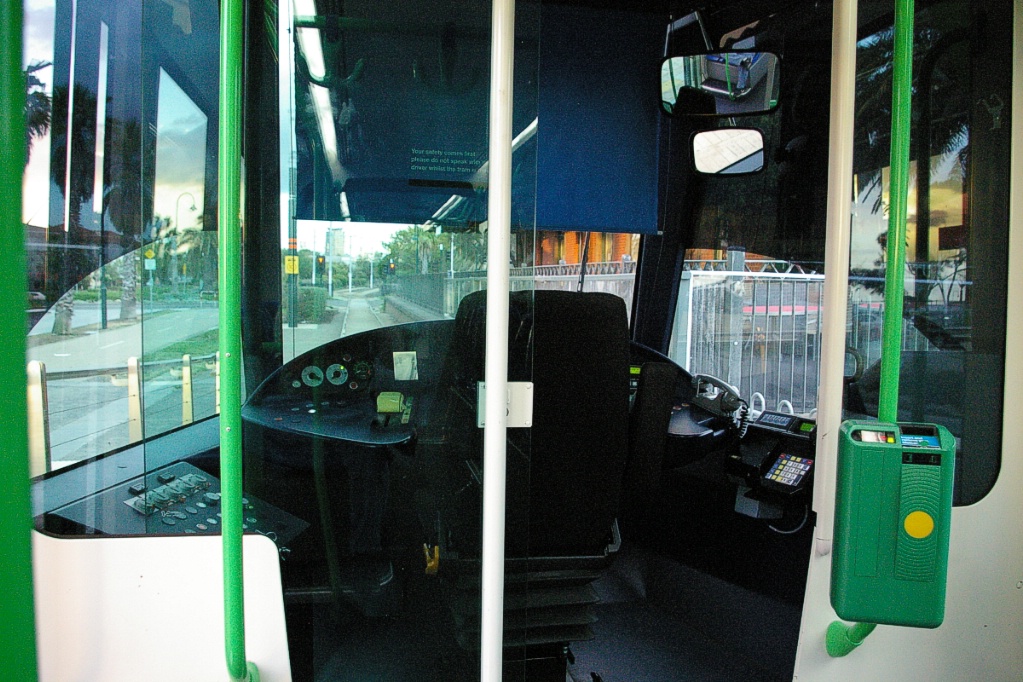
Driver's cab on an Alstom Citadis
Fare collection:
Fare cards may be purchased at train stations, convenience stores, and news stands. Fares may also be purchased from coin-only vending machines on each vehicle.


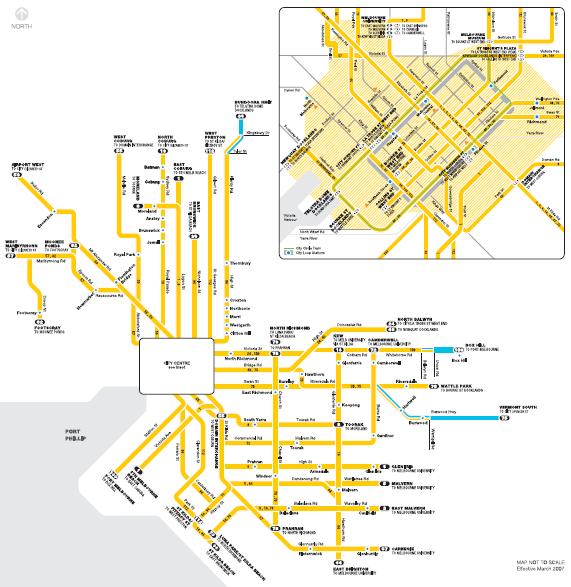
Metlink uses a zone system with Zone 1 covering downtown and the inner suburbs, and Zone 2 the outer suburbs. Most tram routes operate entirely within Zone 1, though routes 75, 86, and 109 enter Zone 2. On the network map to the right, yellow portions of routes are in Zone 1, and blue are in Zone 2.
Zone boundaries are overlapping. This means there is not a single point where one zone ends and another begins. Fare paid for either zone allows travel into the overlapping area. Two-zone fares are only required when travelling completely through to the other zone.
The inset shows the City Centre section. A discounted "City Saver" fare is available for travel within the shaded area. City Saver fares are A$2.40 and are good for a single ride within the City Saver area. A card with ten City Saver fares on it is available for the price of nine. The City Circle tram is shown in grey and is free.
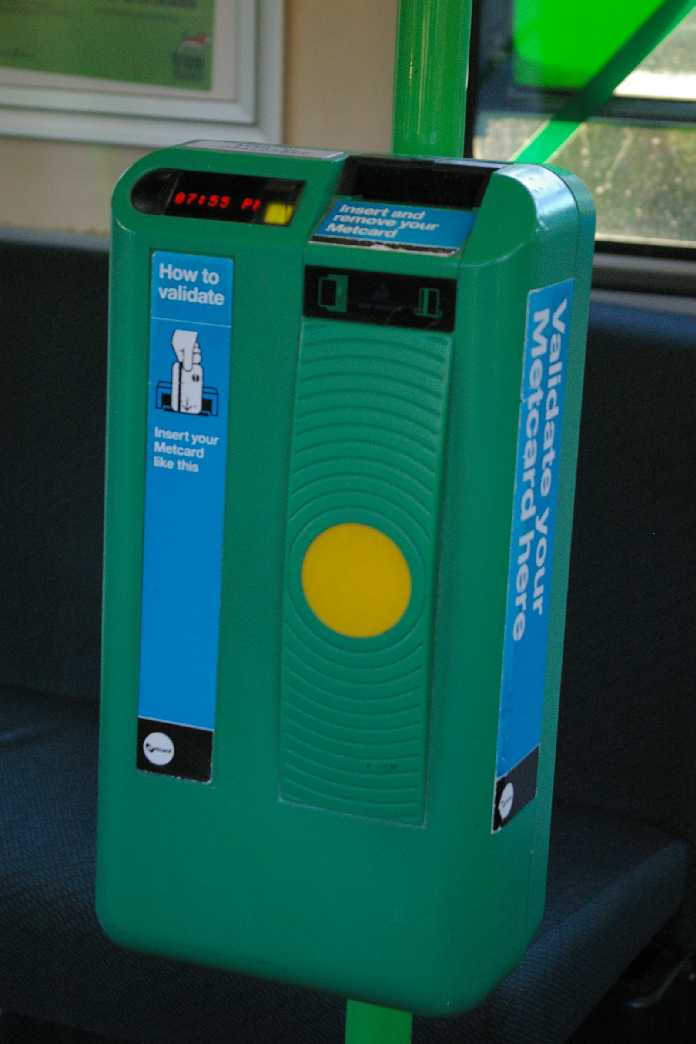
Fare card must be validated on first use using one of several on-board validators. As Metlink also oversees train and bus operations, fare cards may be validated at train stations or on buses.
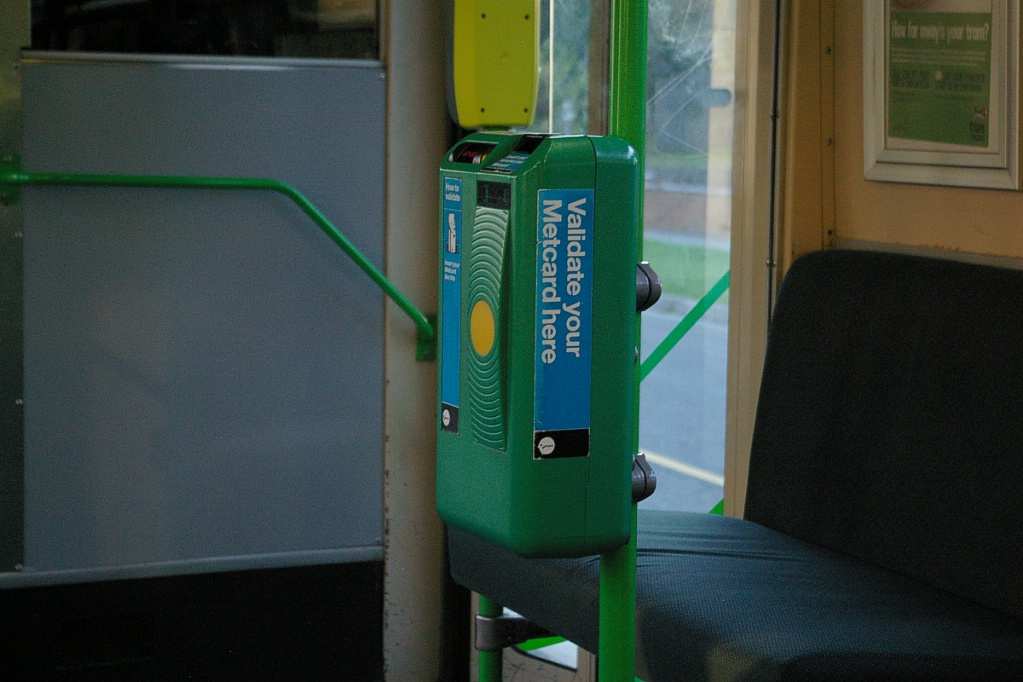
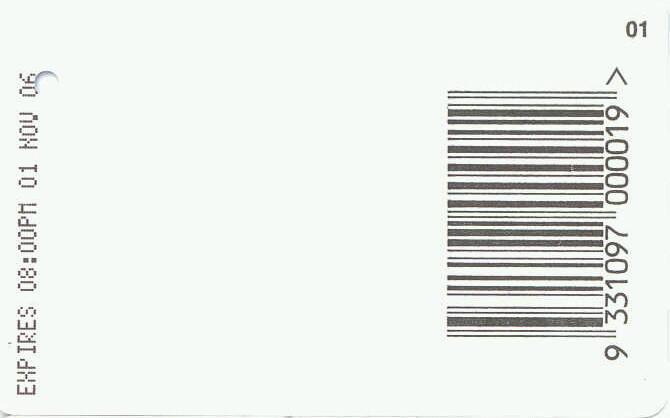
Metcard validation unit
onboard a tram
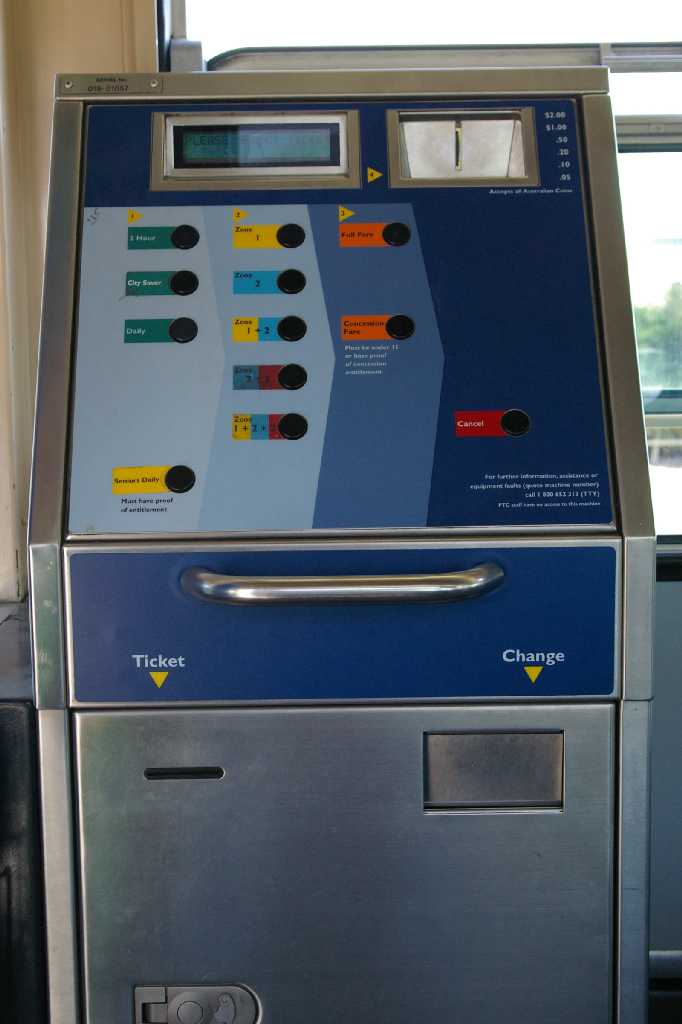
Ticket vending machine
onboard a tram
2-hour adult fares are A$3.30 for Zone 1, A$2.50 for Zone 2, and A$5.30 for both zones.
Roving the Routes
Full details of each route are not available at this time, but here are some photos and notes about each route. Click on the route map image to view the full map for the route (maps are between 300k and 650k each):
2-hour fares expire two hours from the next full hour after validation; cards validated after 6 p.m. expire at 3 a.m. the following day.
A day pass costs A$6.30 for Zone 1, A$4.40 for Zone 2, and A$9.90 for both zones. Day passes expire at the end of the calendar day.
One may purchase a card with ten 2-hour fares, five daily fares, or a week of unlimited travel. All three of these choices cost A$27.60 for Zone 1, A$19.00 for Zone 2, and A$46.60 for both zones.
Route
1 arriving at East Coburg
Route
1 entering service turning northbound on Holmes Street
from Moorland Road
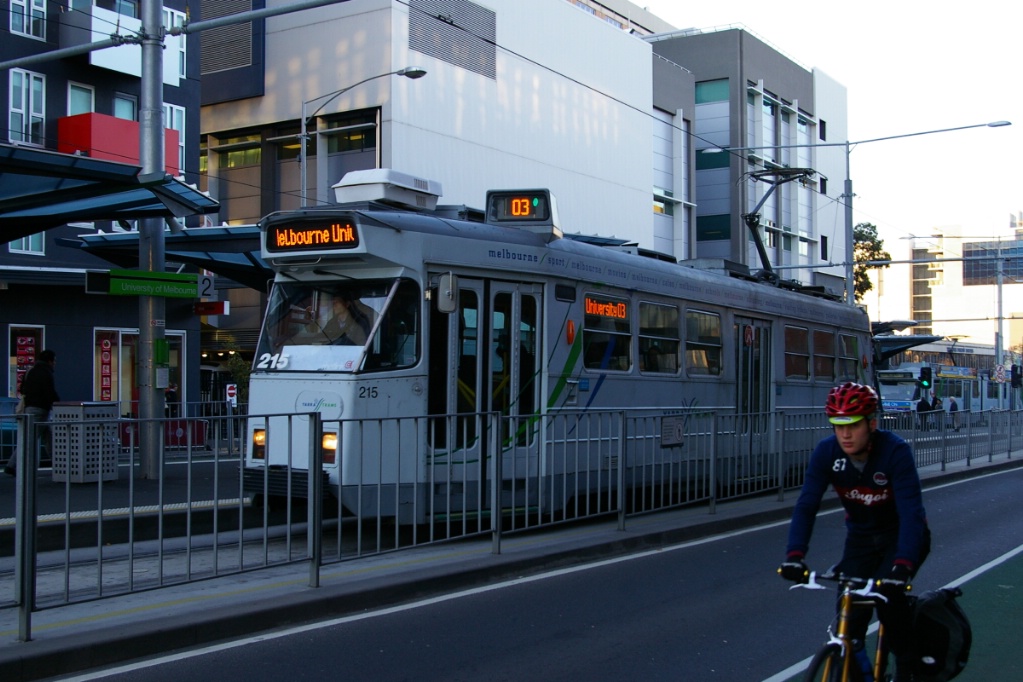
Route
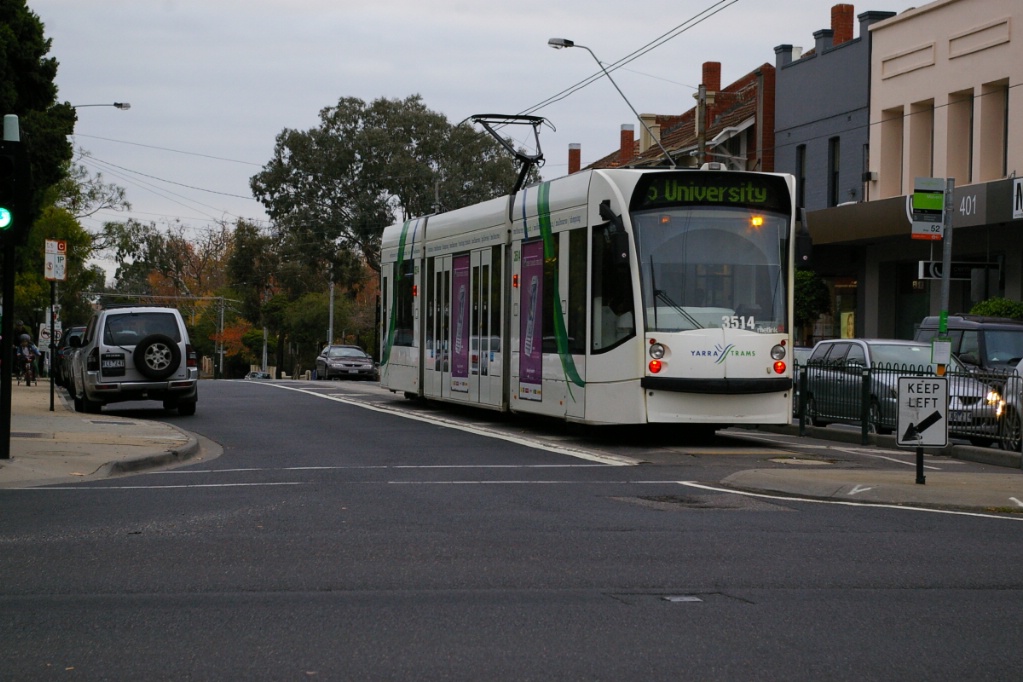
3 arriving at Melbourne University
The monthly pass costs A$102.40 / A$68.60 / A$157.80
respectively.
The yearly pass is also available for A$1094 / A$733 / A$1689 respectively.
Ticket
validator
Route
5 at Burke Road in Malvern
Route
5 turning north at St. Kilda Junction
Route
6 in Glen Iris on High Street at Malvern Road
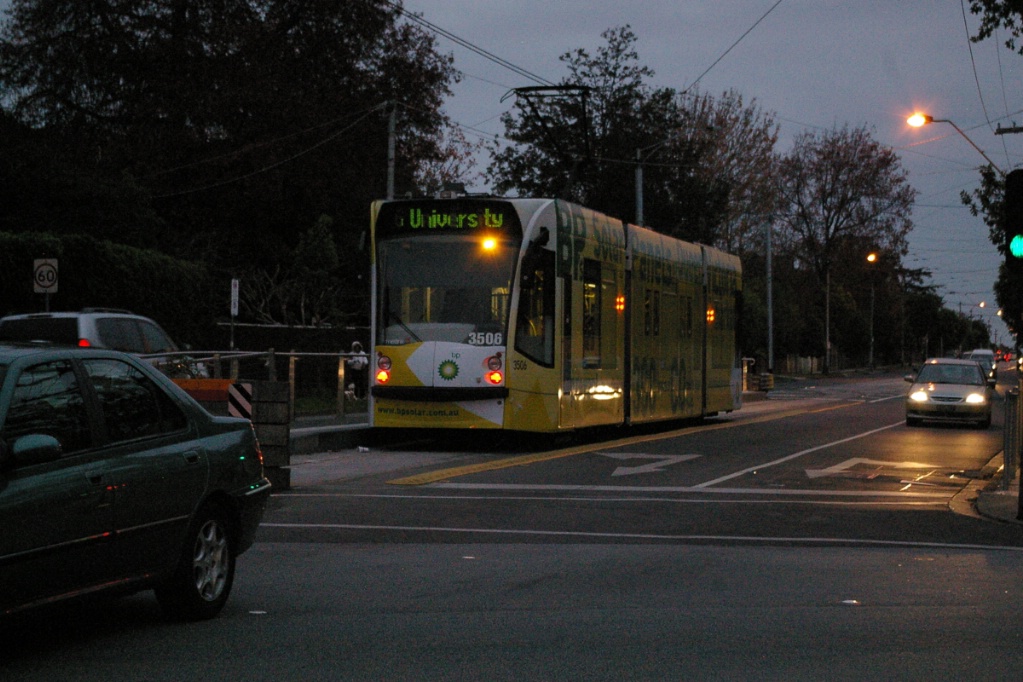
Route
6 arriving at Melbourne University
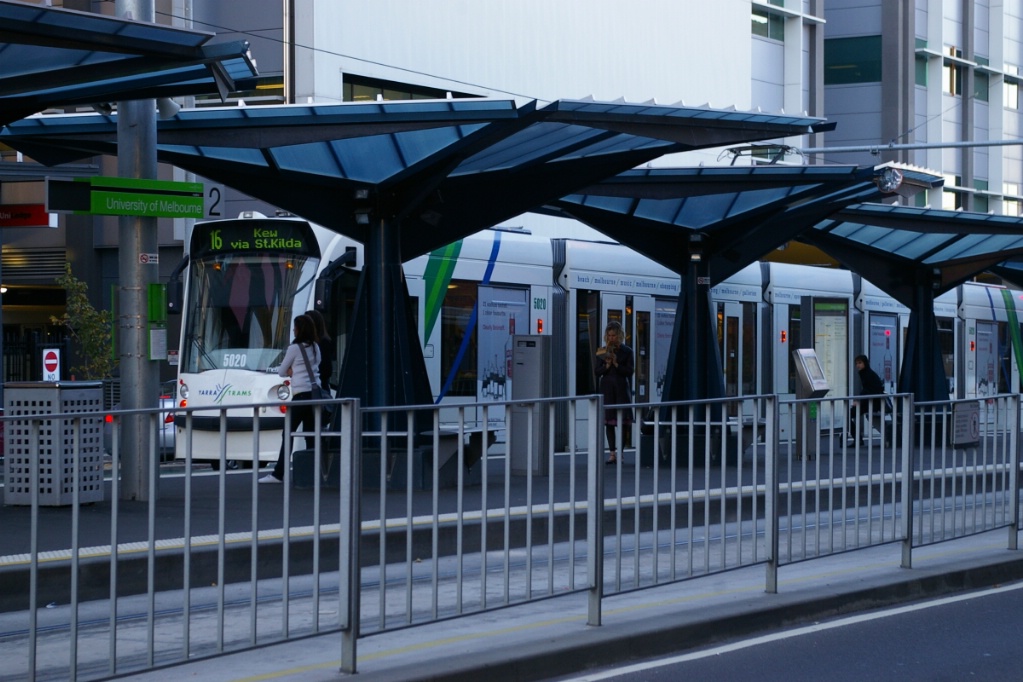
Route 16 heading south from St. Kilda Junction
Route
16 at St. Kilda
Route
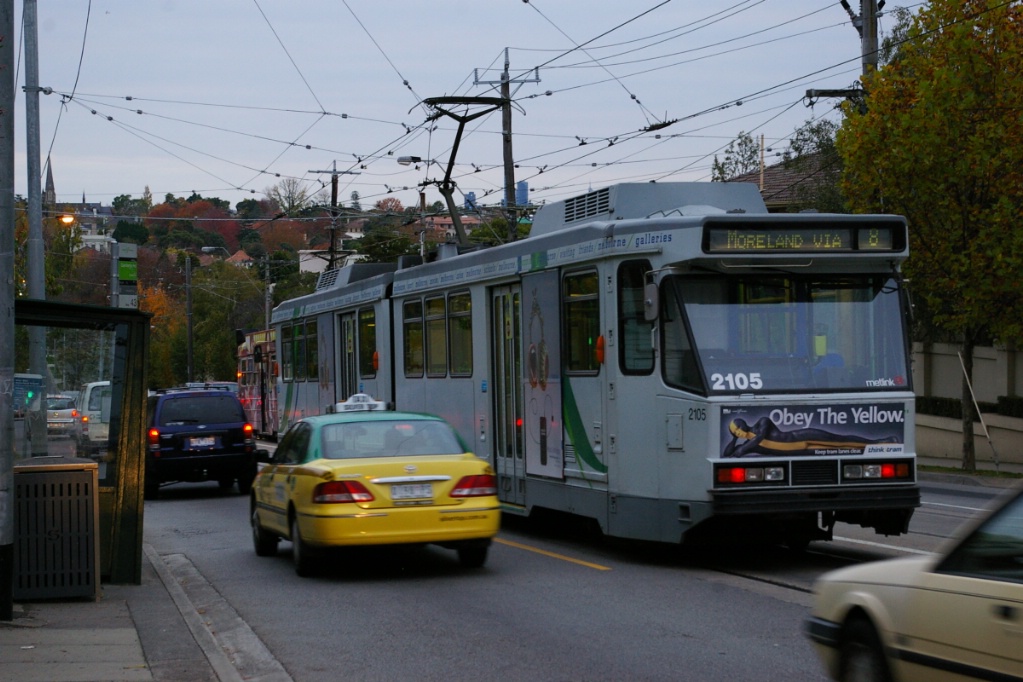
8 on Toorak Road at Glenferrie

Route
8 after turning back on Cameron Street in Moreland
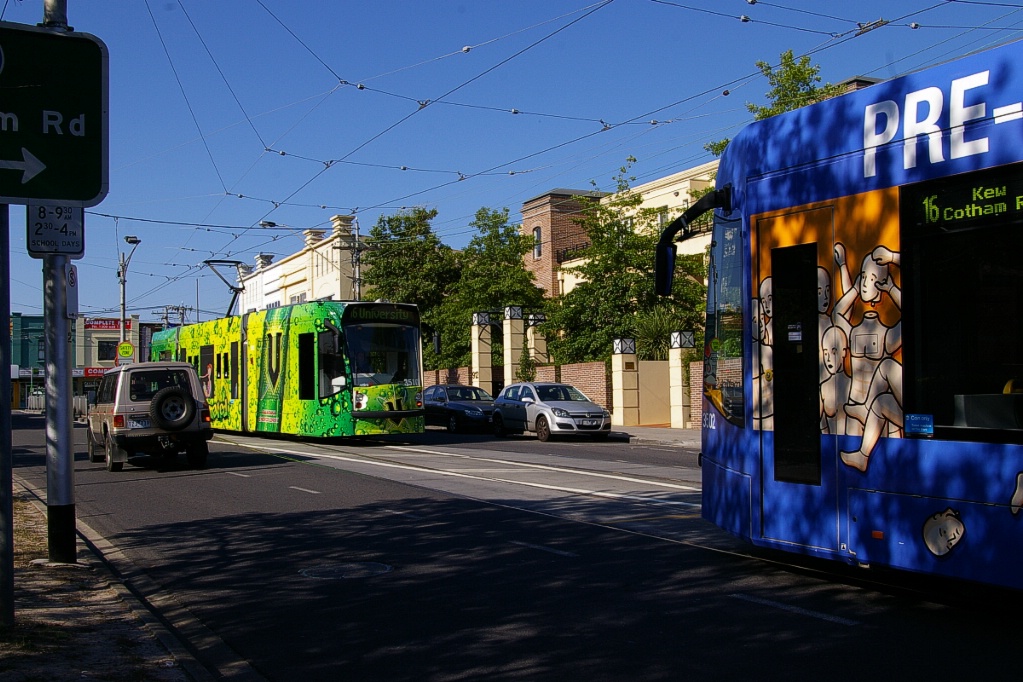
Route
16 at Kew - single track extends past terminal to connect
with tracks to the west on Cotham Road to allow trams
coming from or returning to Kew Depot
Route
16 ready for departure from Melbourne University

Route
19 at North Coburg
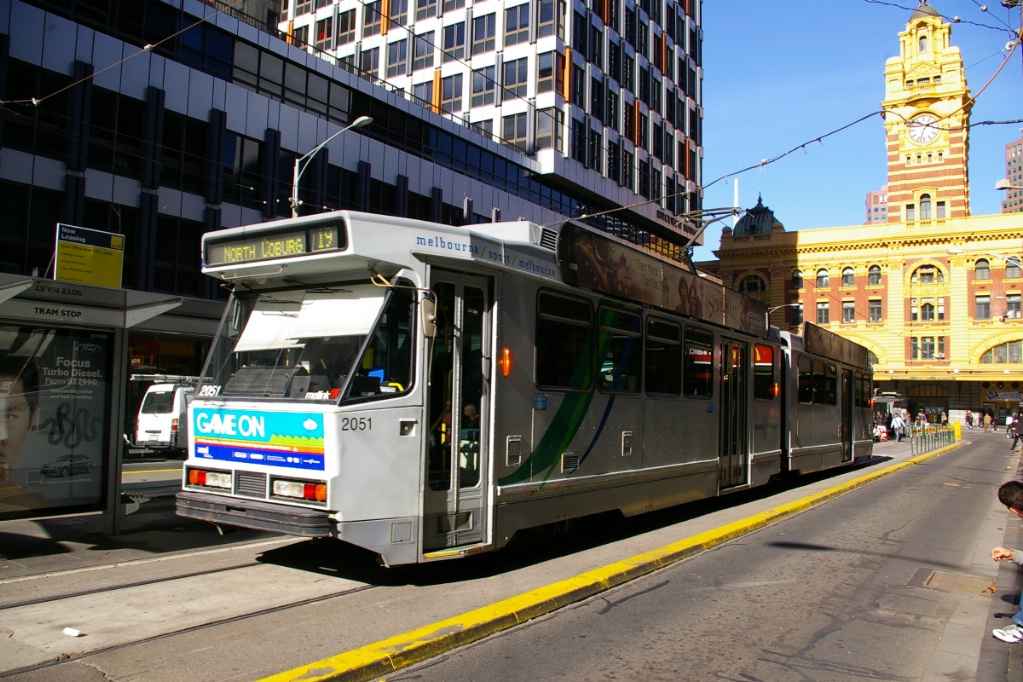
Route
19 on Elizabeth Street at Flinders Street
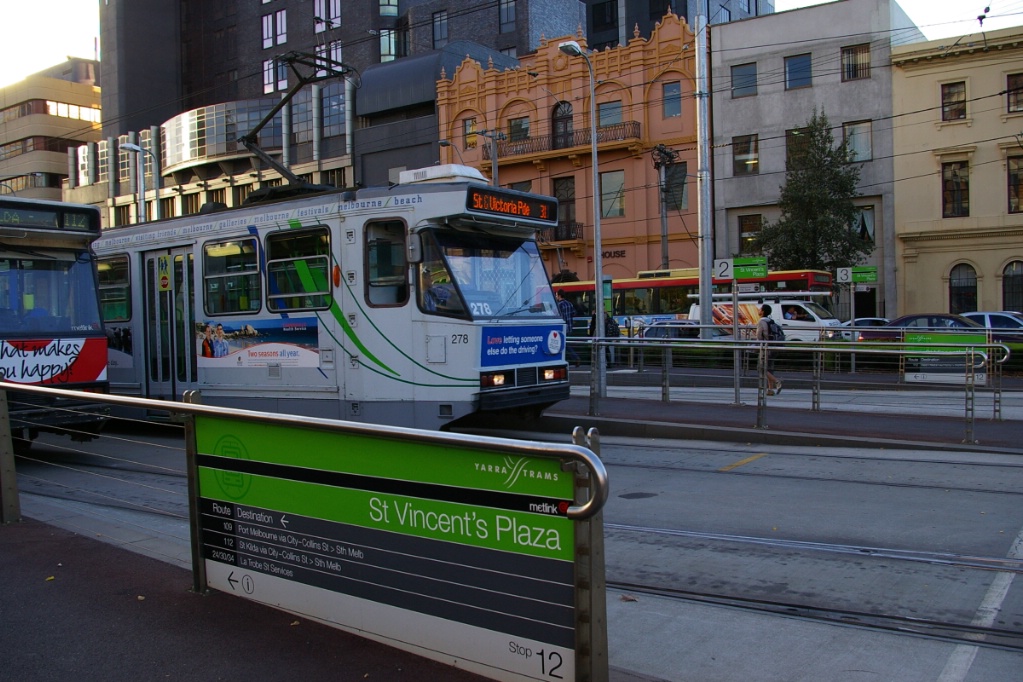
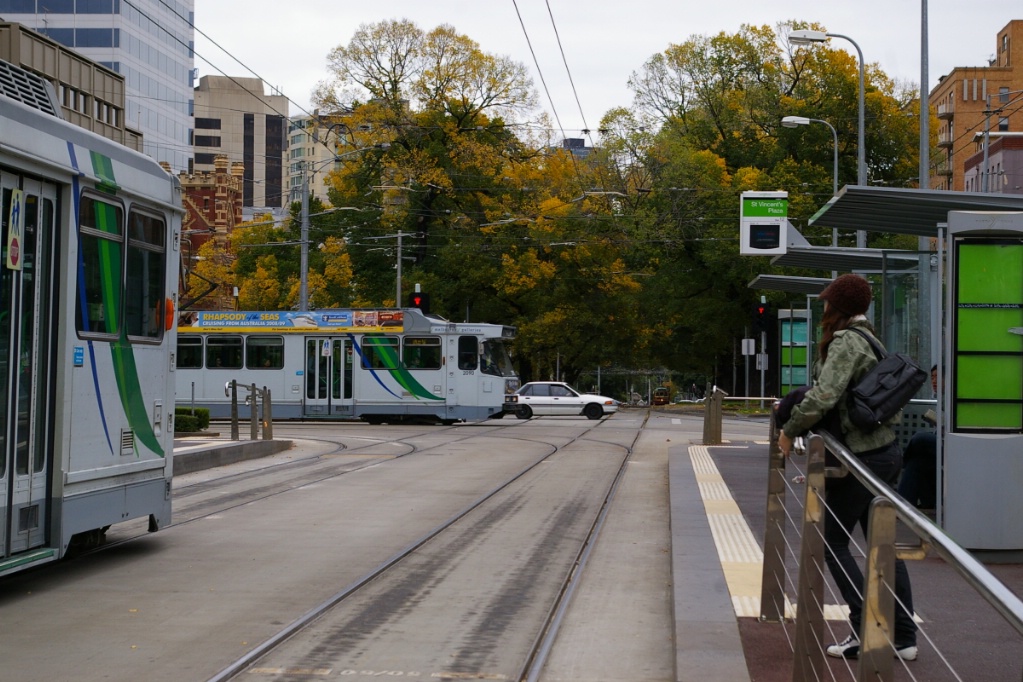
W6 Class tram on Route 30 arriving for westbound run at St. Vincent's Plaza
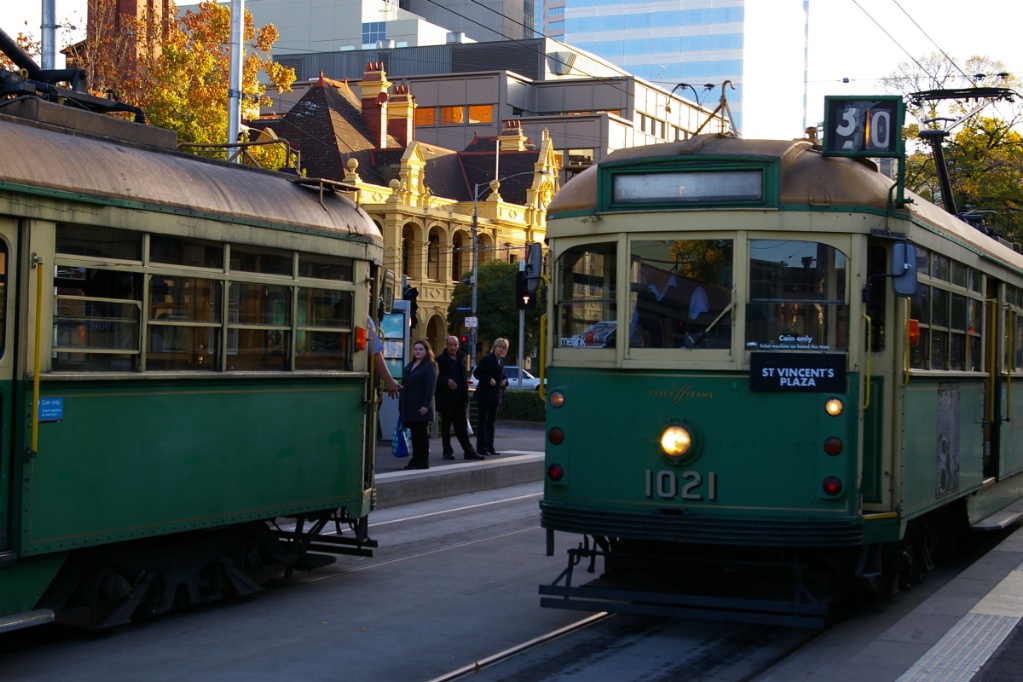
A
pair of W6 Class trams on Route 30 at St. Vincent's Plaza
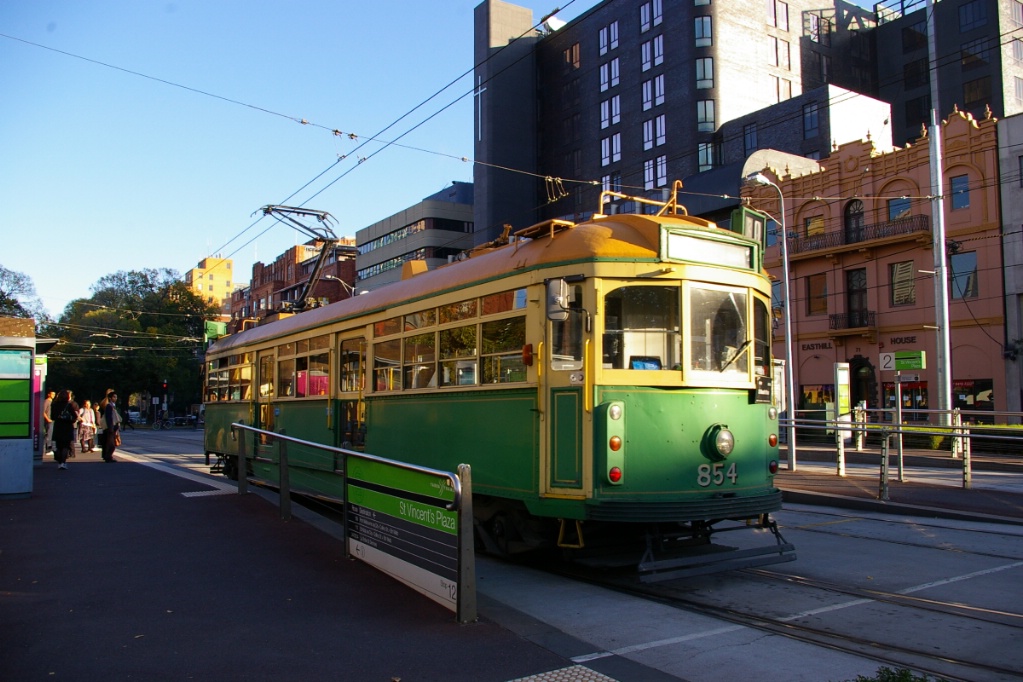
Route
31 arriving at St. Vincent's Plaza
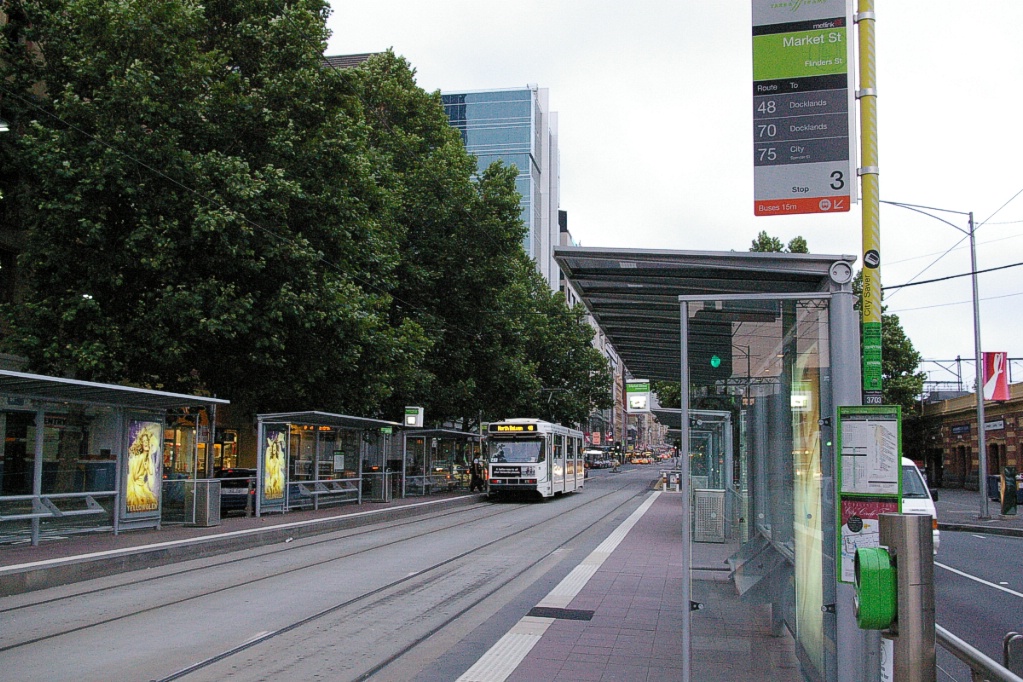
Route 48 bound for North Balwyn approaching Market Street stop on Flinders Street

Route
48 at New Quay Docklands
Route
48 on Doncaster Road at Balwyn Road in North Balwyn
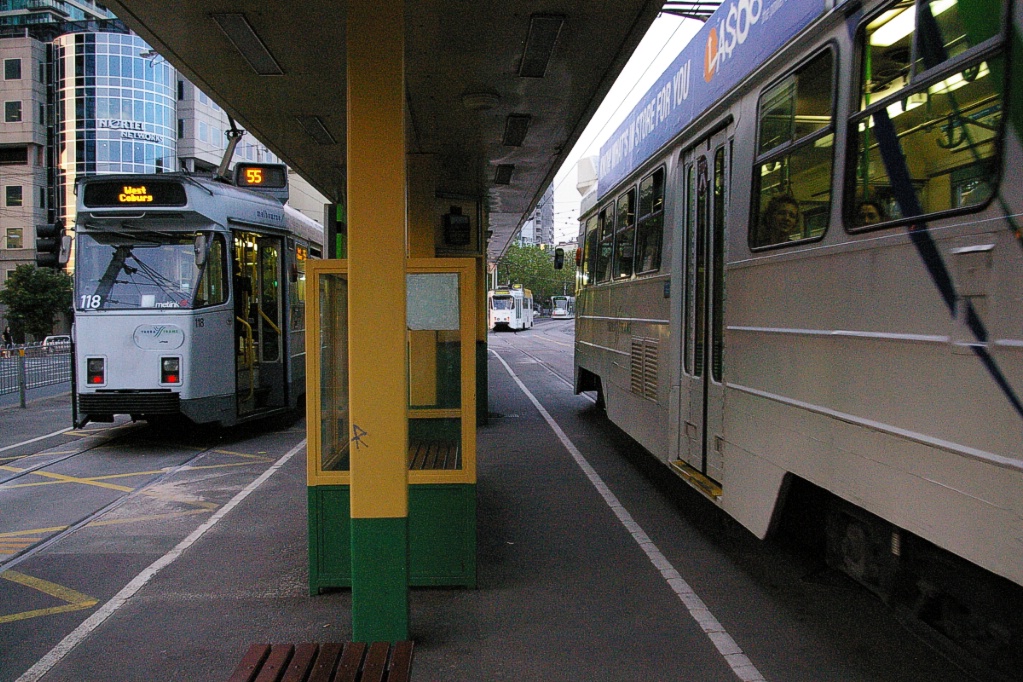
Domain
Road Interchange has three tracks. Track 3 (on the left
in this photo) is used by Route 55 as it terminates here.
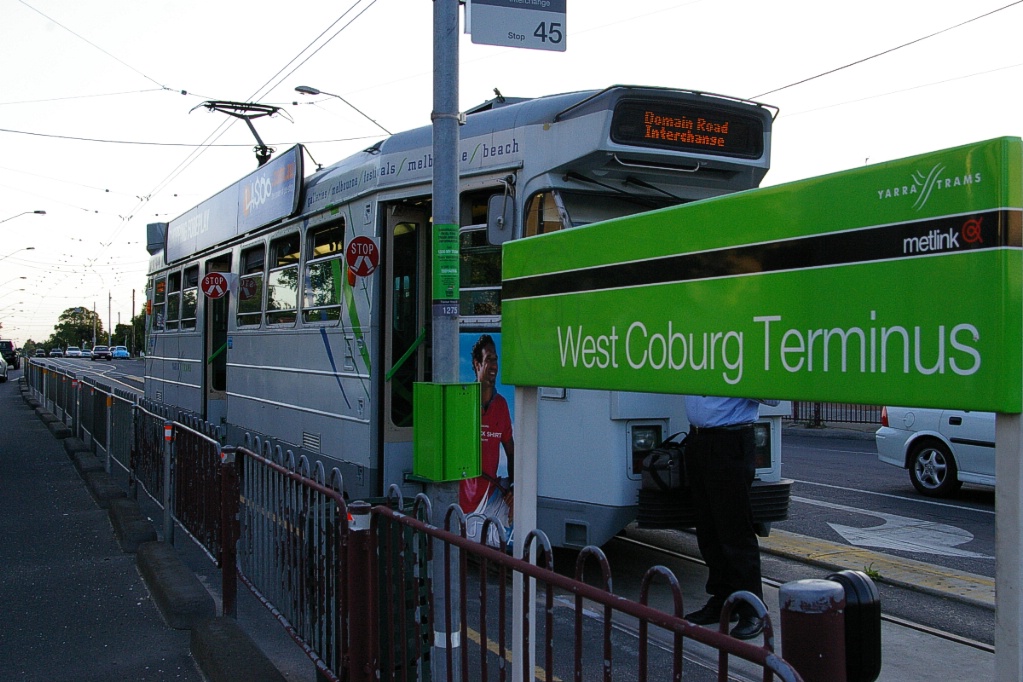
Route
55 at West Coburg
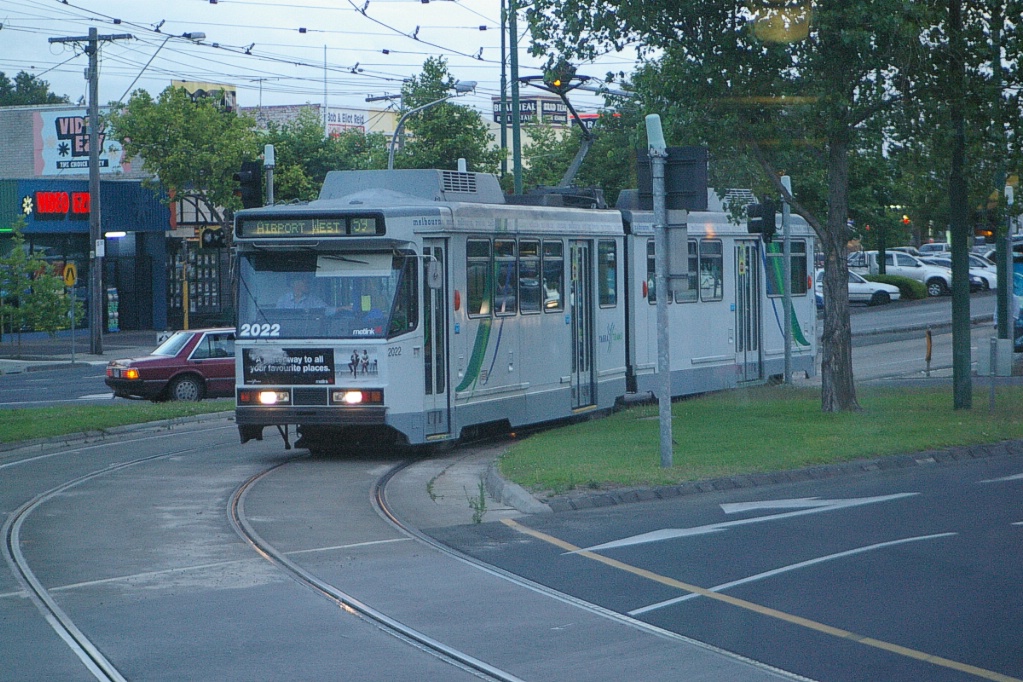
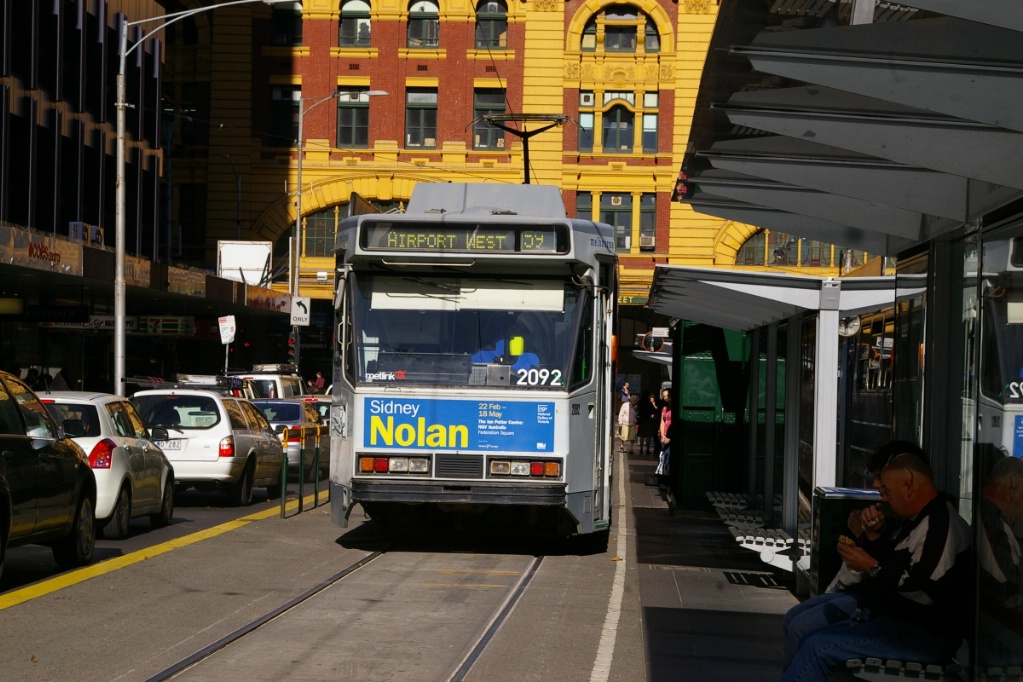
Route 59 heading to Airport West
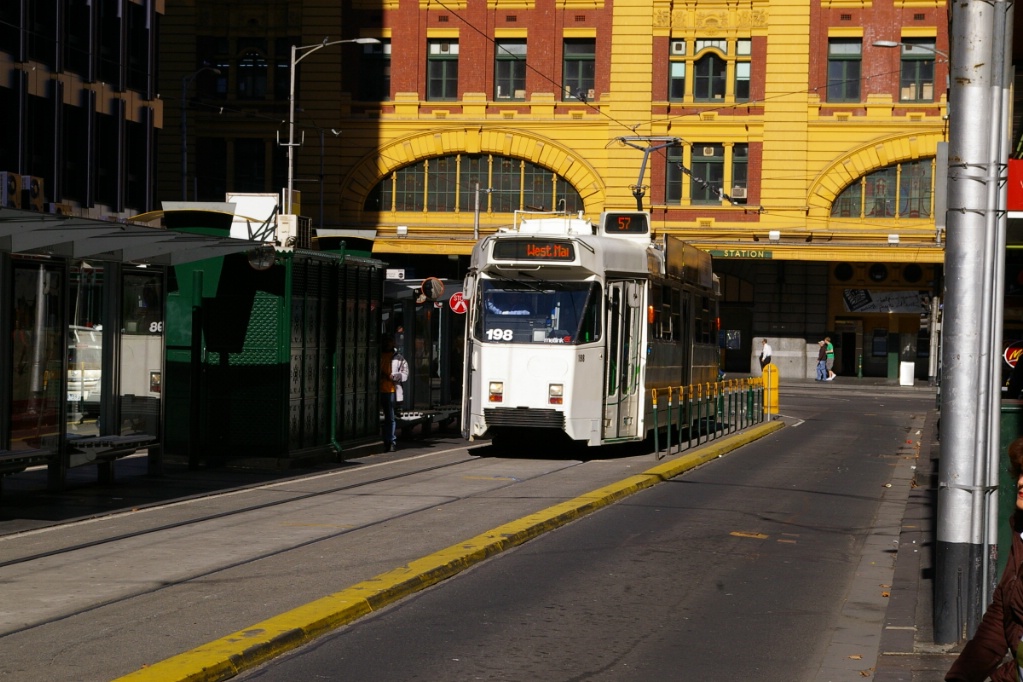
Route
57 on Elizabeth Street at Flinders Street
Route
59 at Airport West
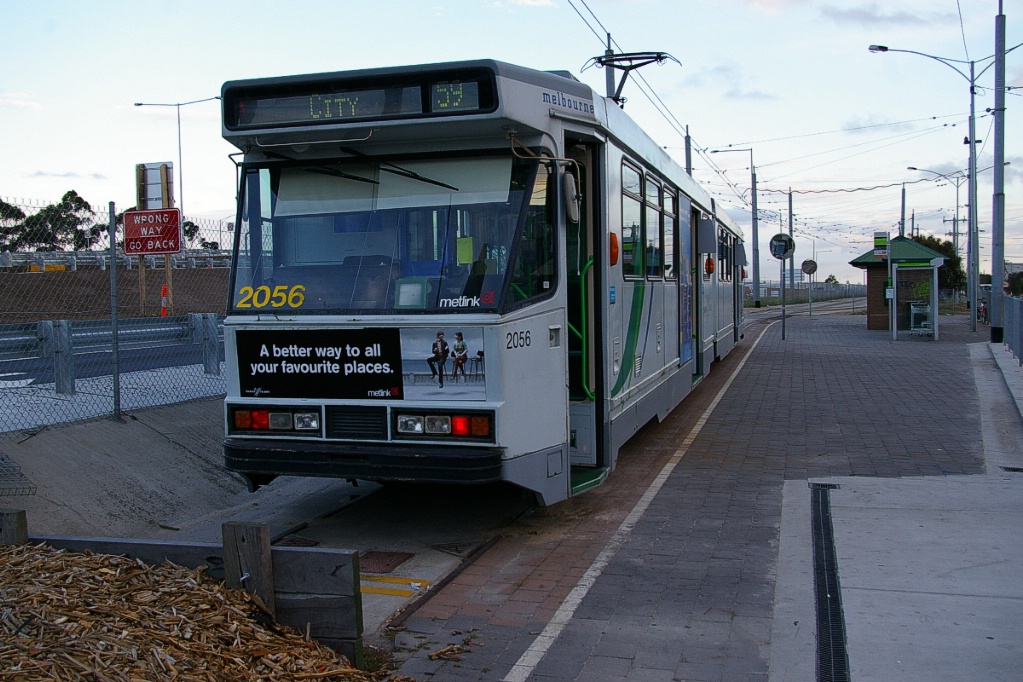
Route
59 on Elizabeth Street at Flinders Street
Route
64 turning after passing southbound through St. Kilda
Junction
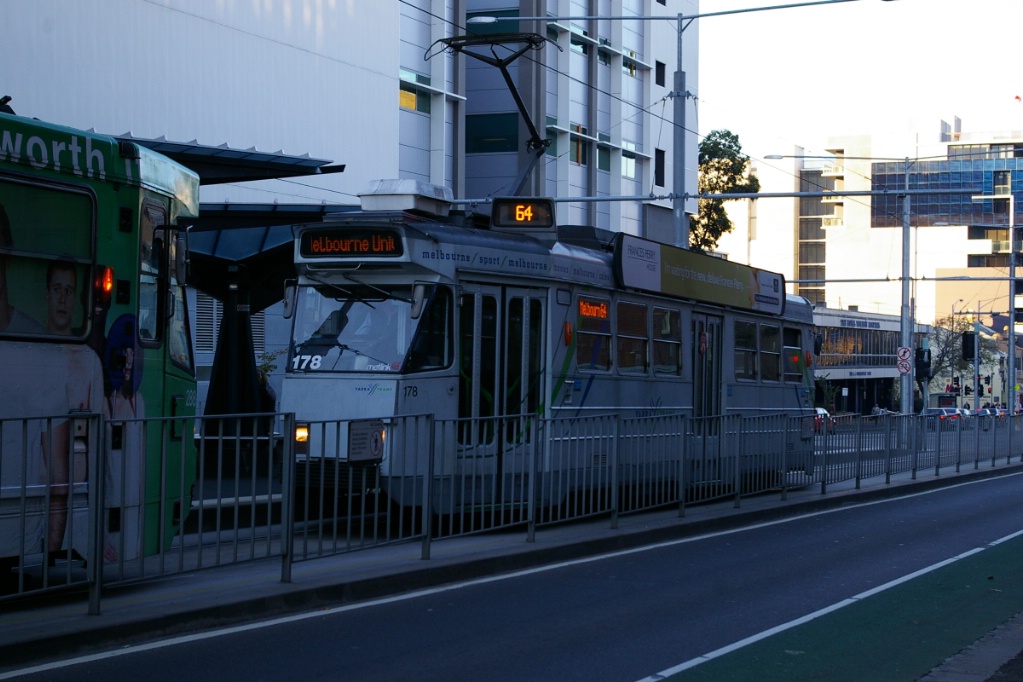
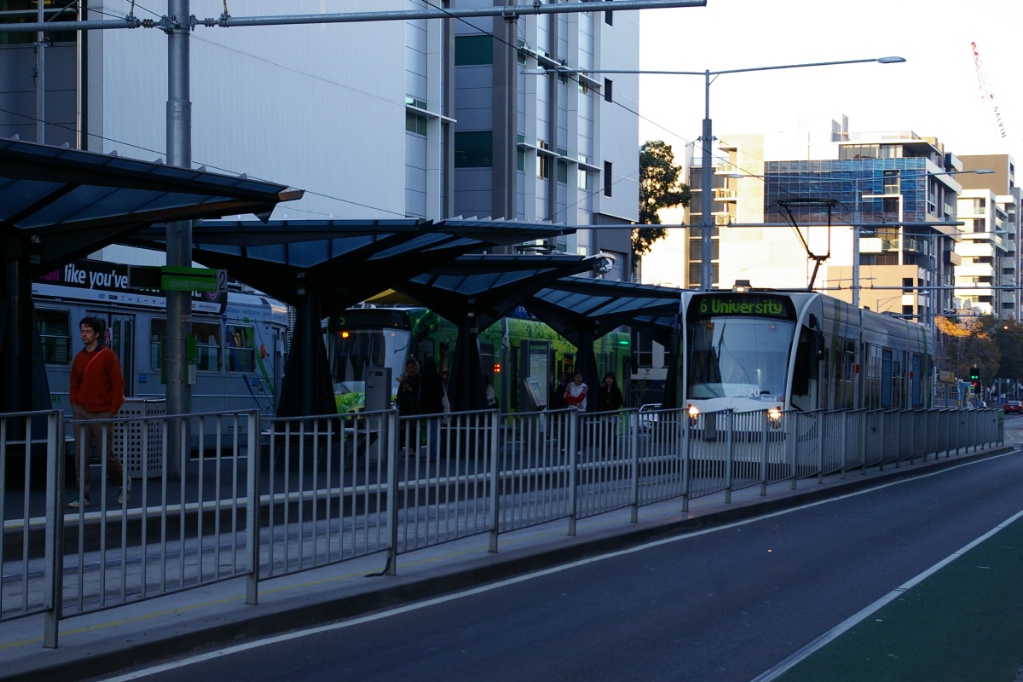
Route
64 arriving at Melbourne University

Route
67 at Carnegie
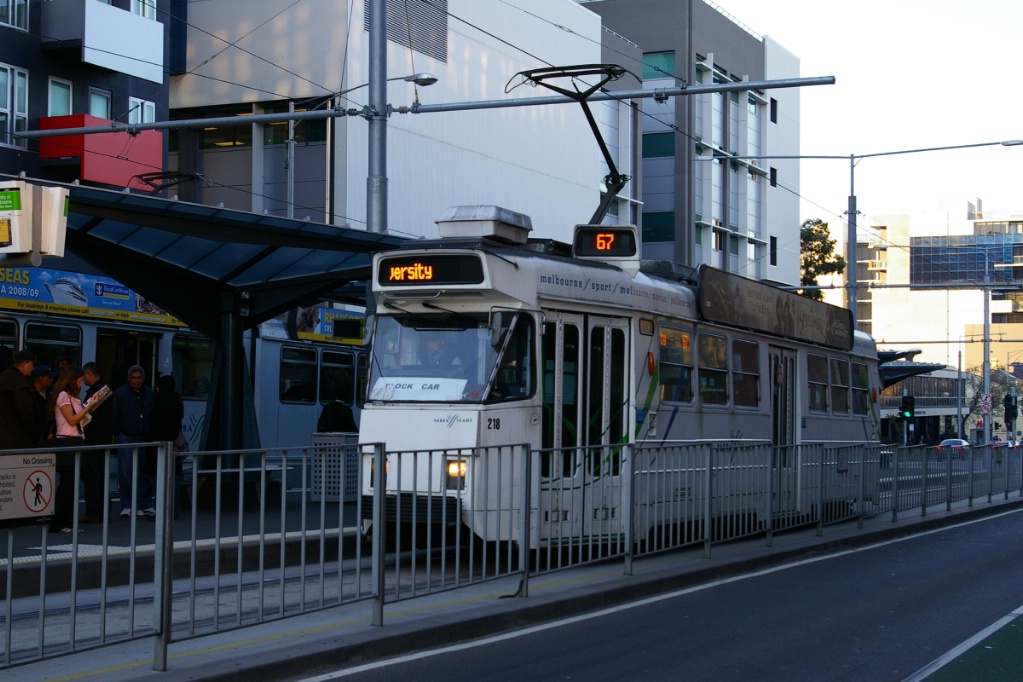
Route
67 arriving at Melbourne University
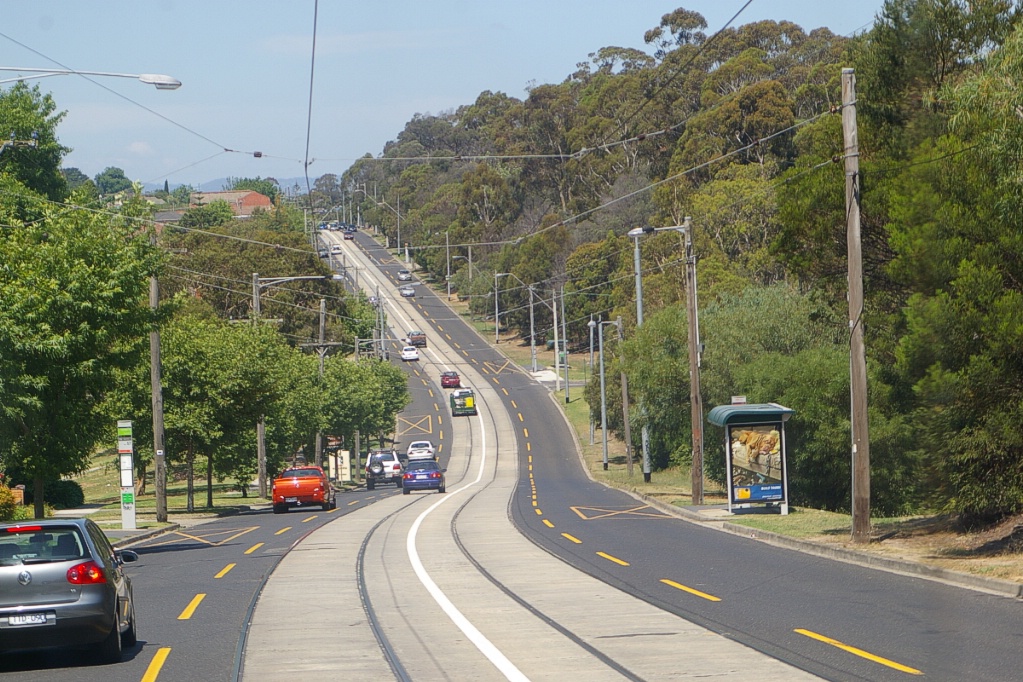
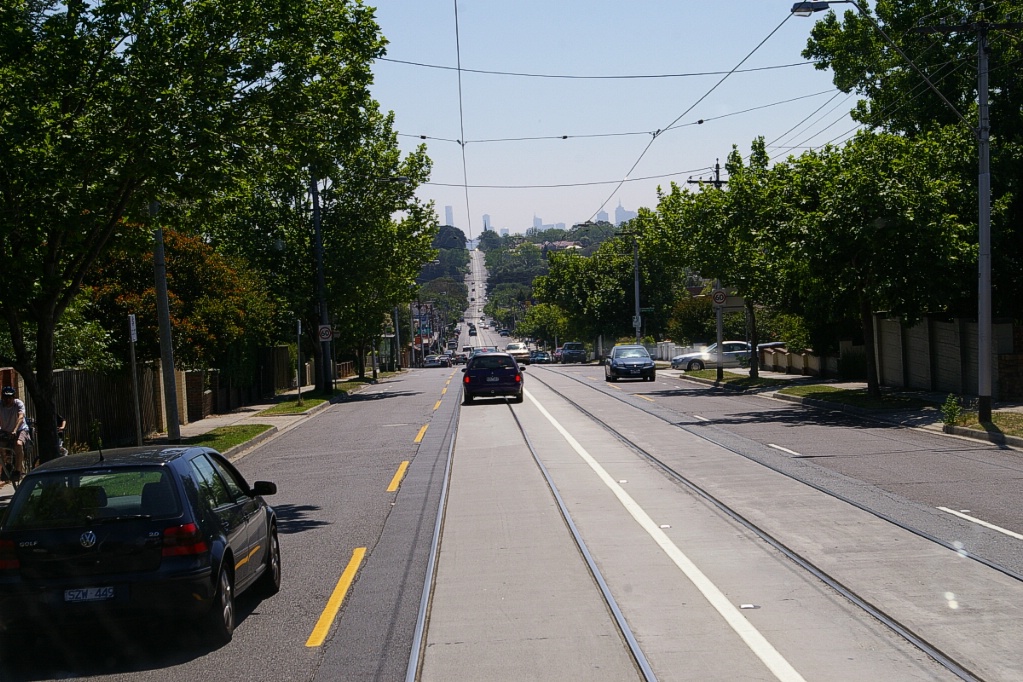
Melbourne has some fairly hilly areas, perhaps more than Toronto. These photos show two sections of Riversdale Road that Route 70 travels along
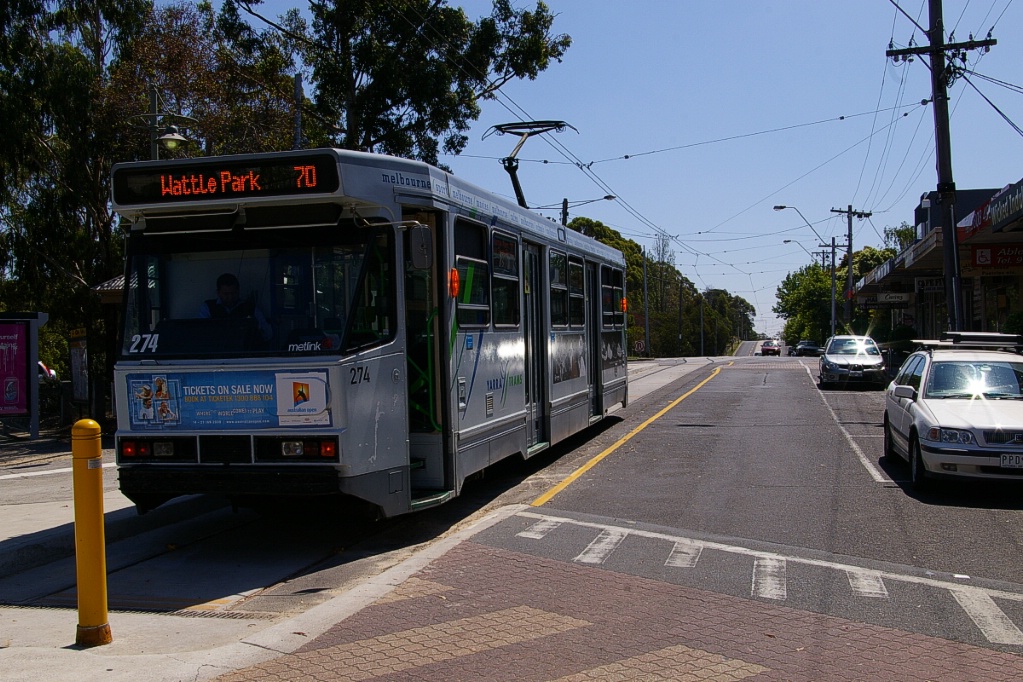
Route
70 terminus at Wattle Park
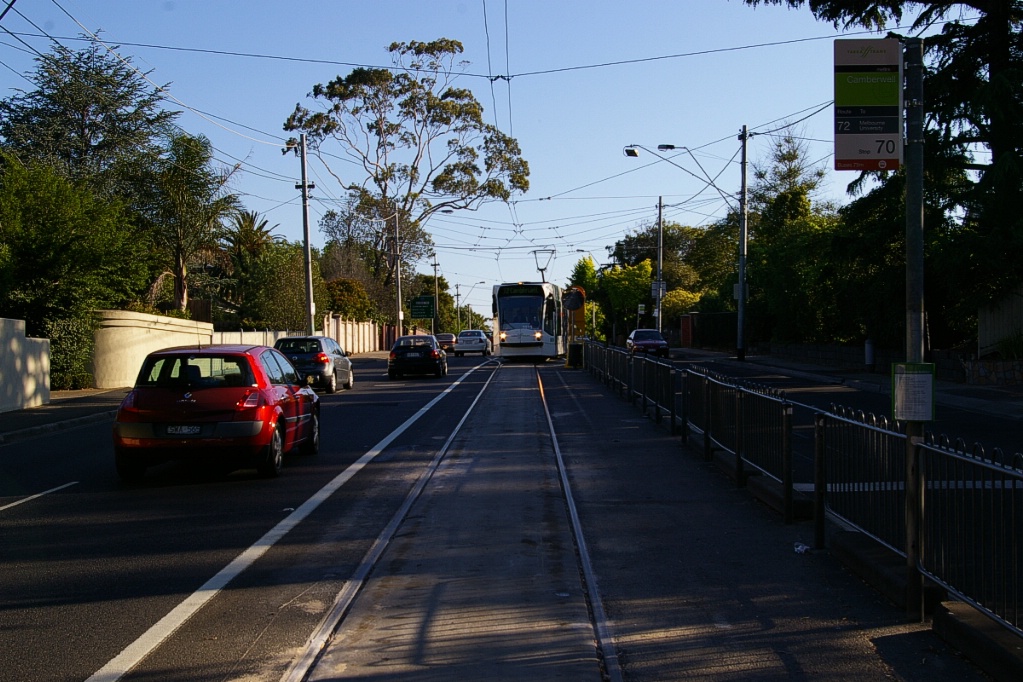
Route
72 entering single track terminal at Camberwell.
The two separate overhead wires can be seen clearly here.

Route
72 arriving at Melbourne University

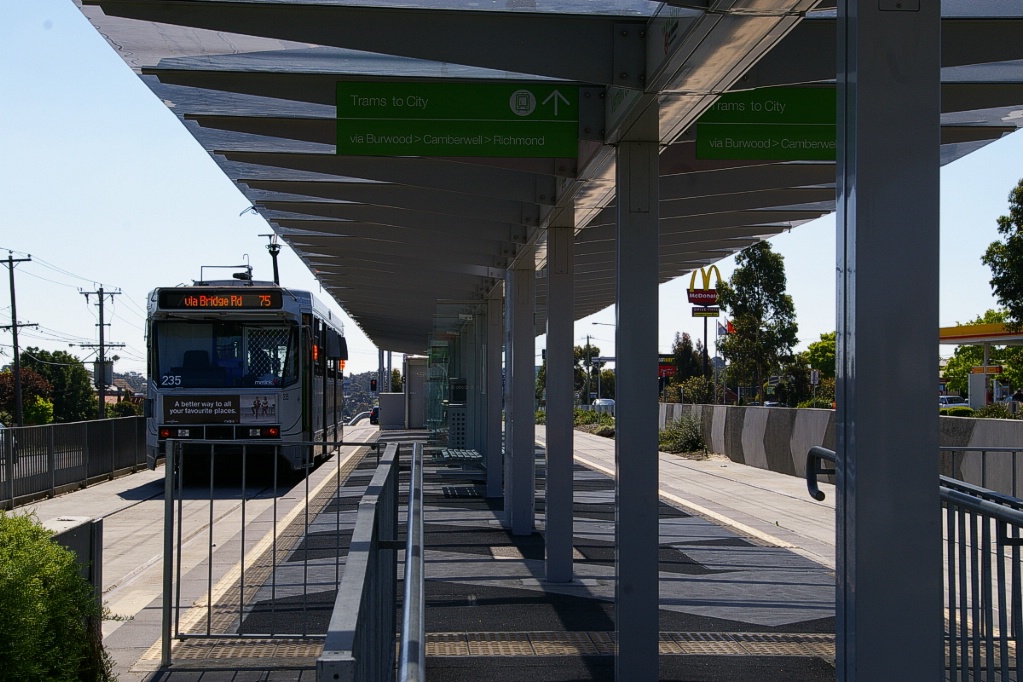
Route
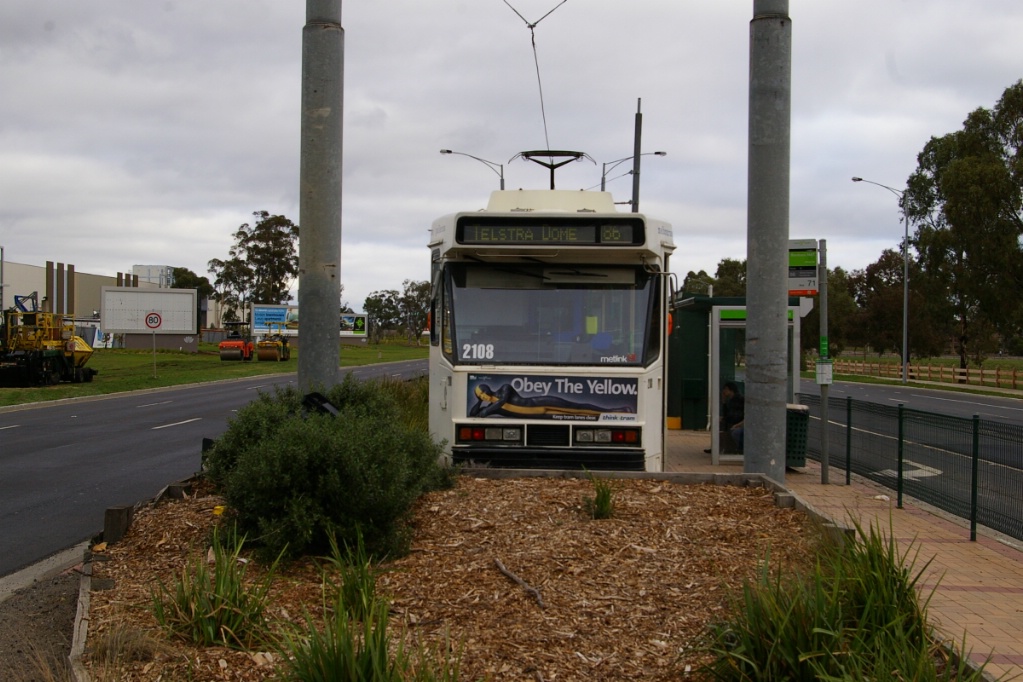
75 at Vermont South terminal.
Former trolley pole mounting and hold-down hook is
visible on this class A1 tram

Route
75 turning onto Riversdale Road from Camberwell
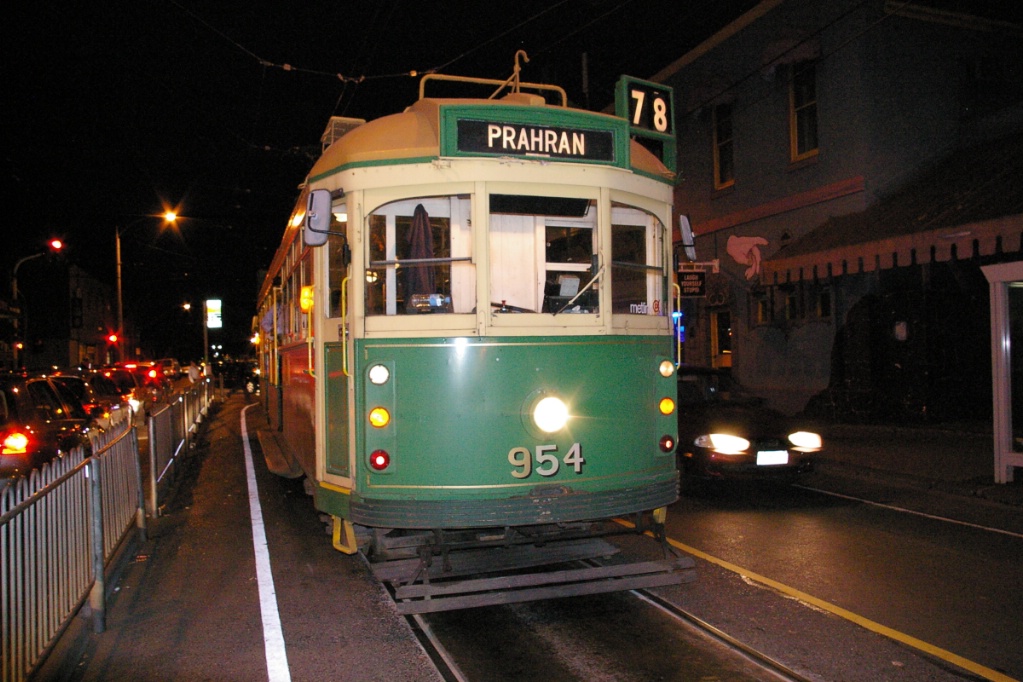
Route
78 at Victoria Street in North Richmond
Routes 78 and 79
are two versions of the same route.
Route 78 operates for the first part of the day and Route
79 finishes the day.
Route 96 travelling on Bourke Street.
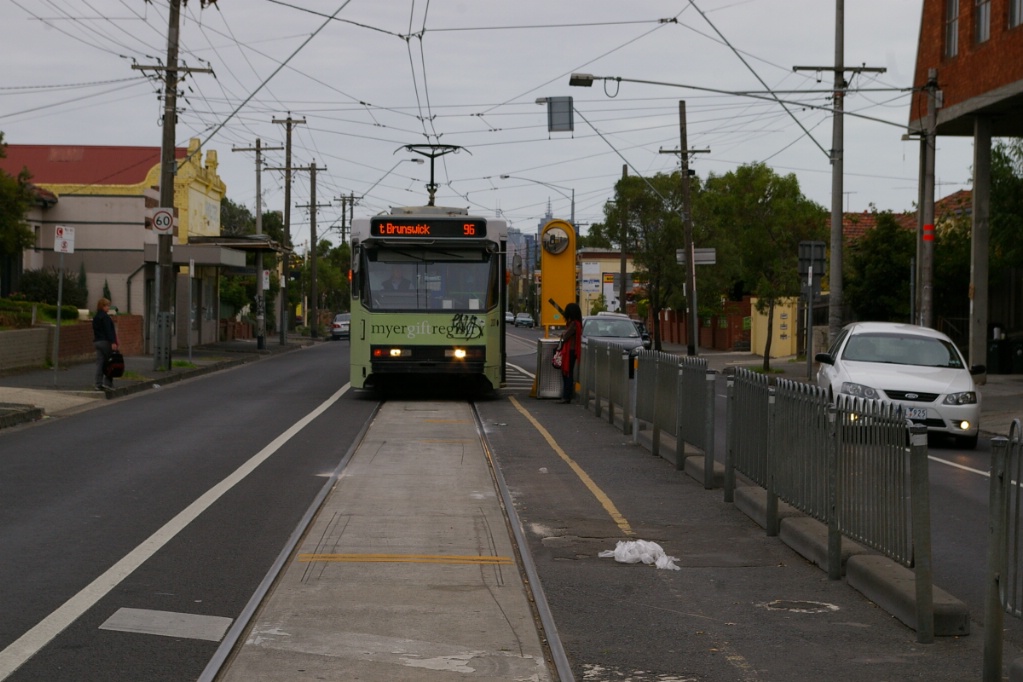
Route
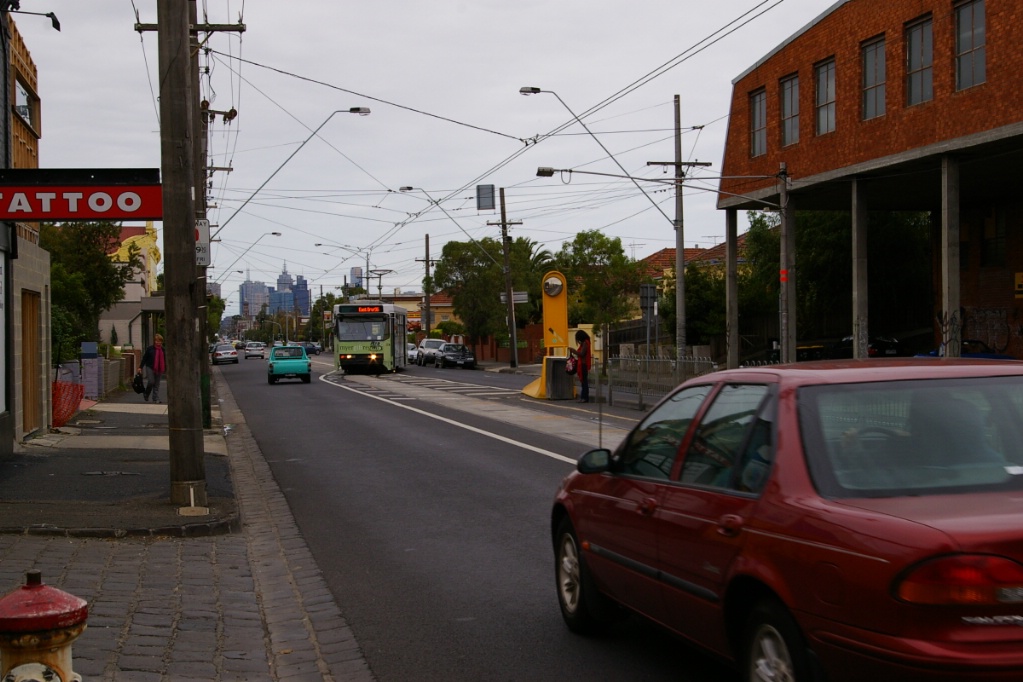
96 arriving at Blyth Street in East Brunswick

Southbound
Route 86 at Hodgson St
Route
86 at RMIT
Route
96 arriving at Blyth Street in East Brunswick
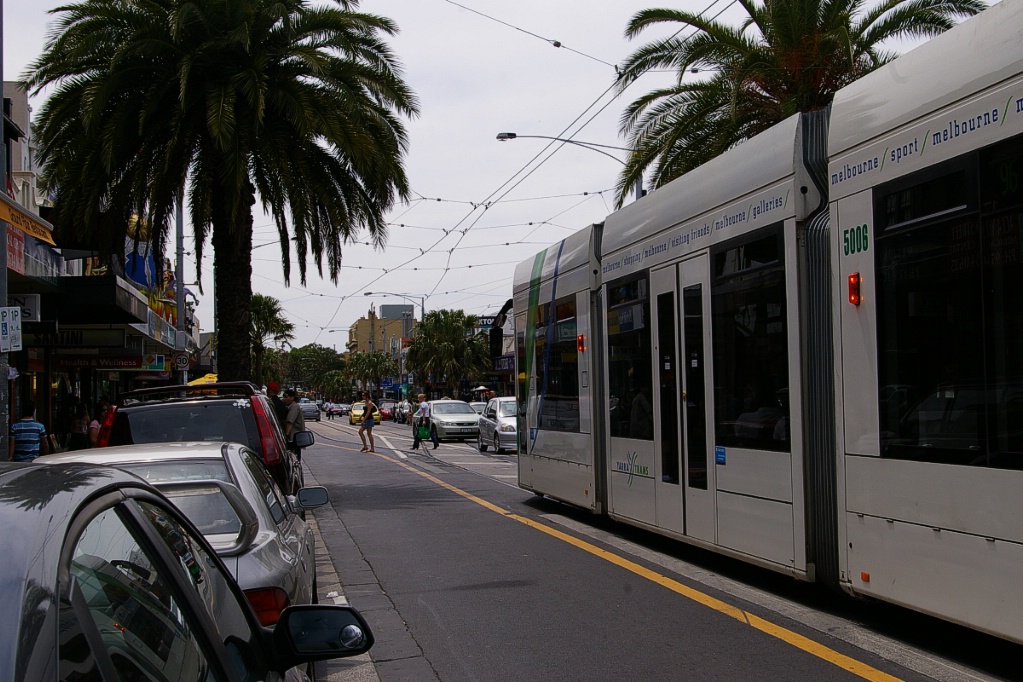
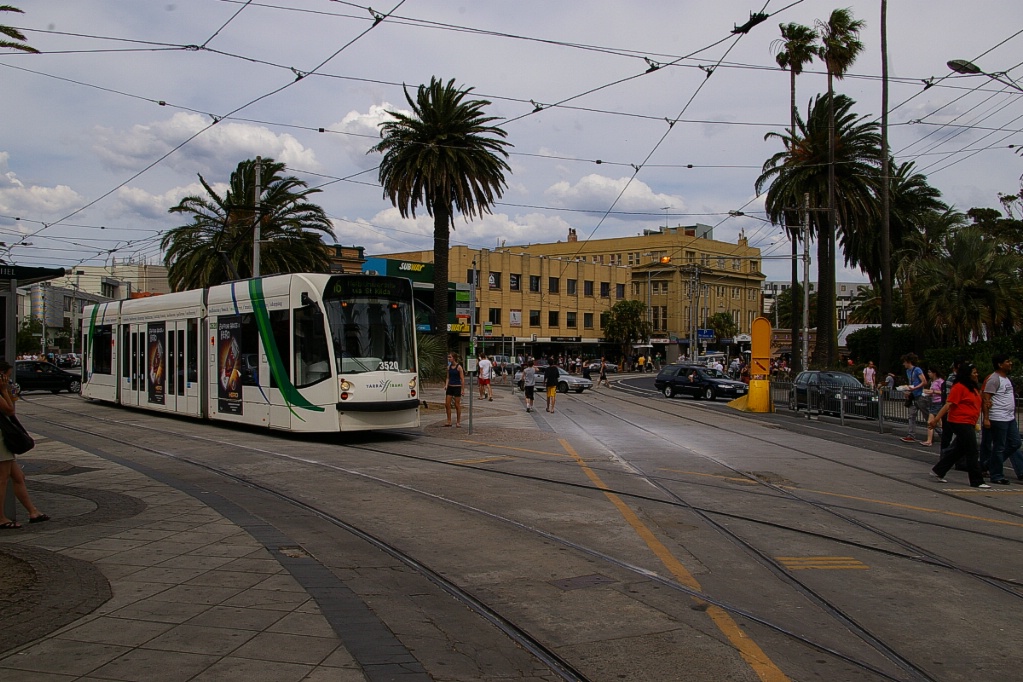
Route
96 about to depart St. Kilda Beach

Route 112 passes through traffic circles on Park Street in St. Kilda
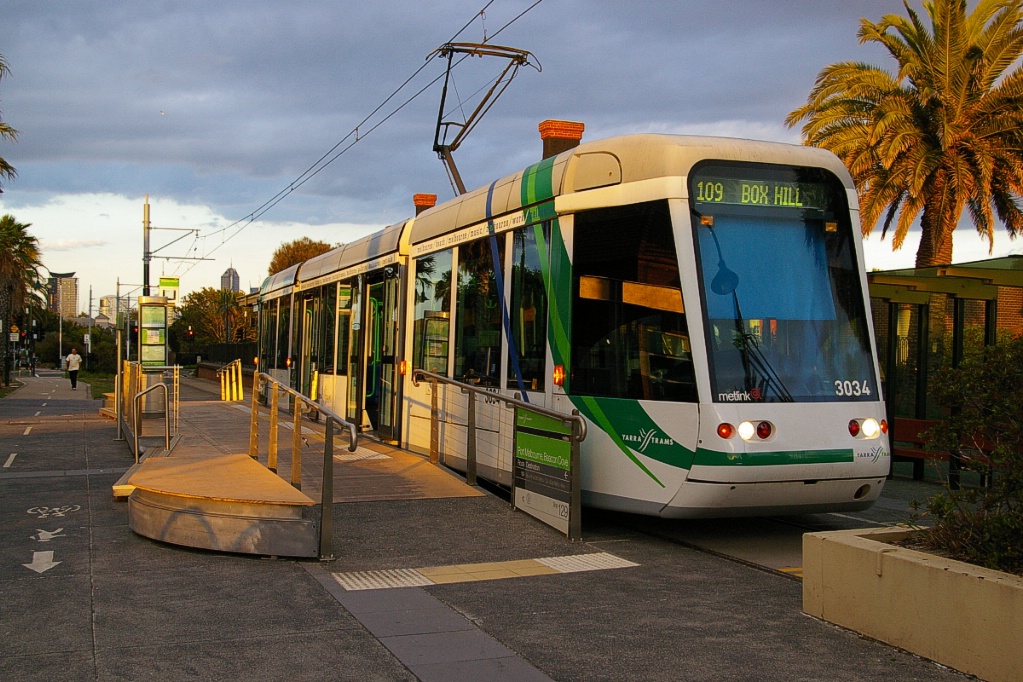
Alstom
Citadis on Route 109 at Port Melbourne southwest of the
CBD

Citadis
trams on Route 109 at Box Hill northeast of the CBD

Route
112 at Regent Street in West Preston
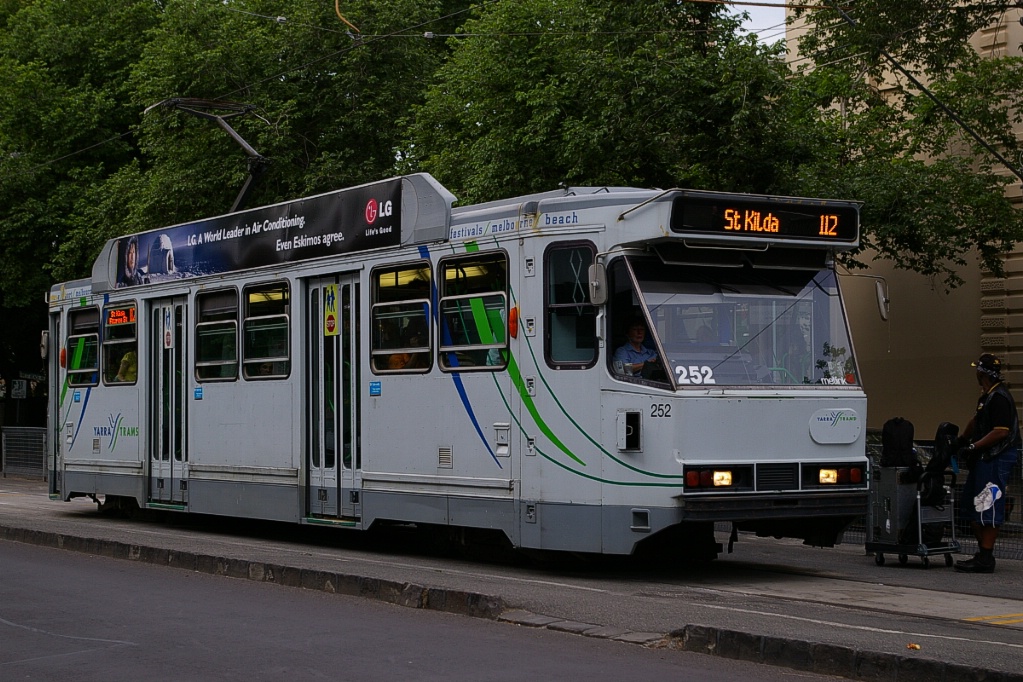
Route
112 at Fitzroy Street in St. Kilda
City Circle tram approaching Nicholson Street on Victoria Pde
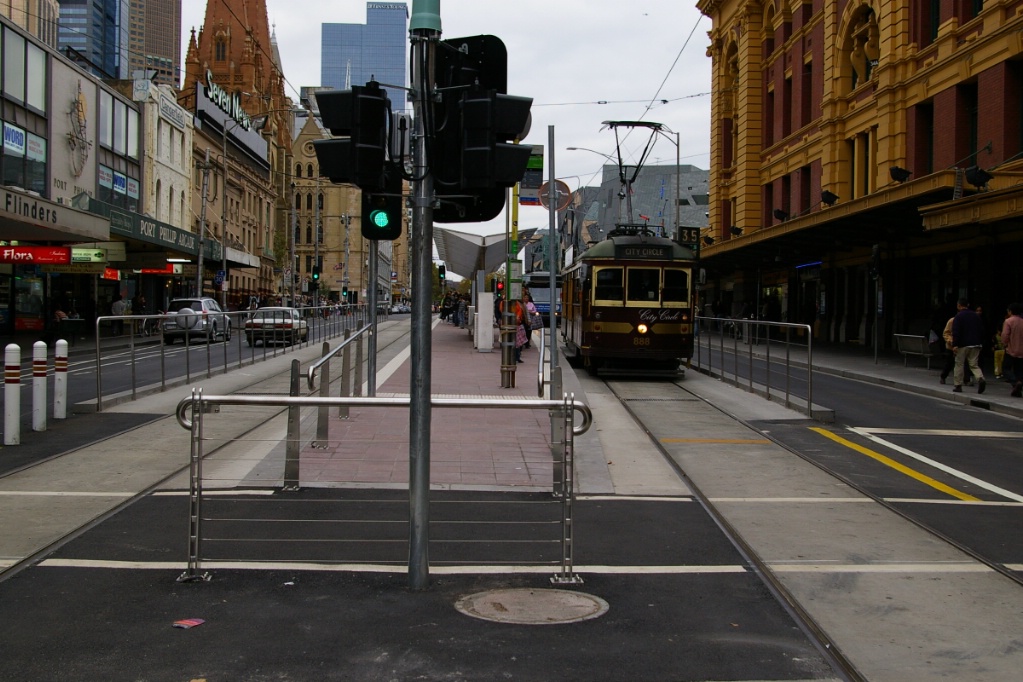
Clockwise City Circle tram arriving at new centre platform on Flinders Street at Swanston
Tram Operations
Some aspects of tram operation in Melbourne are described below:
LRT and Private ROW Operations:
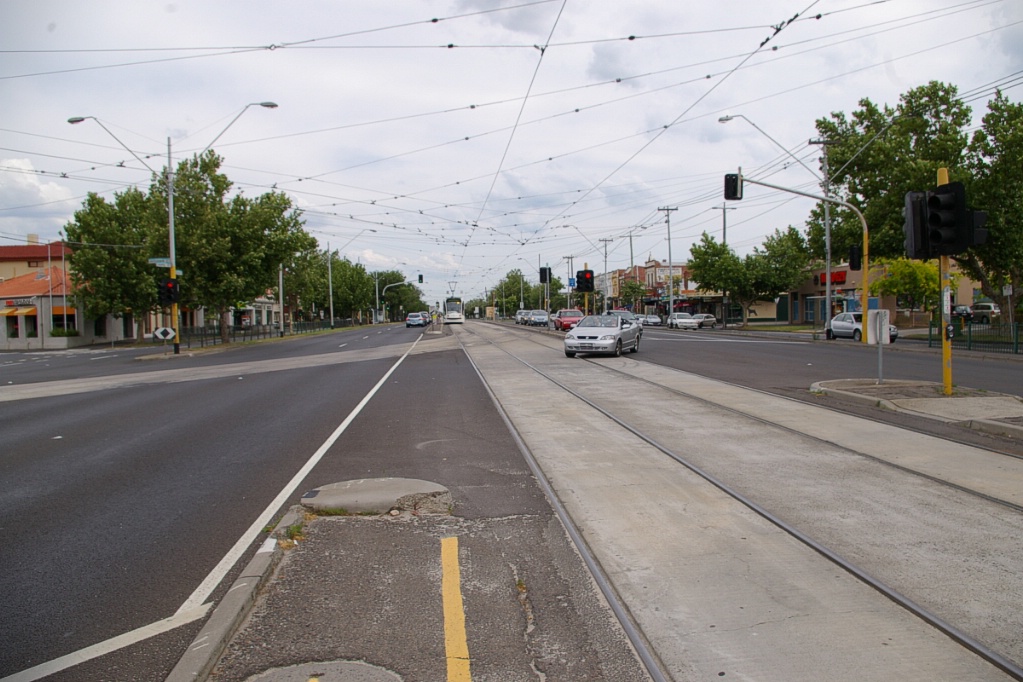
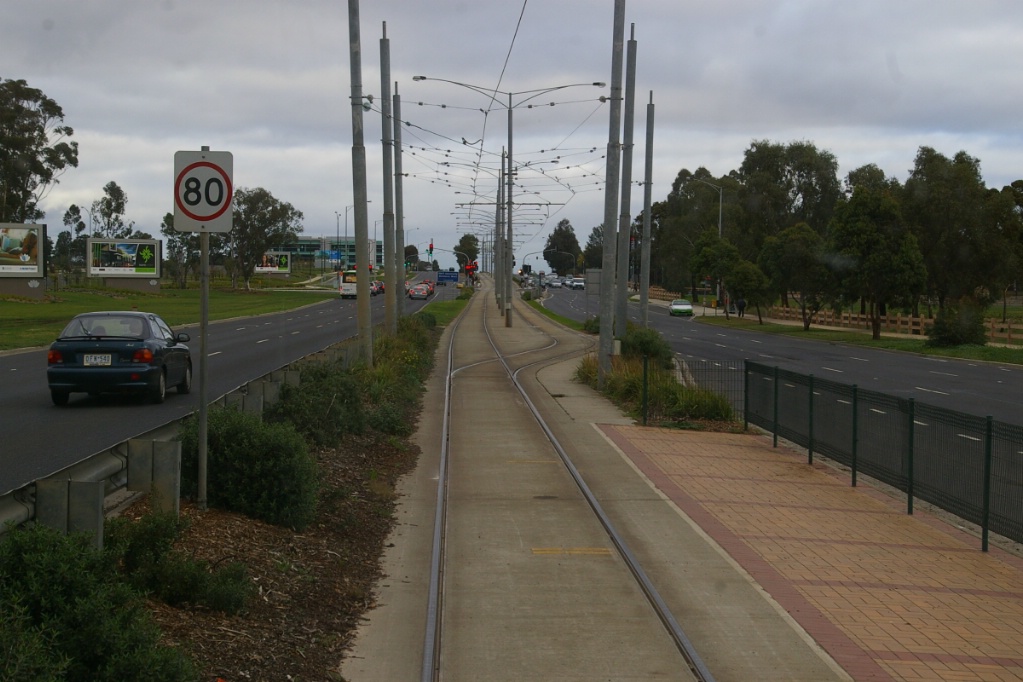
While much of Melbourne's tram network operates on public roads, either in full mixed traffic or in reserved lanes with no physical barrier, there is a significant amount of separated right-of-way that ranges from roadway medians to full private right-of-way away from a road.
Road Medians, Parallel ROW, and Transit Malls
Median ROW on Burwood Hwy used by Route 75 in Zone 2
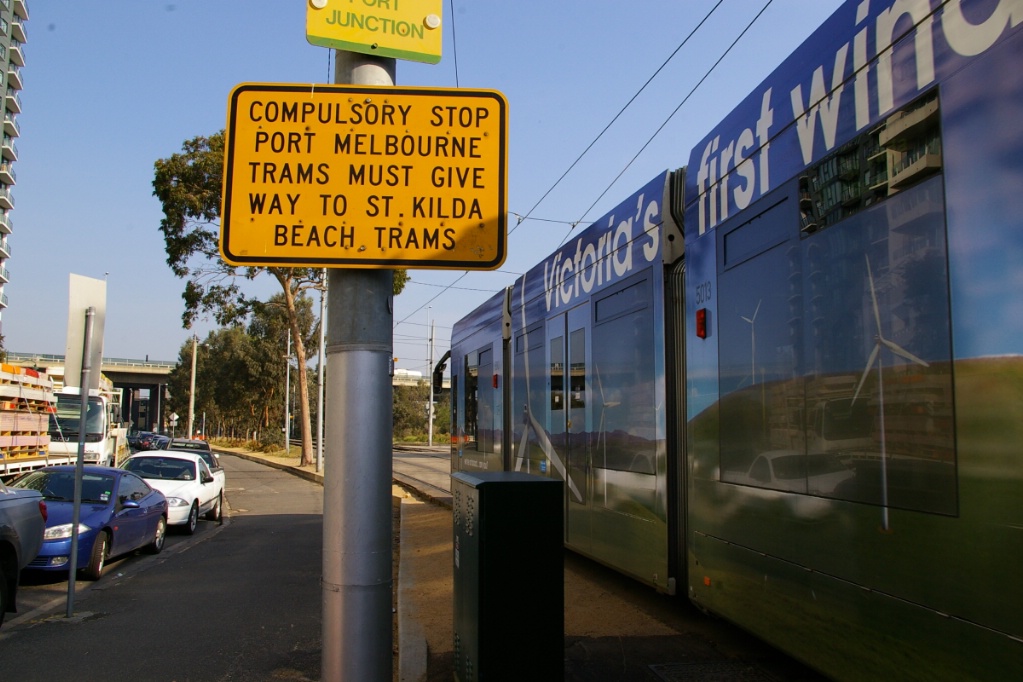
Junction
where Routes 96 and 109 branch to LRT sections
Median ROW used by Route 59 in Essendon
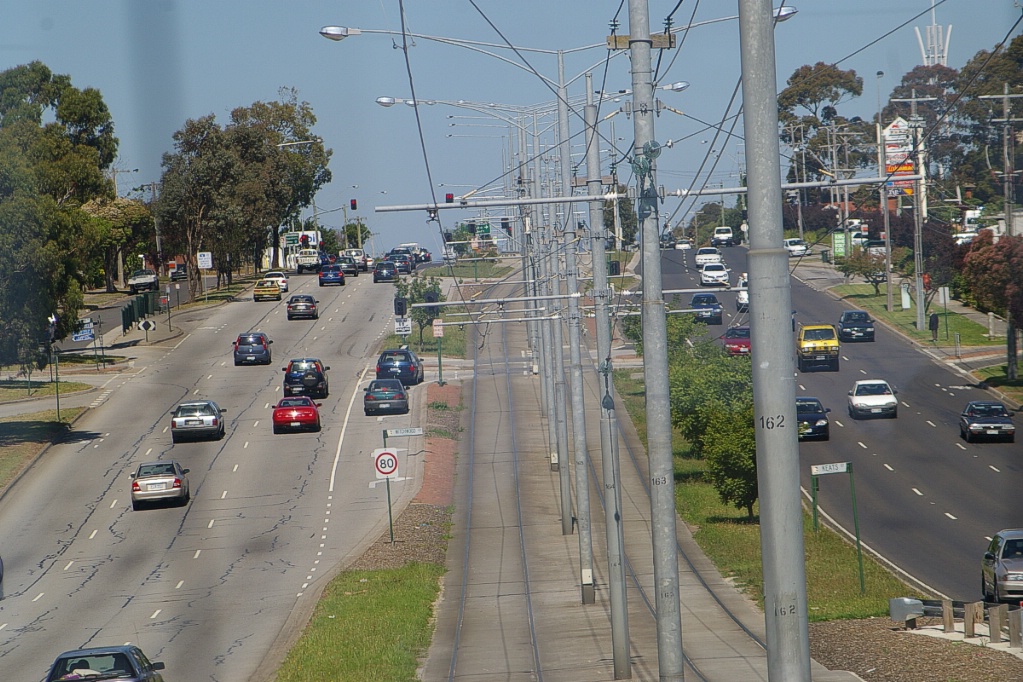
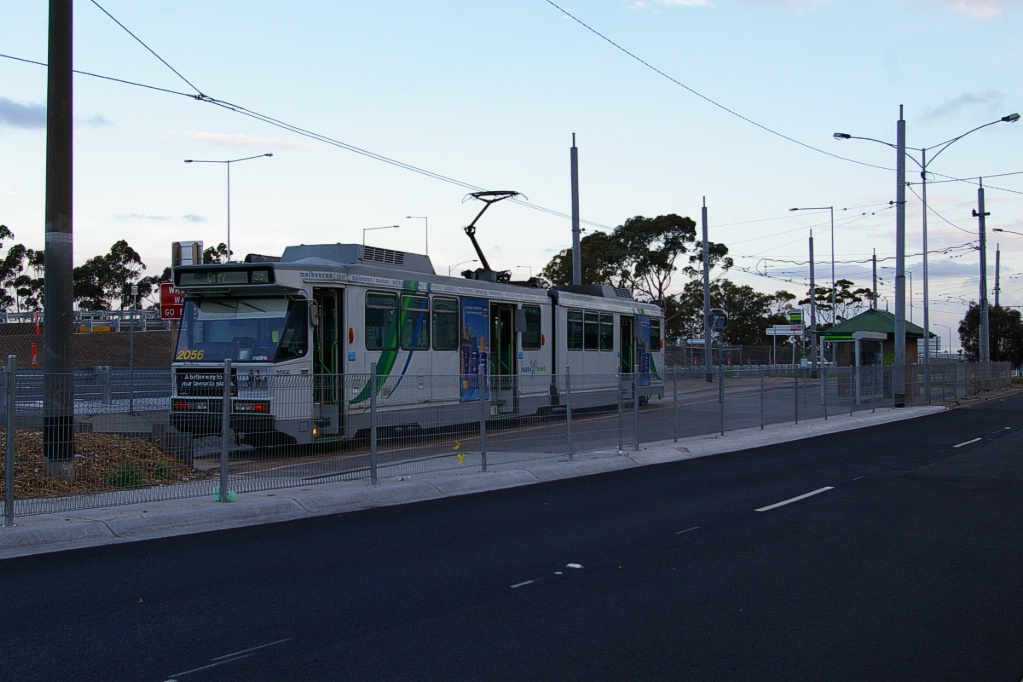
LRT section of Route 109 has crossing gates at intersecting streets
Route 112 at Arthurton - from here north to Miller, a wide median provides space for a tree-lined paved path for pedestrians and bicycles between the tracks


Port Melbourne bound Route 109 on LRT section
east of Montague Street (stop 126)
Intersection of Balaclava and Hawthorn Roads is one of few intersections with a Grand Union that allows trams from any direction to turn to any other direction
Parallel ROW used by Route 59 near Airport West between Matthews Ave (to the left of the photo) and Tullamarine Fwy (to the right)

Route 55 to West Coburg on private ROW next to Royal Park Golf Course near Melbourne Zoo
Route 96 turning off Fitzroy Street onto LRT section ROW
Median on Brighton Rd at Chapel St used by Route 67
Brighton also has service road on each side
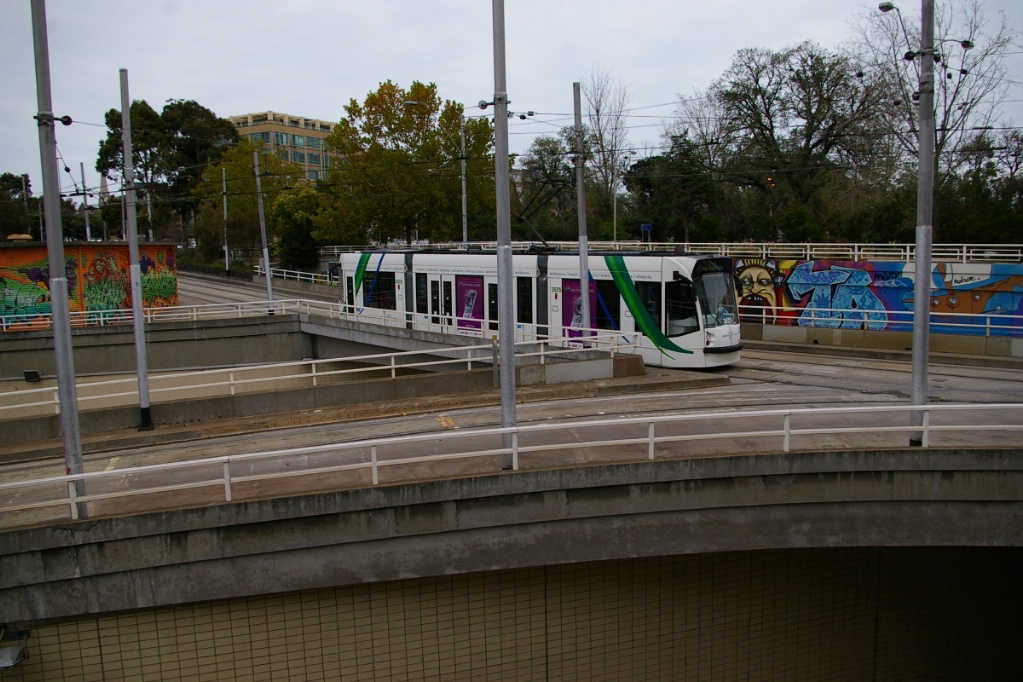
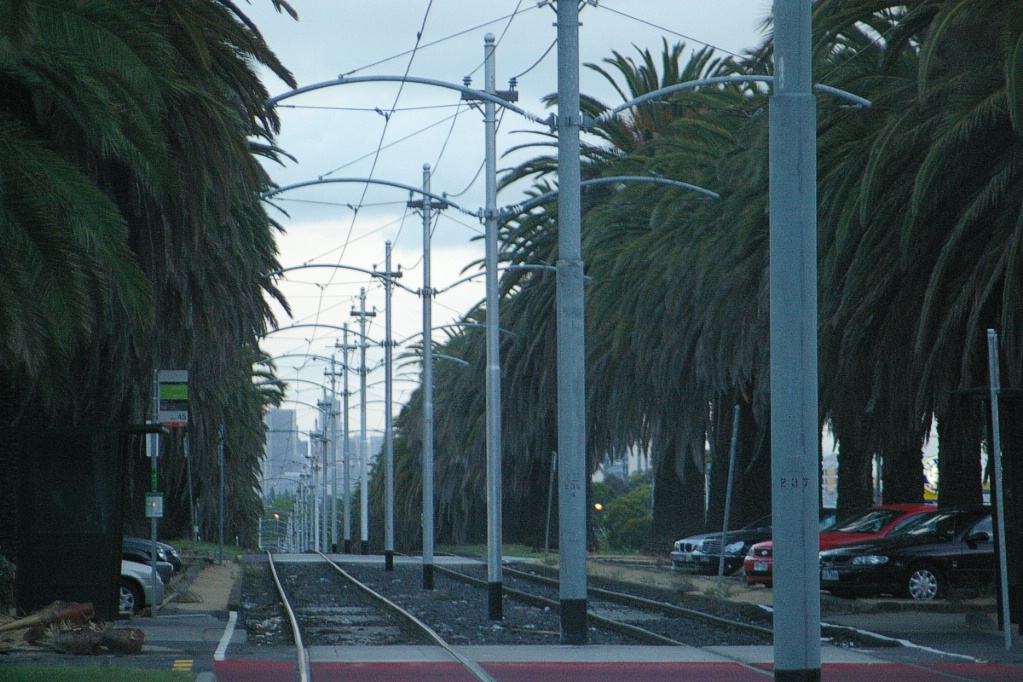
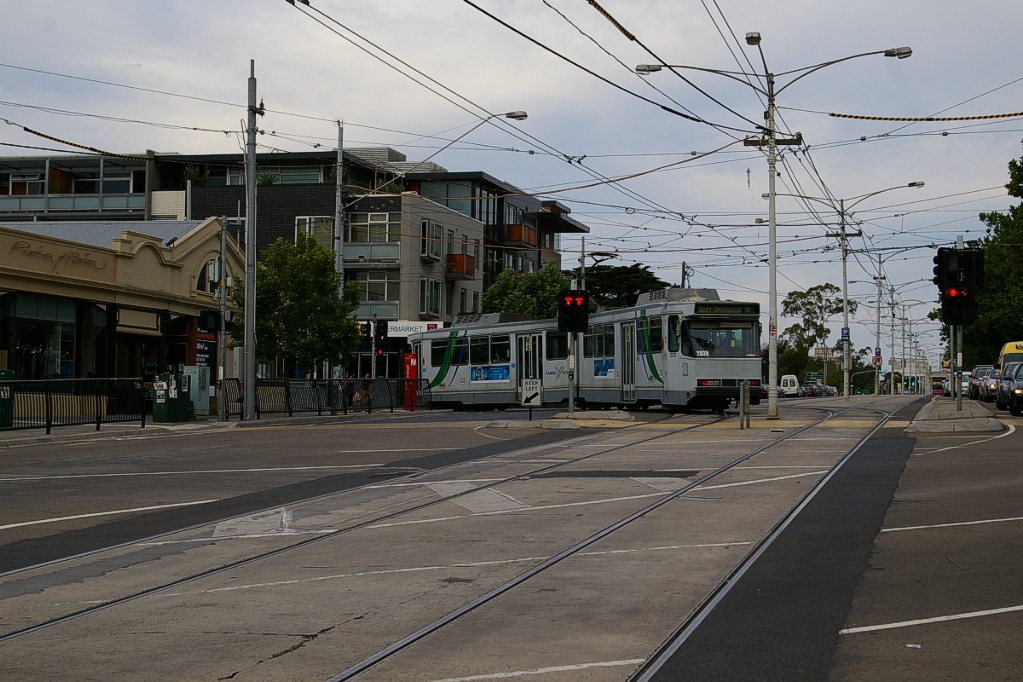
Fraser Street stop on LRT section of Route 96
This part of the line is referred to as "the LRT".
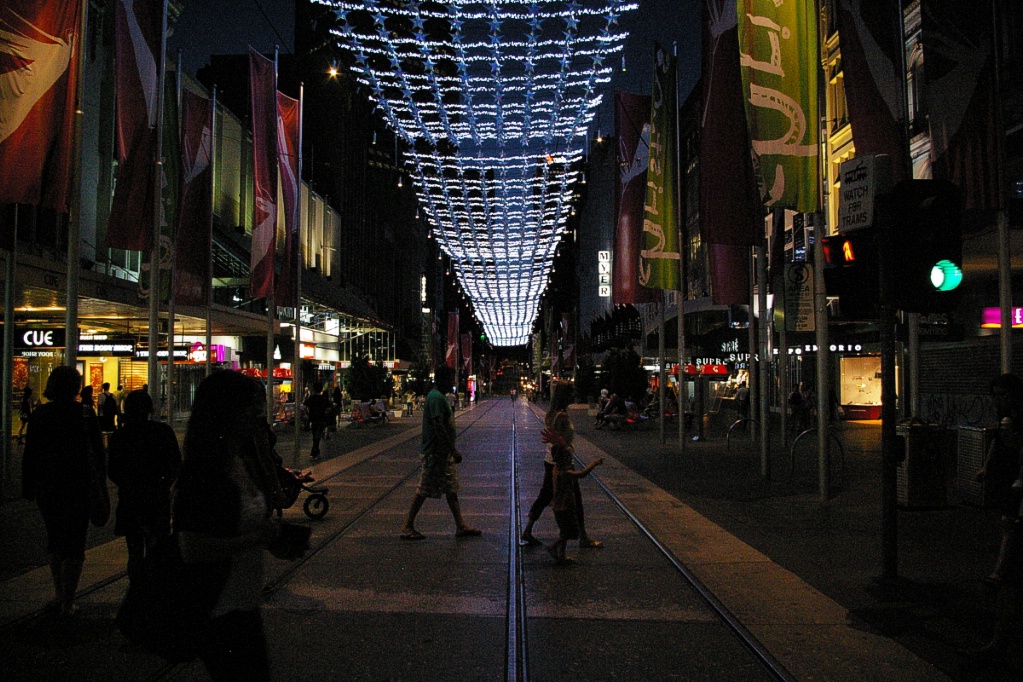
Bourke Street mall between Elizabeth and Swanston
Fraser Street stop on LRT section of Route 96. This part of the route was a former railway ROW and has full catenary overhead wiring. This station is staggered to provide a single access where both directions stop
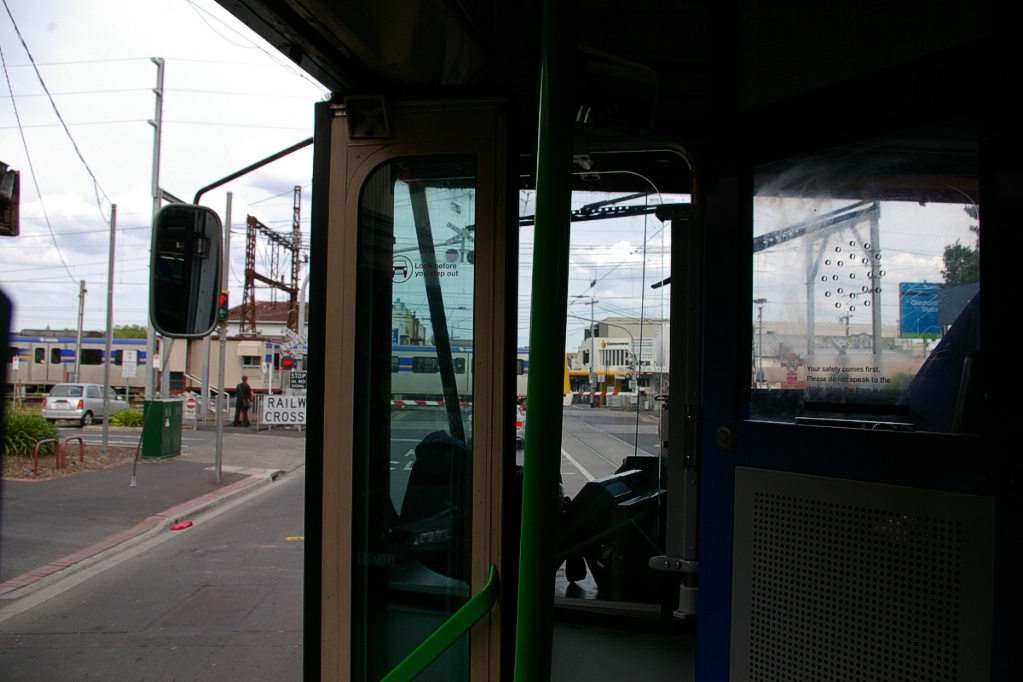
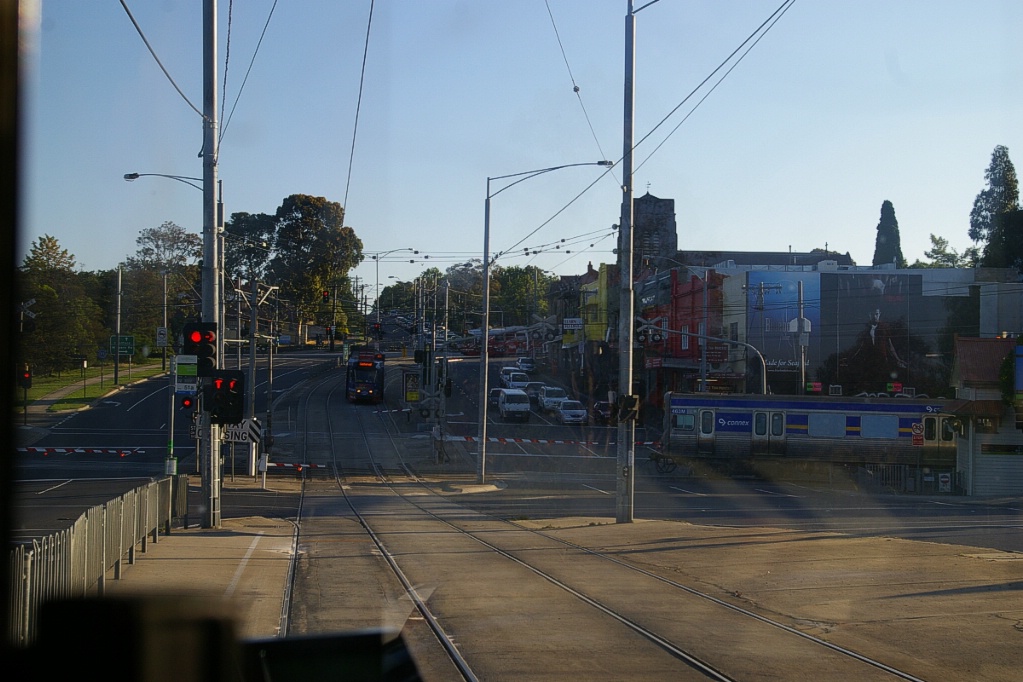
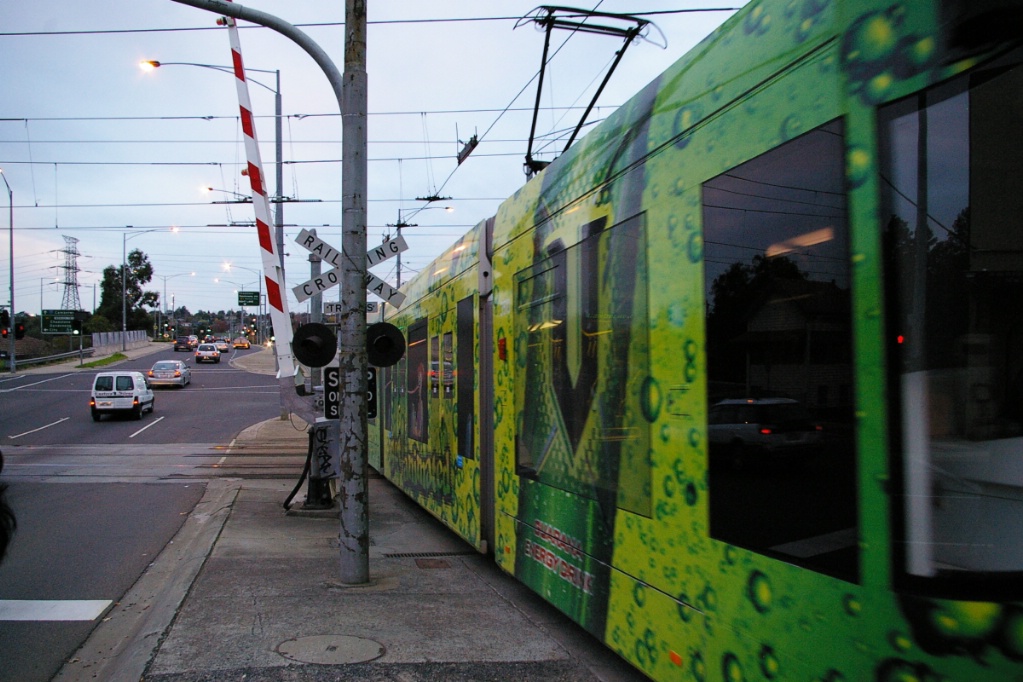
Trams Crossing Railways at Grade:
There are a few locations in Melbourne where the tram network crosses the rail network at grade. In addition to the track crossing (trams use standard gauge, while the rail lines us a wide gauge of 1600 mm/5' 3"), the overhead crossing is not without its technical considerations.
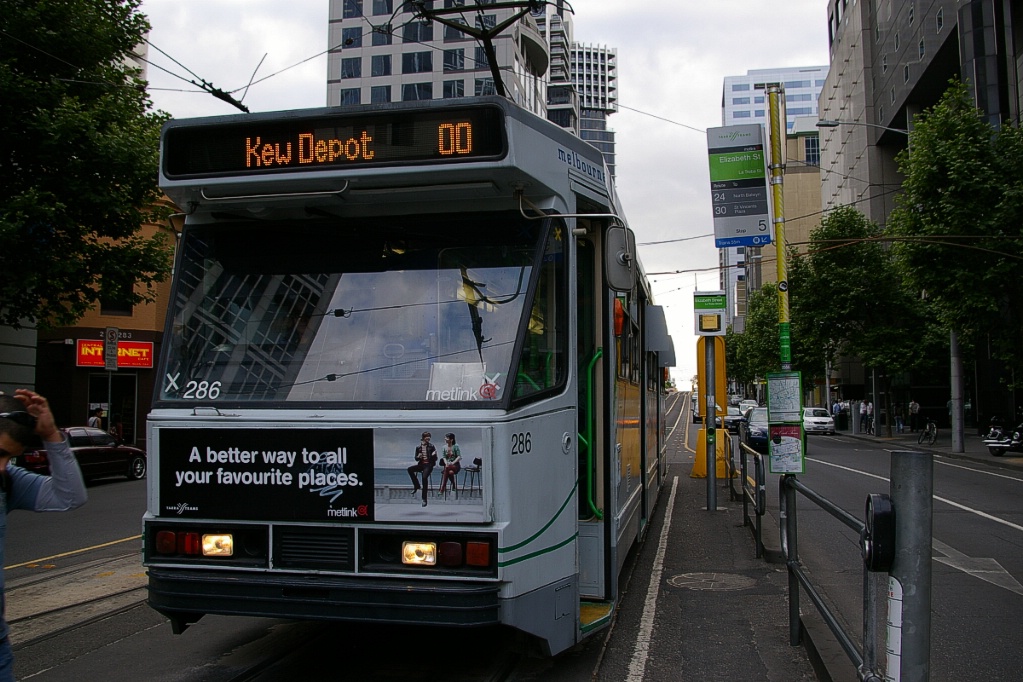
Many stops in the CBD and some stops outside the CBD have information displays showing the expected time until the next tram arrival.
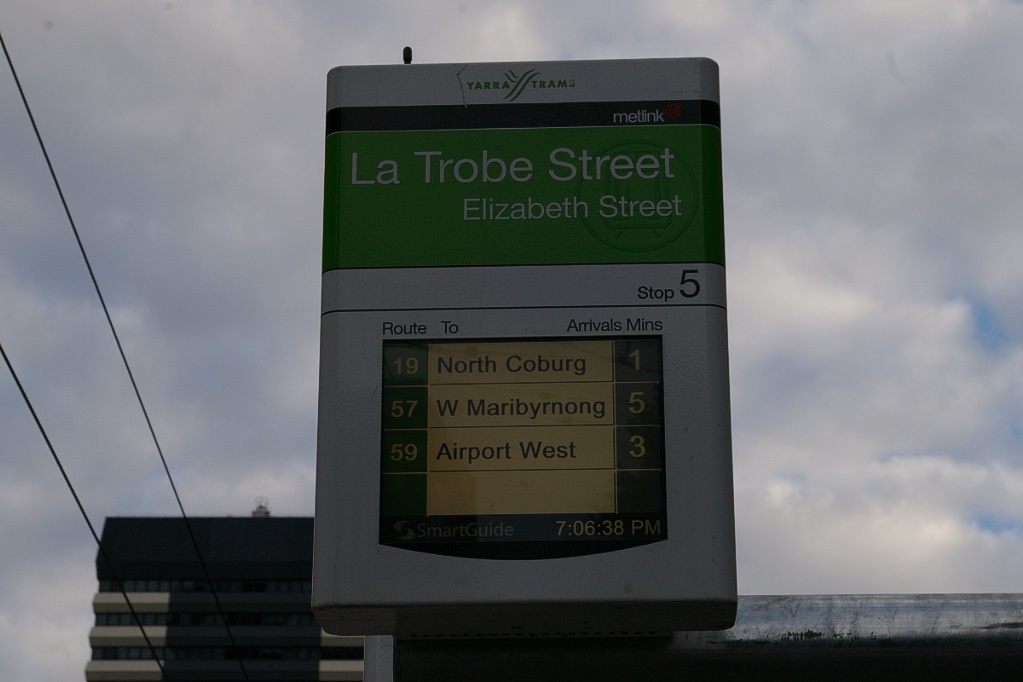
Tram
information display on Elizabeth Street at the La Trobe
Street stop
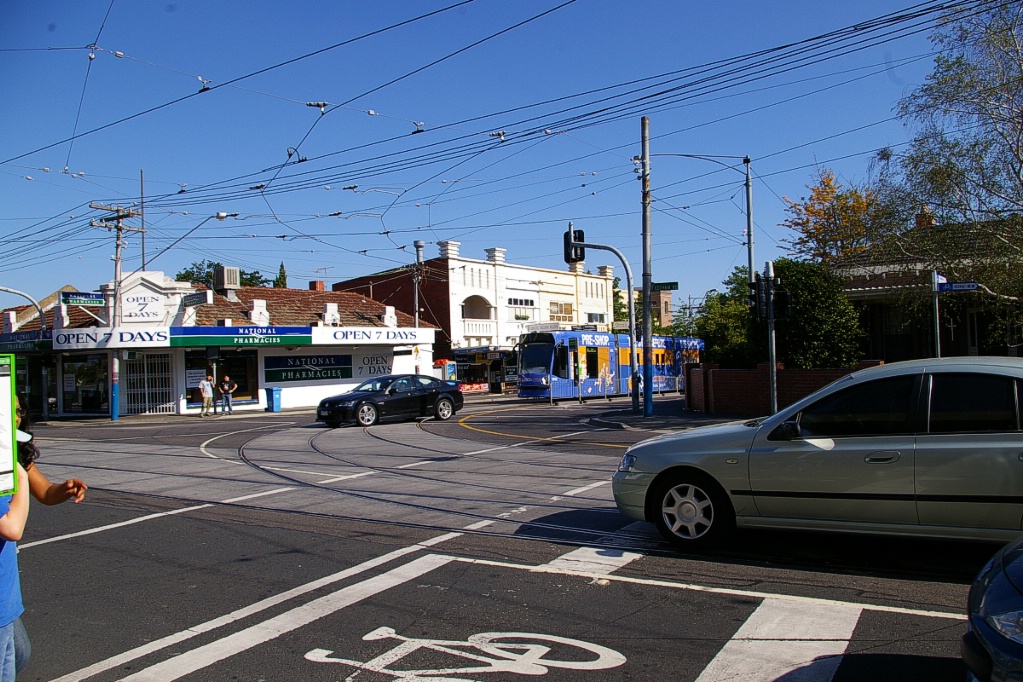
The trams use 600 volts DC, while the railway uses 1500 volts DC. The wiring at the intersection is called a railway/tramway square and is interlocked with the signal gates to provide the proper voltage.
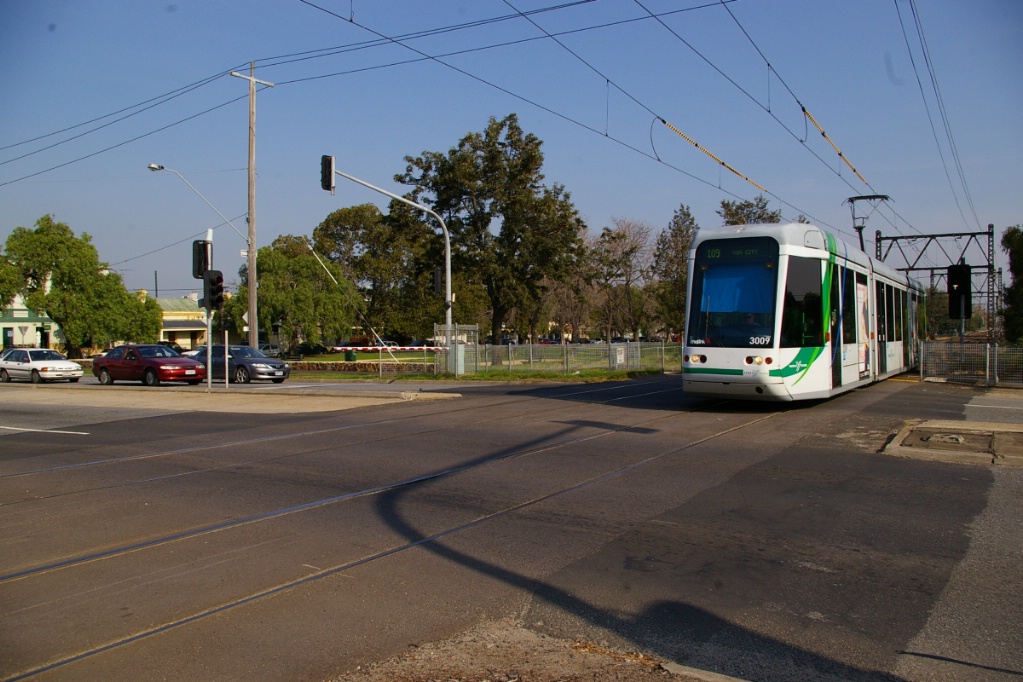
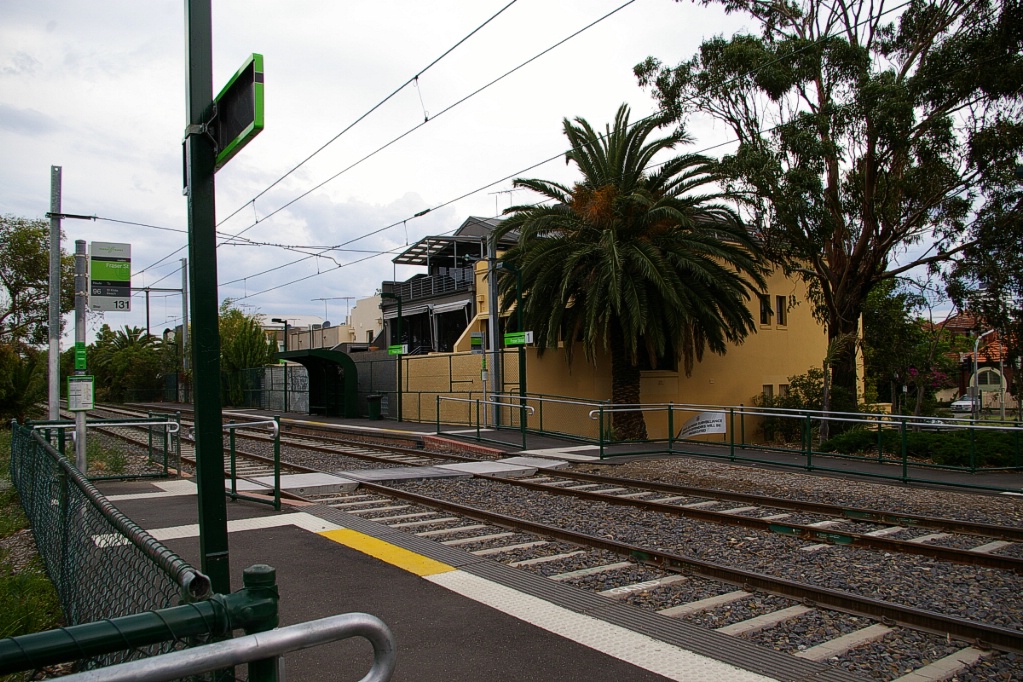
Level crossing on Glenhuntly Road at Glenhuntly Station

Level crossing at Riversdale Station
Level crossing on Burke Road at Gardiner Station
In addition to, or in place of these visual displays, some stops have a pushbutton/speaker unit that will provide an audible version of this information.

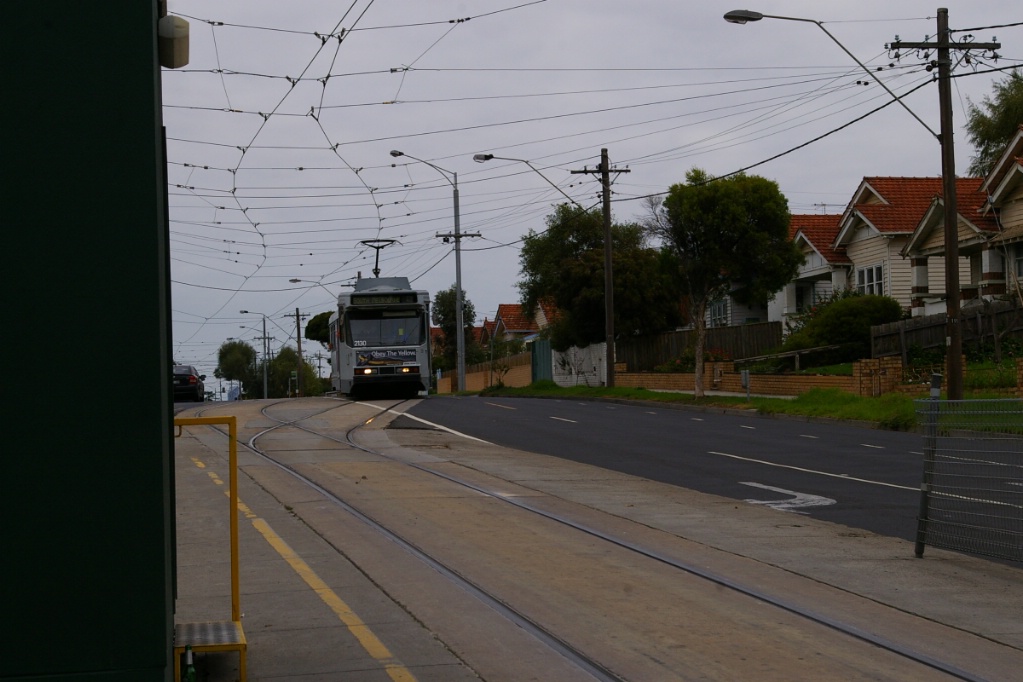
Tram
at Bell Street in East Coburg heading for Brunswick Depot
Revenue Service back to Depot:
Trams often run in revenue service, as non-scheduled "Route 0" cars, when returning to a depot...
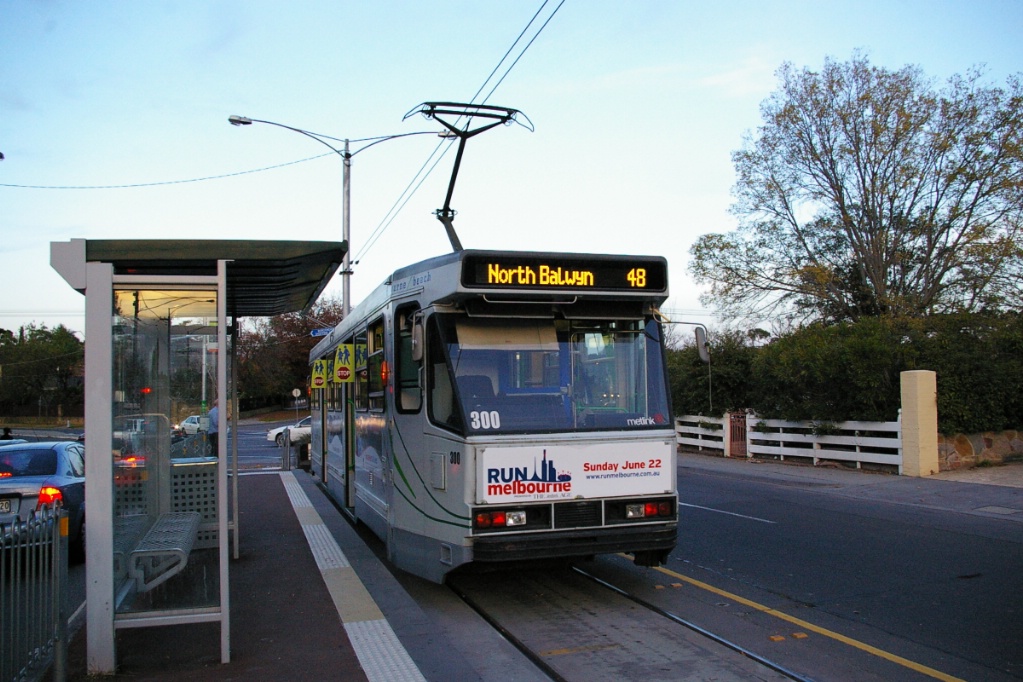
After its last run on Route 48 to New Quay Docklands, this tram returned to the Kew Depot in revenue service also displaying route number "00"
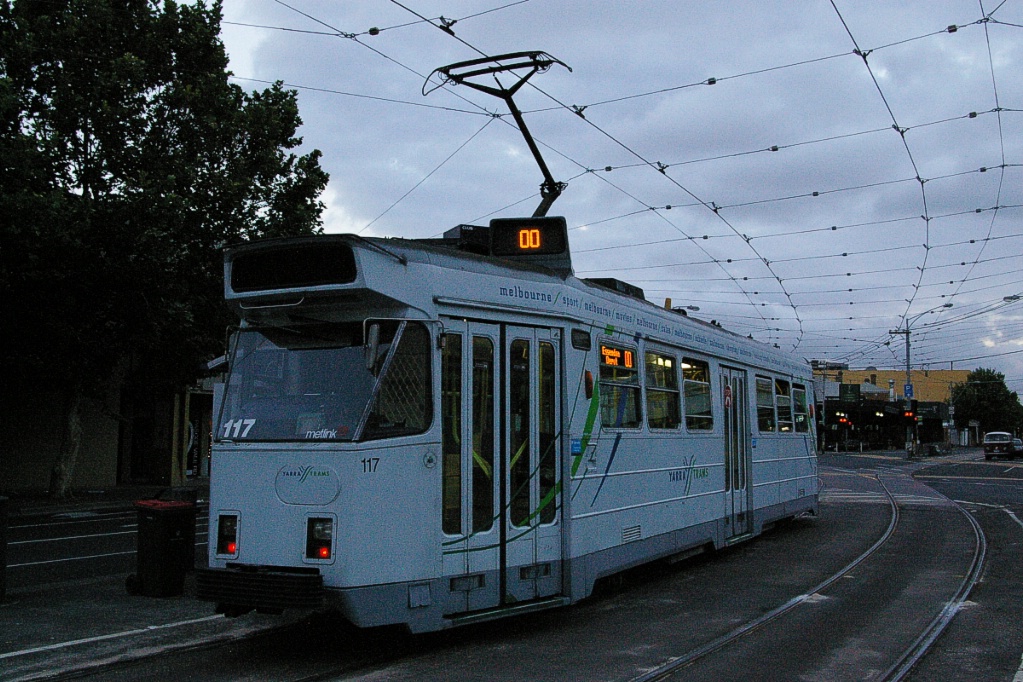
After its last run on Route 82 to Moonie Ponds, this tram pulls out onto Mt. Alexander Road and reverses direction to head to Essendon Depot in revenue service displaying route number "00"
Single track terminals:
Many routes have a stub terminal with a single track, instead of two tracks with a double crossover or a far side pocket track. This is an economical way of terminating a line where headways at the terminus permits.
The track does not need an automated turnout - a spring switch permits an incoming tram to enter and have the points be aligned for its outgoing return. The overhead wiring is simplified by not having the two wires actually connect. The incoming and outgoing wires run parallel to each other and the pantograph contacts both wires while on the single track section. In the days of trolley pole operation, poles were raised and lowered at the terminal, so the raised pole would be contacted with the outgoing wire.
Arriving Route 16 tram #3502 at Kew awaits departure of tram #3510 from single terminal track. Note how the overhead wiring from the two tracks converge but do not connect over the single terminal track. The pantograph of tram #3510 is contacting both wires.
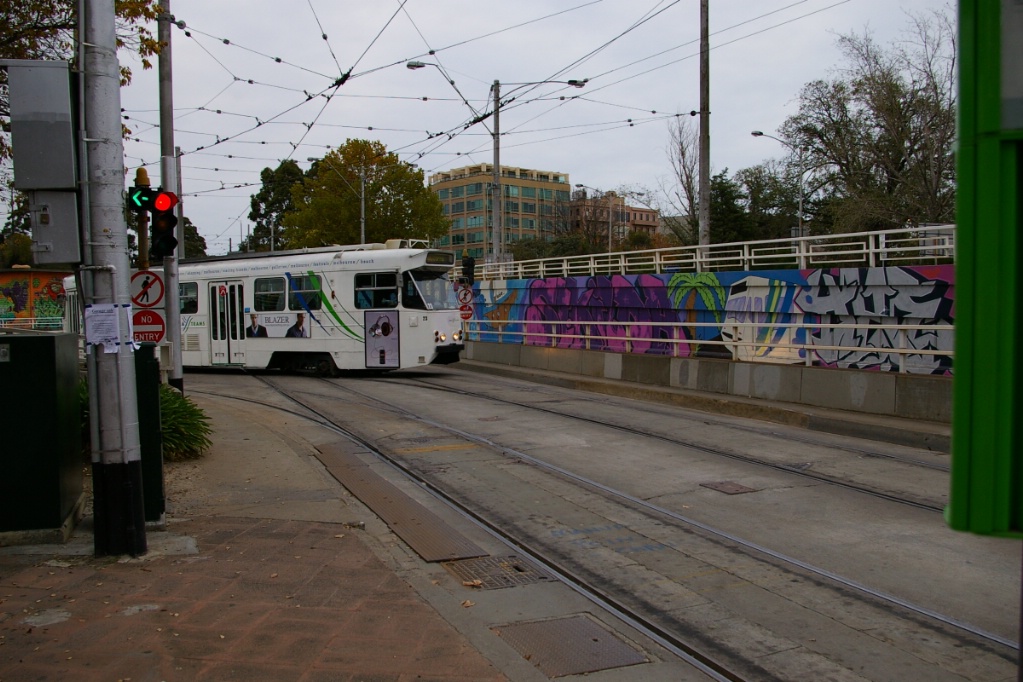
Southbound view at RMIT

Route 86 waiting at RMIT
Junction Stops:
It was just before 4 PM on a Saturday when southbound Route 86 pulled into East Preston Depot with passengers on board and had them transfer to a waiting tram that departed to continue the run.
On St. Kilda Road, south of the CBD, Domain Road Interchange has three tracks and two platforms:
The west track is used only by Route 55 as a single track terminus.
The other two tracks are used by through Routes 3, 5, 6, 8, 16, 64, 67, and 72.
Domain
Road Interchange (tracks 1 to 3 from left to right). This
interchange serves Routes 3, 5, 6, 8, 16, 55, 64, 67, and
72. Route 55 terminates here using track 3, while all
others pass through.
From
the street side, the now out of service tram is on the
left and the one on the right is ready to depart.
In the northeast corner of the CBD, St. Vincent's Plaza has three tracks and platforms:
The north track is used only by Route 112 on its northbound run.
The centre track is used by Routes 24 and 109 on their eastbound run and by arriving Routes 30 and 31.
The south track is used by all routes in the opposite direction.
Routes 30 and 31 turn back east of this stop using a pocket track on the north side of the trough tracks.
Looking west at St. Vincent's Plaza, a city-bound Route 112 is at the platform as a West Preston bound Route 112 turns in

North of platform at Melbourne University with tram in first pocket track visible
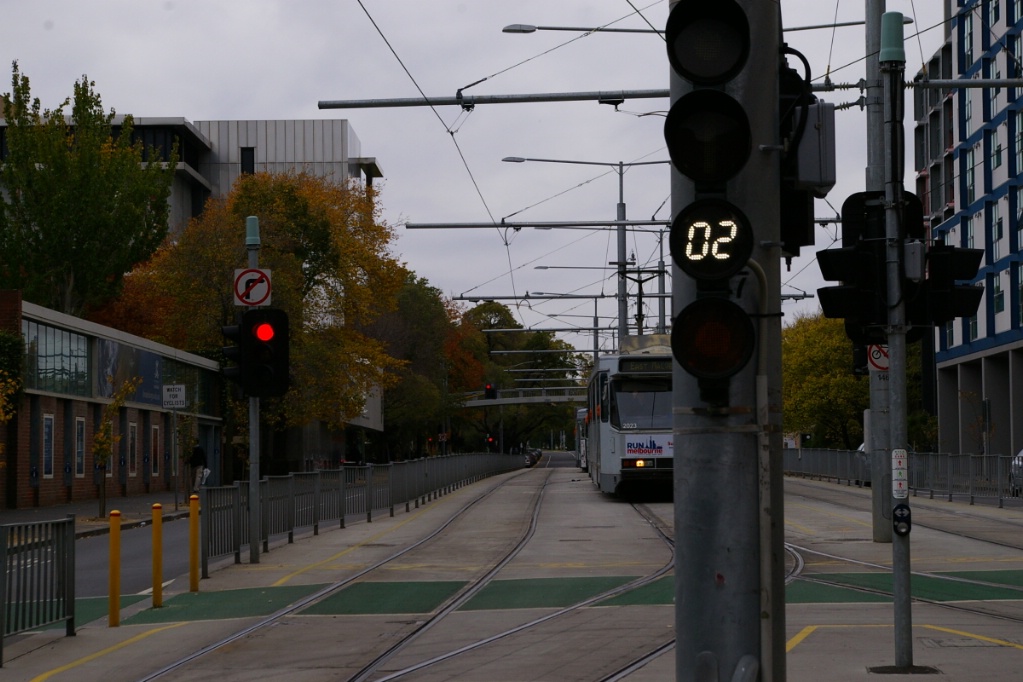
Switch
position signals northbound out of Melbourne University
Instead of a diagonal bar to indicate that a single switch is set for the diverging route, a numeric display shows which pocket track is selected
This stop at the north end of the CBD is the northern terminus of seven routes in addition to having Routes 1 and 8 passing through.
Headways during rush hours can be less than sixty seconds at times. Such headways with seven routes turning back at this location is made possible with the use of three tail tracks north of the stop.
A tram arriving that must turn back enters an available tail track for the operator to change ends and enter the southbound track when there is an opening.

Three
trams are waiting in pocket tracks north of Melbourne
University

Route 1 followed by Route 8 at Melbourne University
Both these routes pass through this stop and continue northbound
Southbound
tram passing tram in first pocket track north of
Melbourne University
Well planning early on has resulted in main streets being fairly wide. Most main streets in the CBD have two lanes of traffic on either side of the two tram lanes, making them at least six lanes wide. Despite the wide streets, there are very few locations in the CBD where separate turn lanes exist.
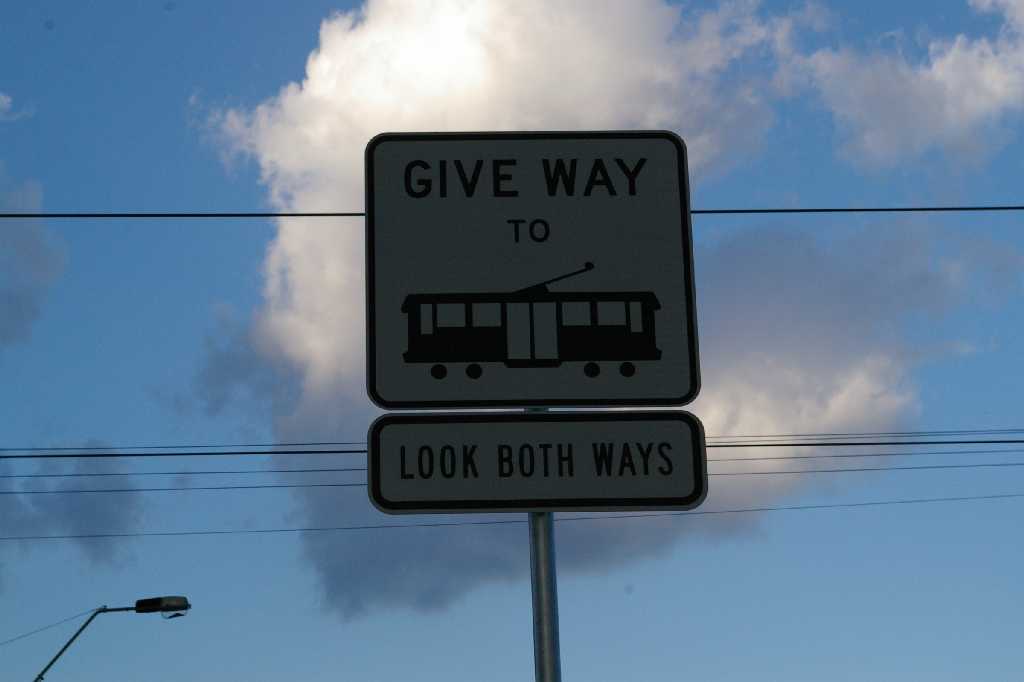
At many intersections when needing to turn right from a street with trams, you must make your right turn from the left! (Melbourne is left-hand running, so this would be comparable to making left turns from the far right in Toronto).
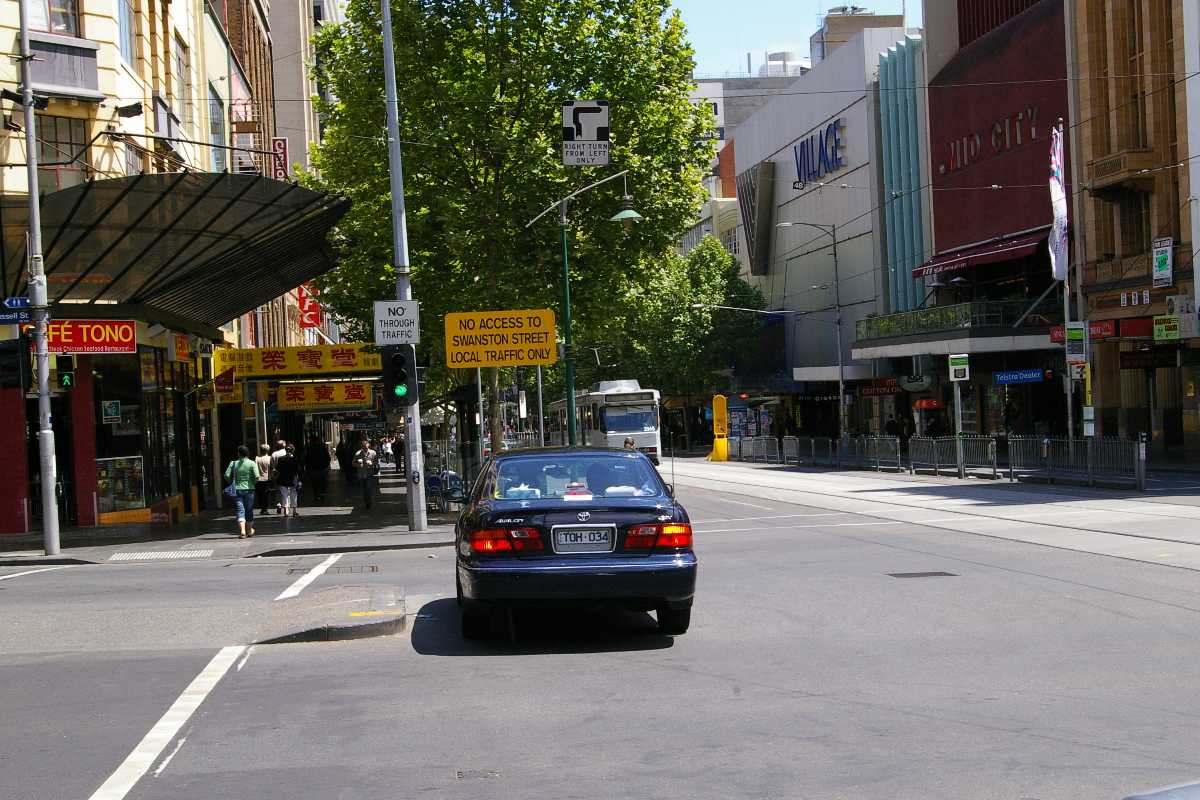
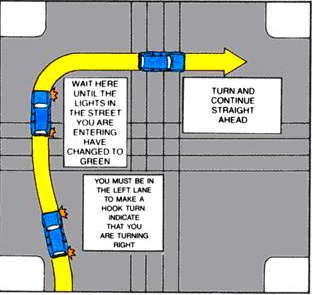
This way, someone turning does not proceed out to block the trams while waiting to complete their turn. This is known as the hook turn.
When the light turns green, a right-turner proceeds into the intersection, but shifts further to the left, positioning the vehicle closer to the crosswalk line at the intersection.
This leaves them with a little more room for through traffic to pass on their right. In some cases, this even leaves enough space for through traffic in the lane they were in to pass.
Only when the traffic lights change for the other direction do the vehicles complete their turn. It is as if being in the waiting to turn position places the vehicle at the front of the line for the cross traffic to proceed once they receive a green light.
Click on the diagram to the left for the official details on using hook turns.
Send questions, comments, and photos hereThis page last updated October 13, 2010