Some photos courtesy of Simon Smiler
This page was last updated October 14, 2012
Send questions, comments, and photos here.

LRT in
London (Croydon)


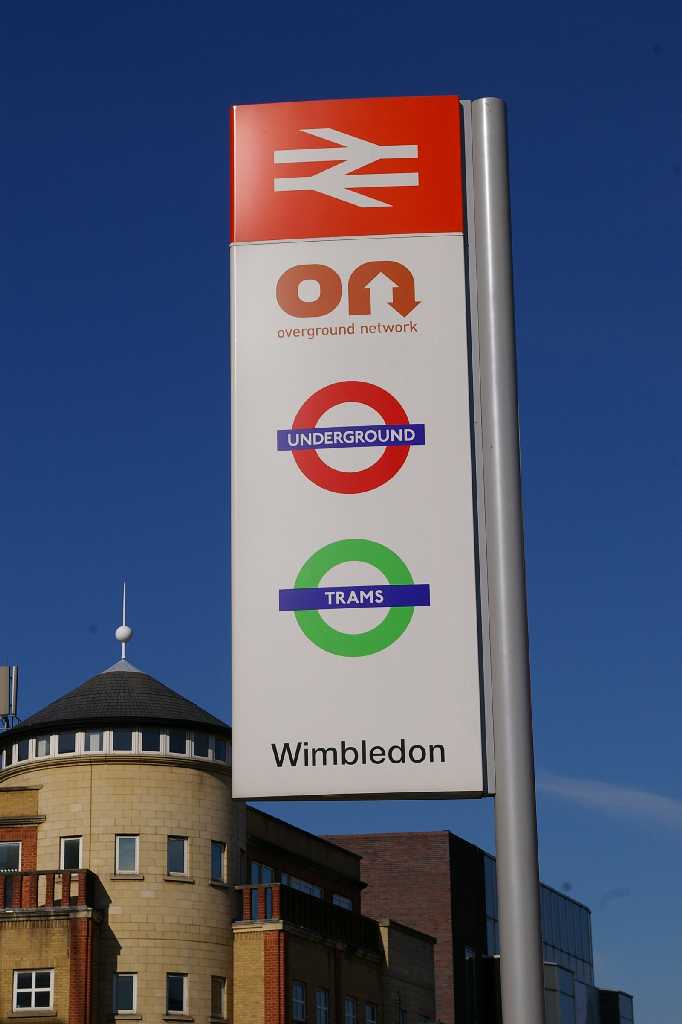
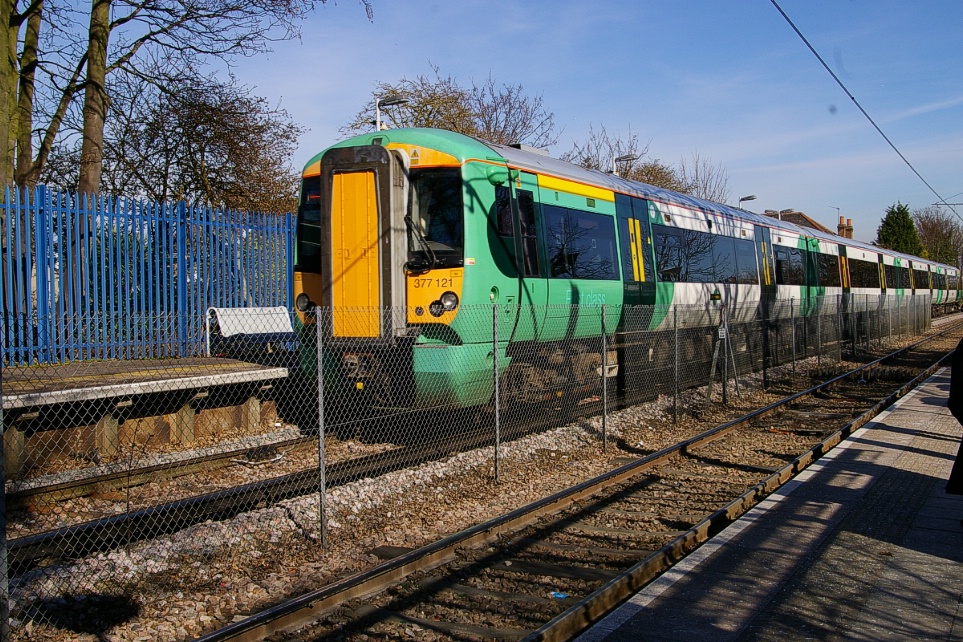
Tramlink (initially known as Croydon Tramlink) is operated by FirstGroup on behalf of Transport for London (TfL). One of the reasons for its creations was because the area it serves is relatively underserved by the London Underground. Its only connection with the Underground is at Wimbledon, though there are a number of connections with the National Rail service where the same zone ticketing is used.
Much of the private right of ways used by Tramlink make use of former railway right of ways. There are a number of single-track sections of the system and one short section of gauntlet (or interlaced) track, which demonstrates a possible cost savings in the initial capital expenditure. This system, which began operation in May 2000, is fully accessible.
Contents
Toronto Comparison
This system is a good example of how LRT can fill the transit needs of an area that does not warrant the expense nor need the capacity of a full subway system.
It is also a nice example of the flexibility of LRT in that it can move from rapid operation over private rights of way to mixed traffic implementations.
System Highlights and Route Details
| Item | Notes |
|---|---|
| Number of lines | 3 (4 starting in June 2012) |
| Total length | 28 km |
| Total stations/stops | 39 (5 are single-direction in Croydon) |
| Loading | Platform at door level, 35 cm above track |
| Fleet |
24 Bombardier
FLEXITY Swift CR-4000 Both have 80 km/h top speed |
| Flexity details |
Seats 70 passengers, plus 138 standees |
| Variobahn details |
Seats 84 passengers, plus 128 standees |
| Fare collection | Self service, barrier free, proof of payment |
| Fare integration | Zoned fare system fully integrated with buses, Underground, and
Overground trains Single fare valid for 90 minutes |
| Airport service | via Underground (subway) connections |
| Opening |
May 2000 |

| Route 1 - Croydon to Elmers End | |
| Stations | 13 (5 are single-direction in Croydon) |
|---|---|
| Right of way | Croydon to Sandilands: separate lanes or mixed
with traffic Sandilands to Elmers End: private right of way |
| Service frequency |
10 minutes weekdays and Saturdays |
| Route 2 - Croydon to Beckenham Junction | |
| Stations | 17 (5 are single-direction in Croydon) |
|---|---|
| Right of way | Croydon to Sandilands: separate lanes or mixed
with traffic Sandilands to Birkbeck: private right of way Birkbeck to Beckenham Junction: shared with National Rail |
| Service frequency | 10 minutes weekdays and Saturdays 12-15 minutes early evenings weekdays and Saturdays 30 minutes early mornings and evenings weekdays and Saturdays 30 minutes Sundays |
| Route 3 - Wimbledon to New Addington | |
| Stations | 29 (5 are single-direction in Croydon) |
|---|---|
| Right of way | Wimbledon to Reeves Corner: private right of
way Reeves Corner to Sandilands: separate lanes or mixed with traffic Sandilands to Elmers End: private right of way |
| Service frequency | 7-8 minutes weekdays and Saturdays 10 minutes early evenings weekdays and Saturdays 15-20 minutes early mornings and evenings weekdays and Saturdays 15 minutes Sundays |
| Route 4 - Elmers End to Therapia Lane | |
| Stations | 18 (5 are single-direction in Croydon) |
|---|---|
| Right of way | Therapia Lane to Reeves Corner: private
right of way Reeves Corner to Sandilands: separate lanes or mixed with traffic Sandilands to Elmers End: private right of way |
| Service frequency | 15 minutes weekdays and Saturdays No Sunday service. |
Ride Descriptions
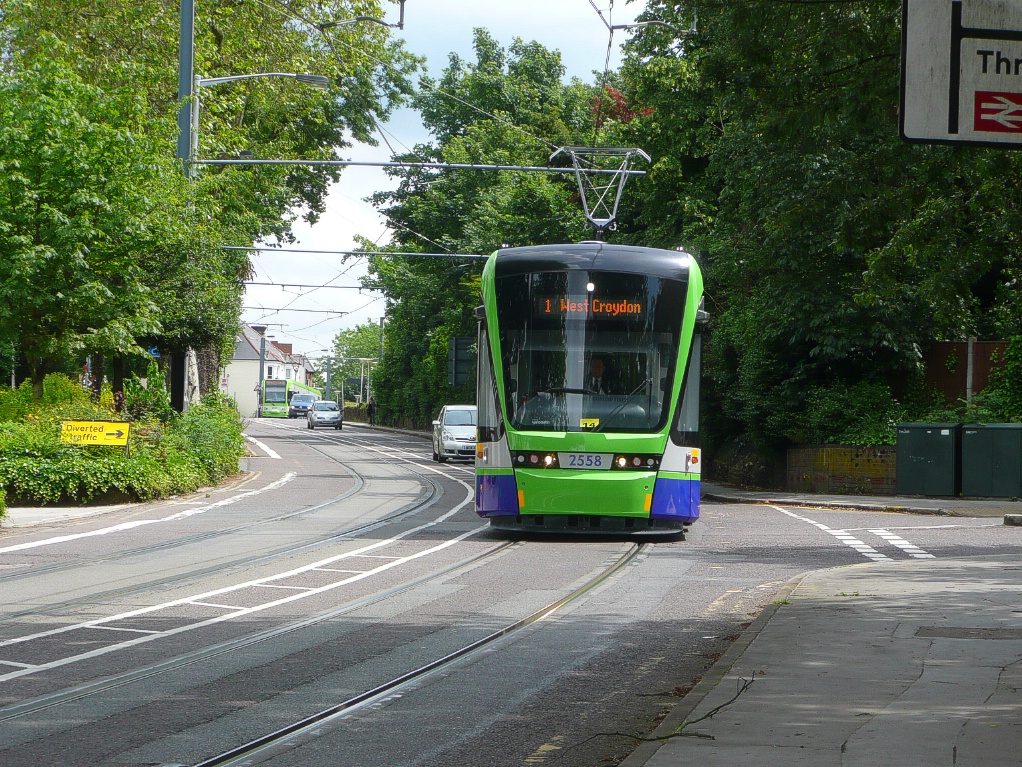
All routes interline through Croydon. The entire trip on Route 3 from Wimbledon to New Addington will be described first. Since all routes take a separate eastbound and westbound path through Croydon, the first section will describe the eastbound passage and a second section will describe the short westbound passage. The third description will cover Routes 1 and 2 where they branch from Route 3 at Sandilands. The new Route 4 operates the same as Route 3 from Therapia Lane to Sandilands, then follows the path of Route 1 to Elmers End.
| Corridor | Notes |
|---|---|
| Route 3 | Entire route from Wimbledon to New Addington |
| Croydon Westbound | Westbound passage through Croydon for all routes |
| Routes 1, 2, and 4 | Branch of routes from Sandilands to Arena, and Routes 1 and 4 to Elmers End |
| Routes 2 | Branch of Route 2 from Arena to Beckenham Junction |
 s
s
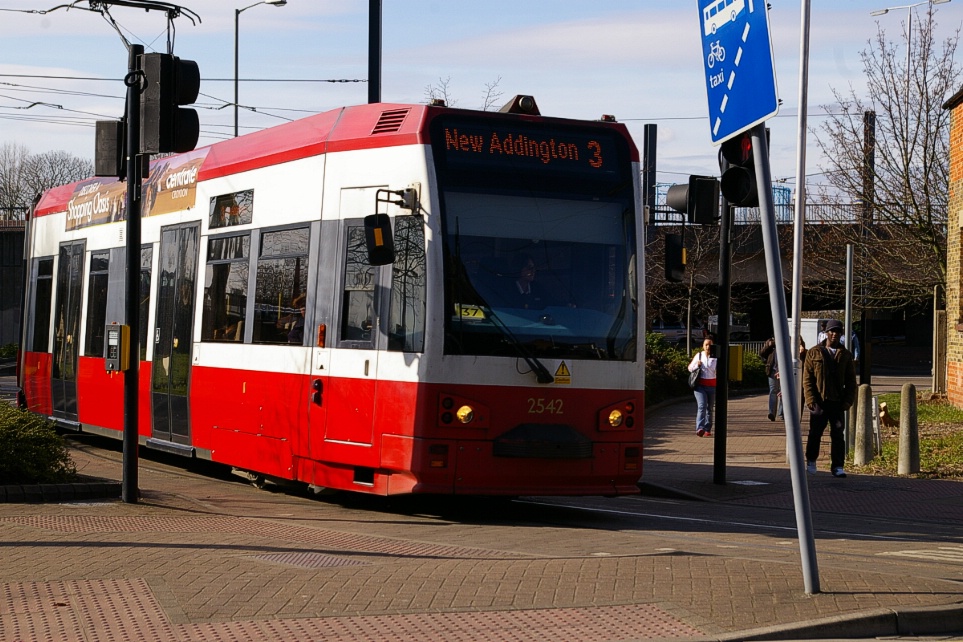
Route 3 - Wimbledon to New Addington
The trip on Route 3 from Wimbledon to New Addington takes about 45 minutes, while the return trip takes about 43 minutes as its path through Croydon is more direct.
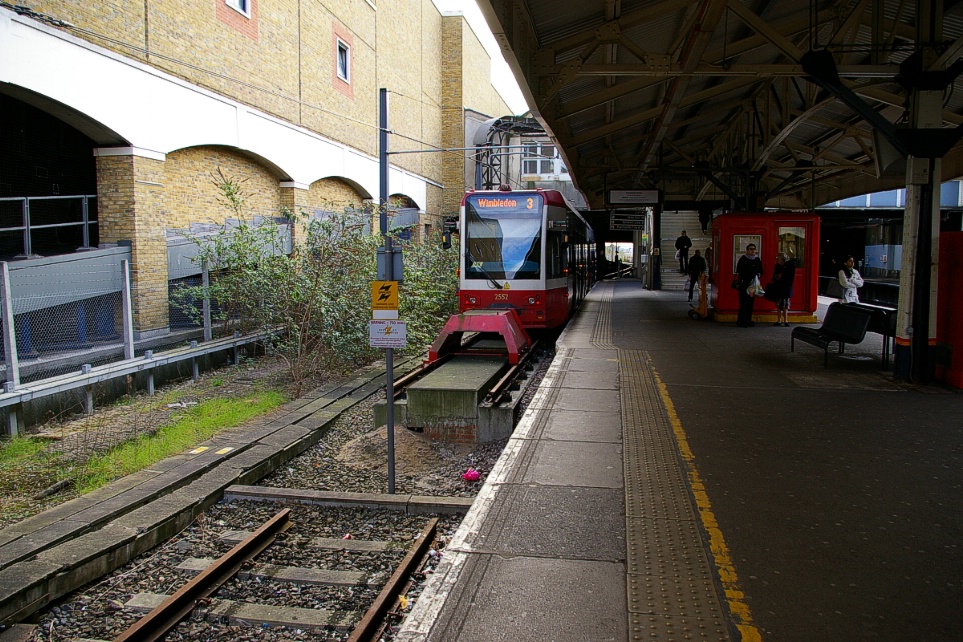
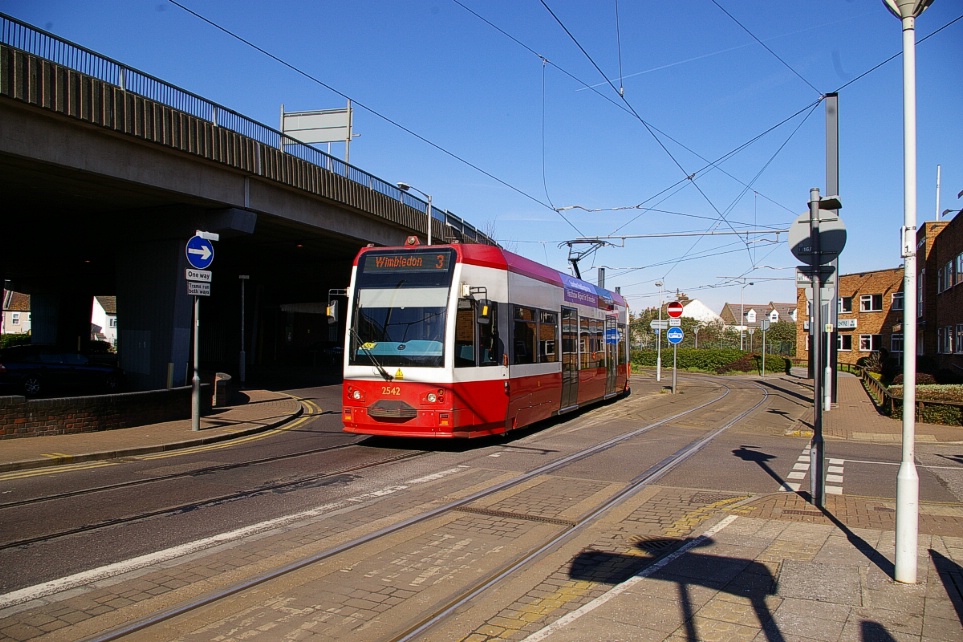
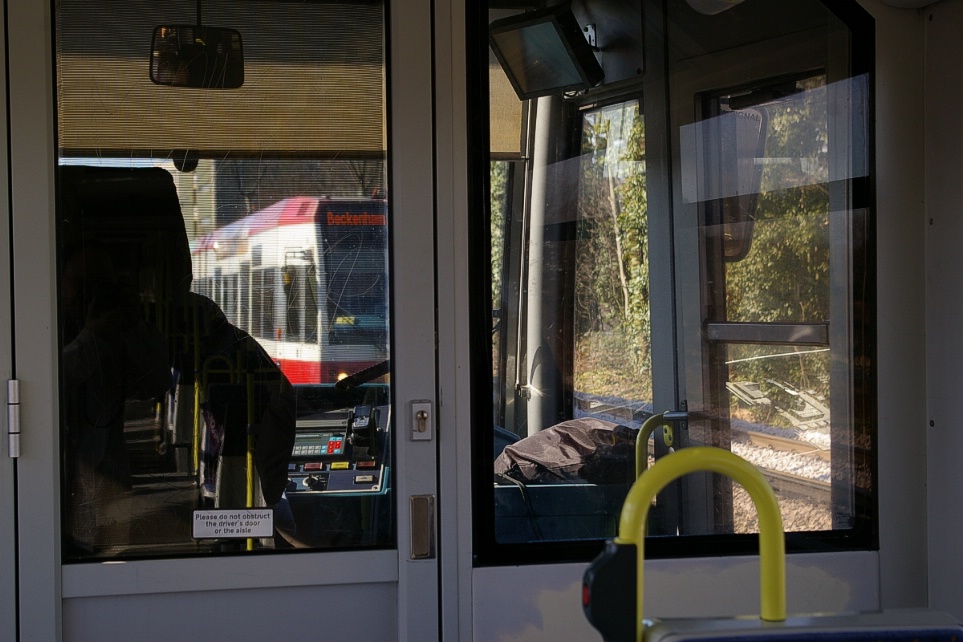
Wimbledon is a station with one southern terminus of the District Line of the Underground and National Rail connections. Trams use the east end of track 10 on a shared platform with National Rail services. As trams are low floor vehicles, their track is raised above normal railway track height, as can be seen in the photo to the right where the railway track at the west end meets the tram track.
Tram service is a request-stop service, meaning that trams only make stops where necessary if a passenger is waiting at a stop or if an on-board passenger presses a stop request button.
The single track exits the east end of Wimbledon through an underpass where it splits into two tracks almost half way to Dundonald Road. The line operates over a private right of way here, formerly a British Rail line that closed in the 1990s.

Between Morden Road and Phipps Bridge, the line is single track. This occasionally requires a tram to wait at a stop until the tram in the other direction arrives.
Just west of Mitcham, there is a section of gauntlet track, also known as interlaced track. Effectively, this section must be treated as a single track section where trams in one direction must wait for those in the other. Unlike a true single track section where the tracks converge at each end with a full switch, gauntlet track only has their inside rails crossing. Movement on each track interferes with the other, but does not actually connect with it.
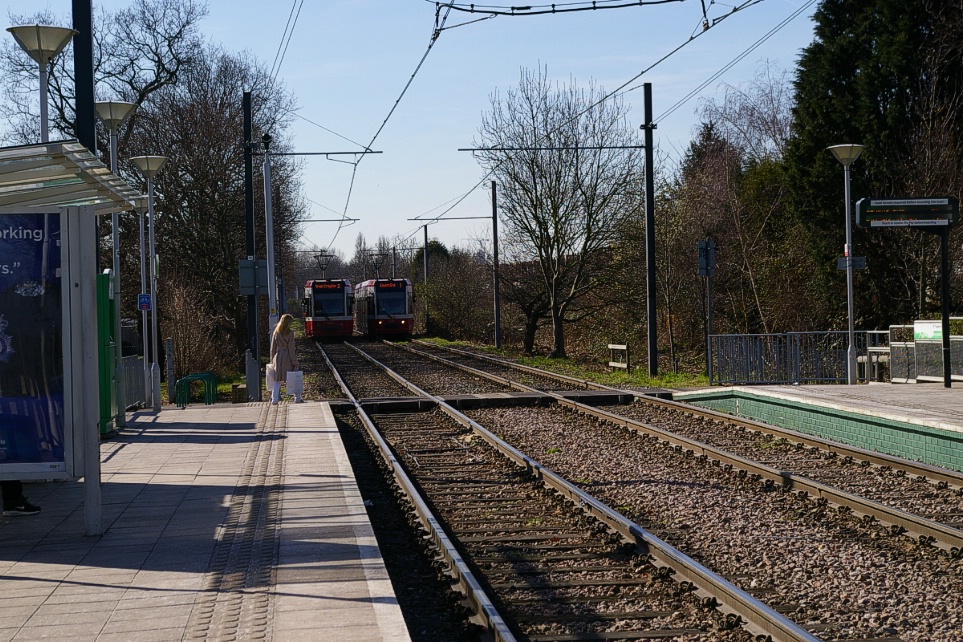
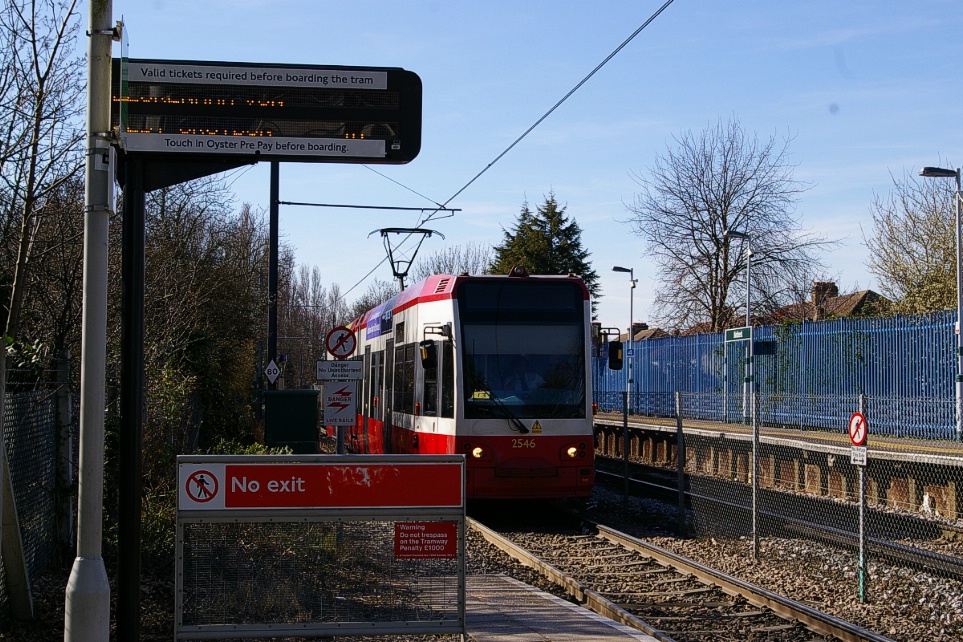
Between Mitcham and Mitcham Junction, there is a true single-track section. Mitcham Junction is served by National Rail services, where connections may be made. Another single-track section is between Mitcham Junction and Beddington Lane. Just east of Beddington lane, the line has its first level crossing with road traffic.

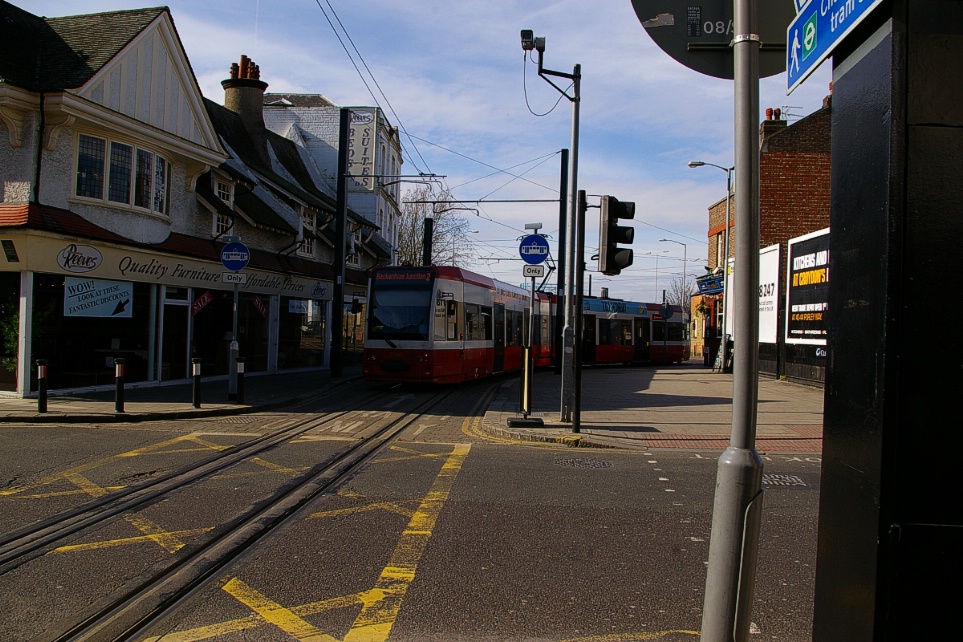
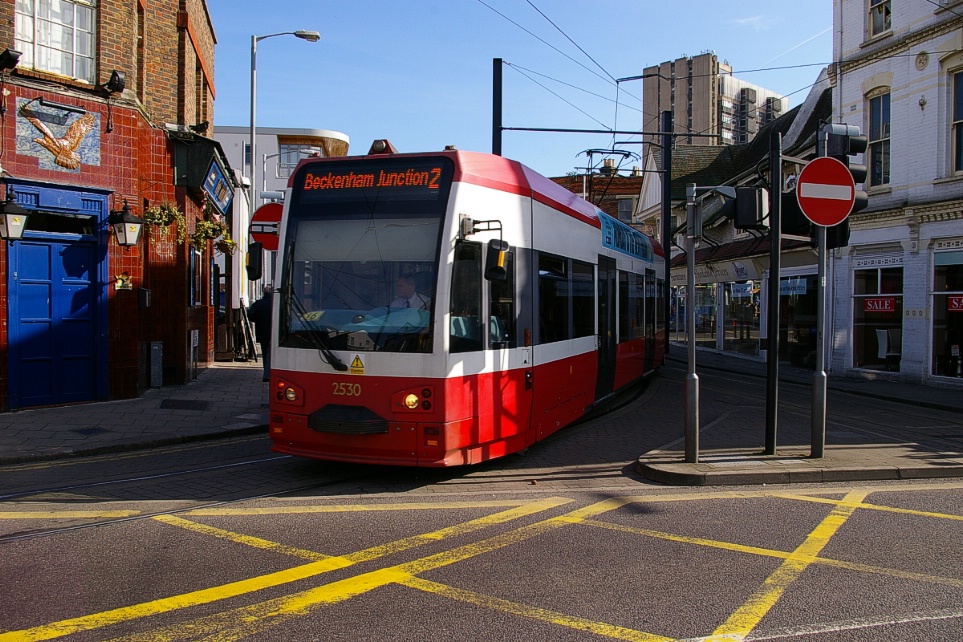
The final single-track section west of Croydon is between Wandle Park and Reeves Corner. Reeves corner is the start of mixed traffic operation. The system map above shows Reeves Corner as being on the westbound branch of the loop through Croydon, but it is located just west of where trams branch apart and serves both directions.

Just east of Reeves Corner, eastbound trams branch to run a few blocks to the north, joining the west end loop used by route 1 and route 2 trams to turn back to the east. The westbound journey over this split section is described below.
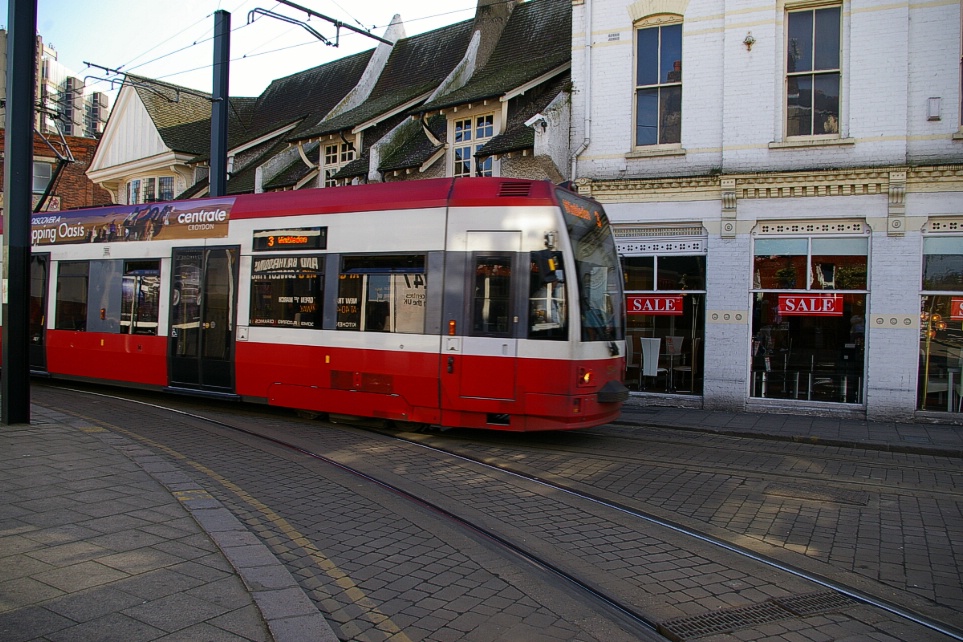
Much of this section has the tram track in a lane that is isolated from other road traffic. This lane is at the curb, so the trams open on the left side at Centrale, West Croydon and Wellesley Road.
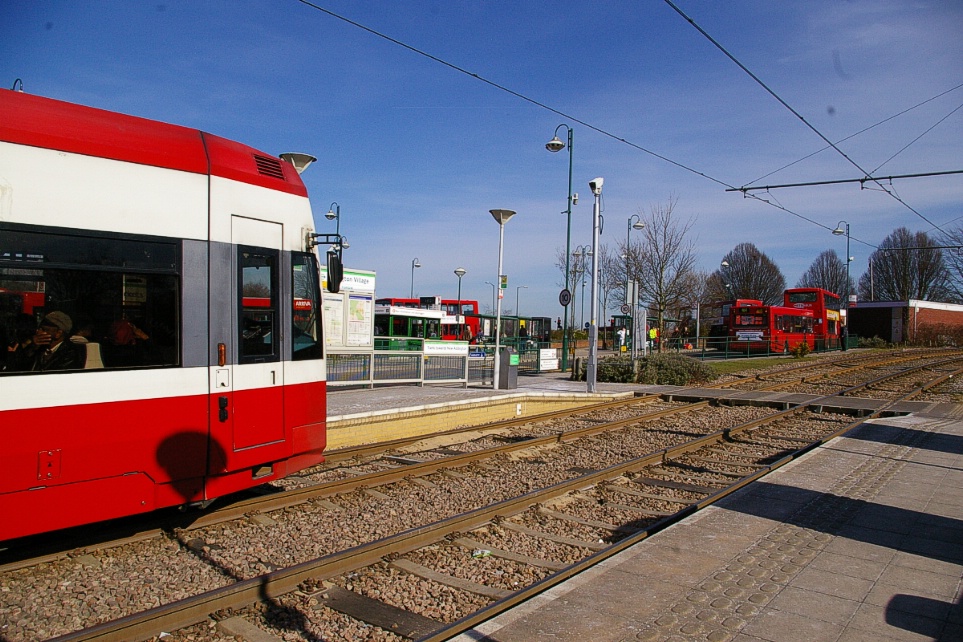
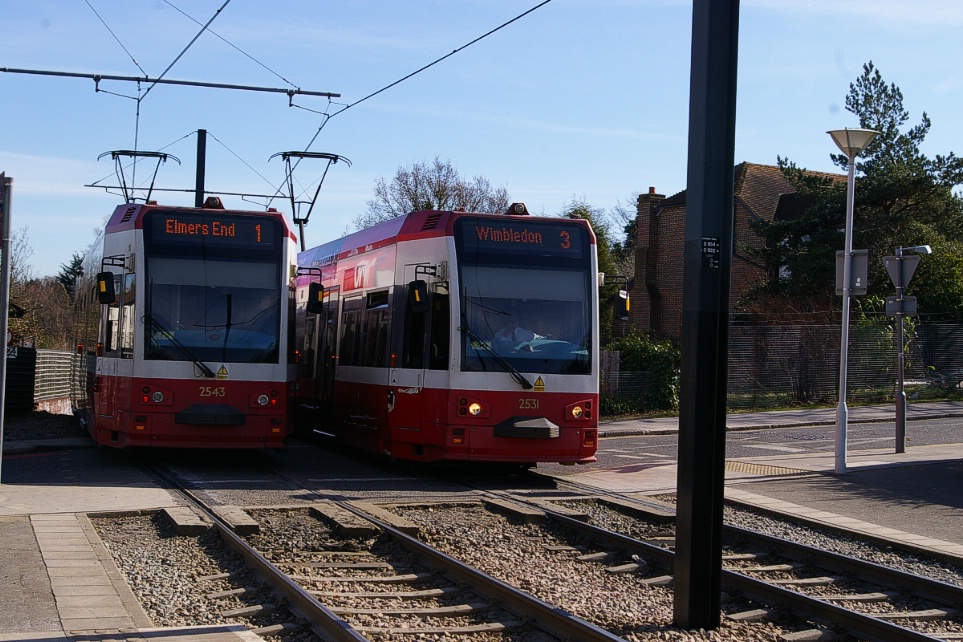
As the two directions converge just west of the East Croydon stop, the trams follow lanes that are isolated from the rest of traffic. The East Croydon stop has three tram tracks, with the eastbound track on the north side where the National Rail station is and a second platform is between the middle track and the westbound track on the south side. The middle track is available for turning back a tram from either direction.
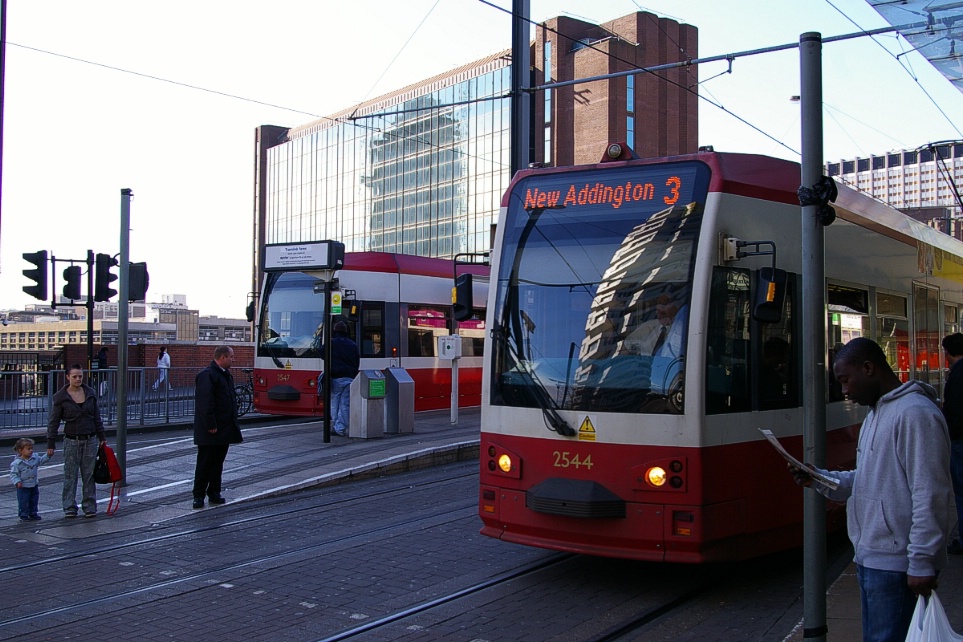
Route 3 to New Addington about to depart East Croydon.
|
Route 3 to Wimbleton about to leave East Croydon as Route 2 waits enter.
|

Left: Route 1 to Elmers End
Right: Route 2 follows exiting Route 3. |
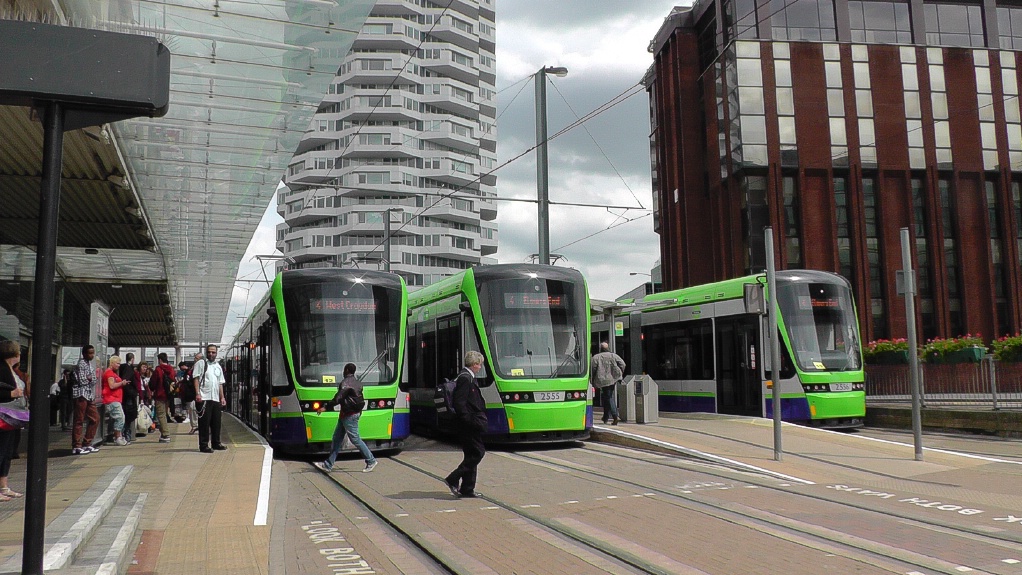
Three Stadler trams (half the fleet!) at East Croydon.
|

Two eastbound trams at East Croydon.
|


Shortly after deparating East Croydon, the tram is back in mixed traffic on Addiscombe Road.
Lebanon Road has a stop that is staggered - the westbound stop is half a block west of where the eastbound stop is. There are bus stops at this location, but bus bays are provided opposite the tram stops - that is, the westbound bus bay is opposite the eastbound tram stop and the eastbound bus bay is opposite the westbound tram stop.

Near Lebanon Road.
|
Just west of Sandilands, Addiscombe Road shifts to the north side of the tram line and the trams are left in their own right of way. Sandilands is the eastern-most stop that all routes share. East of the stop, the line passes a level crossing with Woodbury Close and and decends slightly towards a former railway right of way.

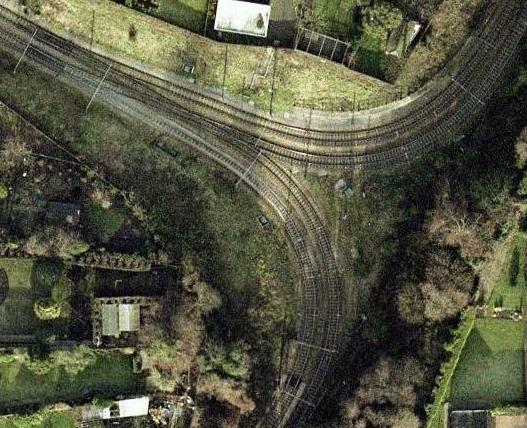
Here both branches make 90 degree turns (see satellite image to the right), with Routes 1 and 2 turning left and Route 3 turning right.
After the turn, Route 3 passes through the Park Hill tunnel of the former Woodside and South Croydon Railway. The tunnel is just over 500 metres in length.
After the tunnel, the line travels about another 800 metres before reaching the Lloyd Park stop. At this stop, the line makes a greater-than 90 degree turn to the east and parallels Coombe Road on the north side. The next stop is Coombe Lane, about 1.8 km east of Lloyd Park.
Coombe Road is now Coombe Lane and the line meets it with a level crossing east of the Coombe Lane stop. Here it parallels it on the south side as the road becomes Gravel Hill. There is about another 2 km until the next stop at Gravel Hill.

Addington Village.
Addington Village.
After the Grave Hill stop, the line crosses Grave Hill and parallells it on the north side for a short distance before turning left on the west side of Kent Gate Way where it crosses its northbound lanes at an acute angle to continue on its median for several hundred metres.
There it crosses the southbound lanes of Kent Gate Way at an acute angle and arrives at Addington Village stop, less than one kilometre from Grave Hill. This stop is a major hub for bus routes.
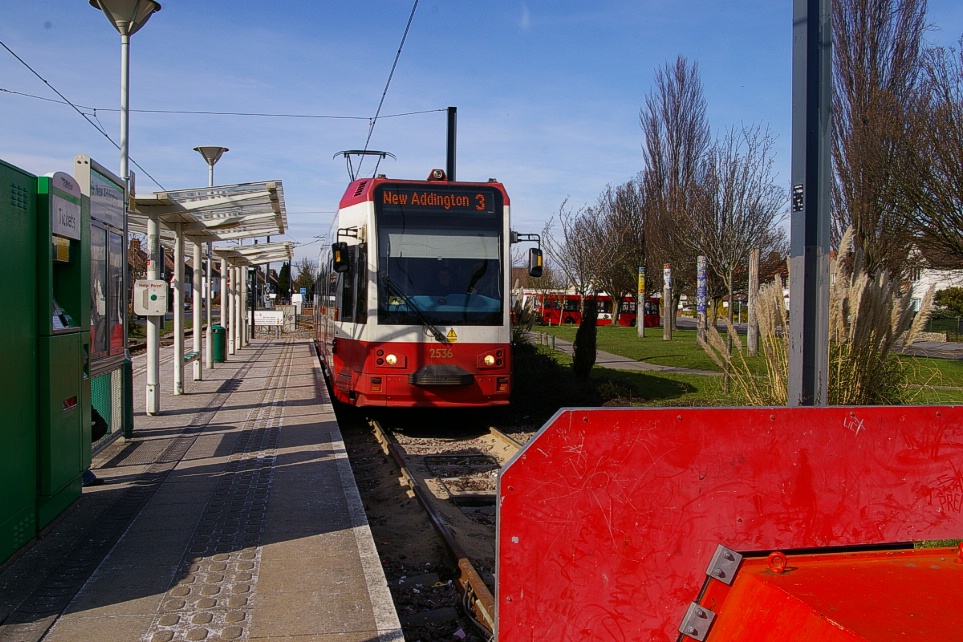
The line continues and curves to the southeast to parallel Lodge Lane. In just under one kilometre, the line arrives at Fieldway. Continuing to parallel Lodge Lane for just over a half kilometre, the line reaches King Henry's Drive. The line continues in a very wide median for less than another half kilometre to New Addington. Just before reaching New Addington, the tracks converge into a short single track section (less than 100 metres in length) before splitting into the two tracks at New Addington.

Croydon Westbound
West of the East Croydon stop, westbound travel continues straight for two stops before the point where Routes 3 continues west to Wimbleton (and Route 4 will continue west to Therapia Lane) and Routes 1 and 2 turn north to turn around back to the East Croydon stop.
After departing East Croydon, westbound trams continue straight along George Street where a stop is on the right side. Continuing on George Street, a slight jog along Crown Hill and then the street becomes Church Street.
Route 2 turning to loop west
of Church Street stop. |
Route 1 arriving at
Church Street stop. |
Westbound Route 3 after
departing Church Street. |
Route 2 after departing
Church Street stop. |

Church is a narrow, two lane street that winds down a grade before coming to the Church street stop. Travelling along Church Street, other traffic must make a left turn at Old Palace Road while trams continue on the next block where the stop is. Like the George Street stop, this stop loads on the right side.
West of the Church Street stop, trams that turn back east (Routes 1 and 2) diverge slightly from the straight line that Routes 3 and 4 trams take, but their route continues straight for a block gauntlet style (see photo at right).
Routes 1, 2, and 4 - Sandilands to Arena, Routes 1 and 4 continuing to Elmers End
Both routes are interlined from Sandilands to Arena, which takes about 6 minutes. Routes 1 and 4 branch to Elmers End, taking another 2 minutes, for a total time from Sandilands of about 8 minutes. Route 2 branches to Beckenham Junction, taking another 10 minutes, for a total trip time from Sandilands of about 15 minutes.
East of Sandilands, where Route 3 branches to the right, Routes 1, 2, and 4 make a left turn and proceed through an underpass below the intersection of Addiscombe and Ashburton Roads. About 600 metres up this line is the Addiscombe stop, located at Lower Addiscombe Road.
About another 750 metres away is the Blackhorse Lane stop, followed by Woodside that is just under 500 metres further. The final stop for all three routes (1, 2, and 4) is about another 750 metres away at Arena.
A westbound Route 2 has just departed Arena as an eastbound Route 1 is
arriving.
|

This eastbound Route 1 heads straight through the junction at Arena.
|
A westbound Route 2 approaches from the curve through the junction at
Arena.
|

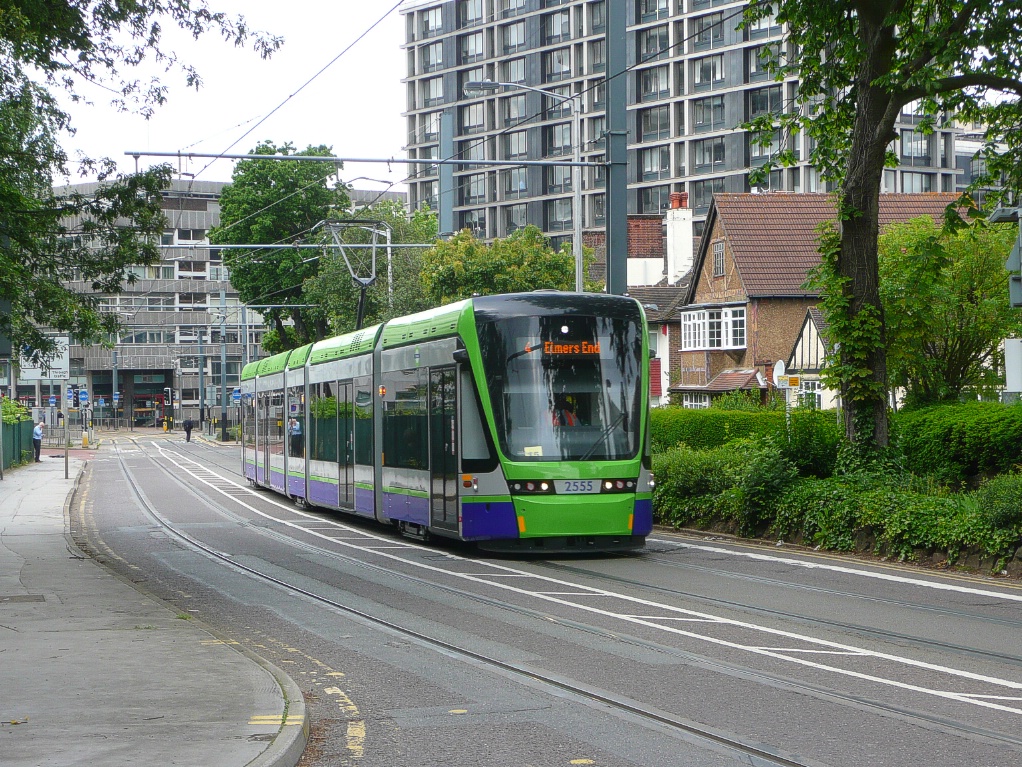
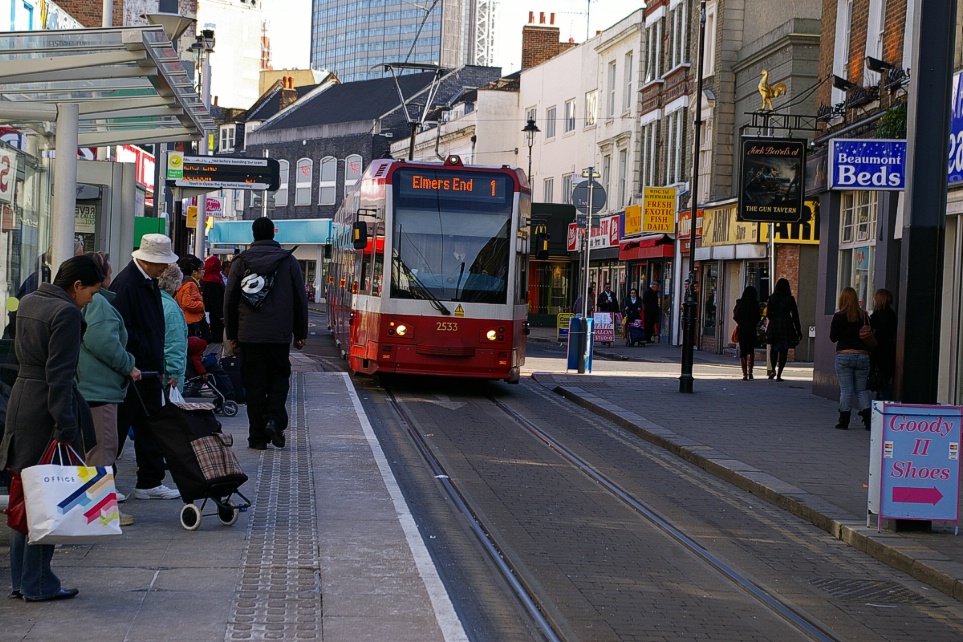
Just east of Arena, Route 1 and Route 4 trams continue straight through the junction to Elmers End, about one kilometre away. The right of way from Woodside to Elmers end is a former British Rail right of way. A few hundred metres west of Elmers End, a National Rail line parallels the tram right of way into a station at Elmers End.
On parts of the system built on the right of way of former railway lines, former station platforms were demolished and rebuilt to Tramlink standards for low level boarding. The exceptions to this are Wimbledon and Elmers End, where track level was raised to make use of a platform that is shared with other rail services.
Routes 2 - Arena to Beckenham Junction
East of Arena, Route 2 trams curve to the northwest at the junction and proceed just over a kilometre of winding right of way to Harrington Road.
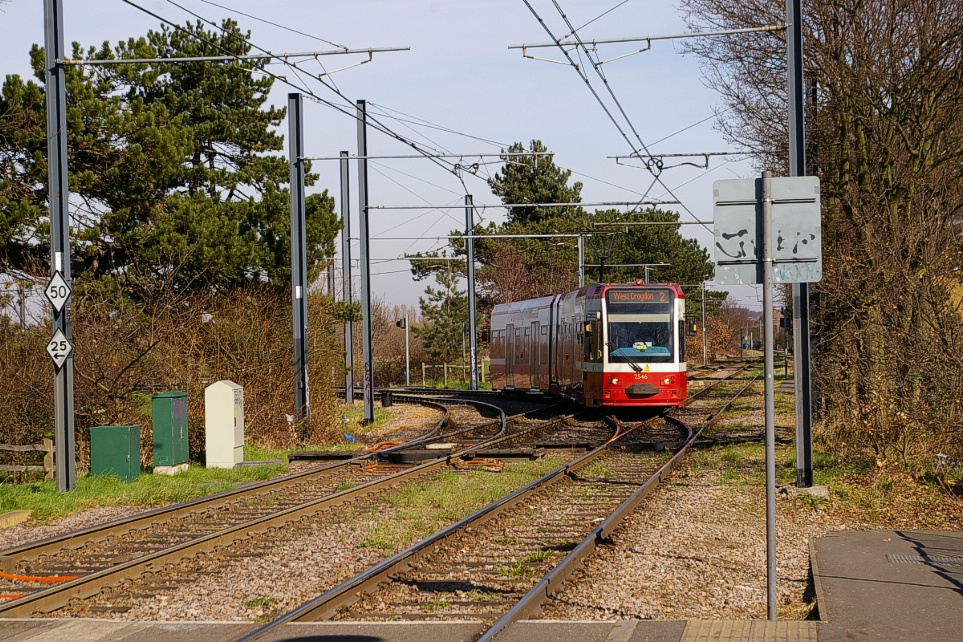
About 200 metres beyond Harrington Road, the line converges to a single track before making a greater than 90 degree turn to the right to head to the northeast where it is joined by a National Rail line that will parallel the tram line all the way to Beckenham Junction. The line continues as a single track. About 500 metres from where the single track begins is where the Birkbeck stop is. This stop is also a stop for the rail line.

Westbound tram about to leave Birkbeck.
|
Birkbeck stop with low level LRT platform along the closest track and high
level platform on the opposite track.
|
Birkbeck as an eastbound tram arrives.
|
The single track continues to Avenue Road, about another 500 metres away where it splits to two tracks. Past Avenue Road, the line converges back to a single track until it reaches a siding east of the Beckenham Road stop. The Beckenham Road stop is about 500 metres from Avenue Road.
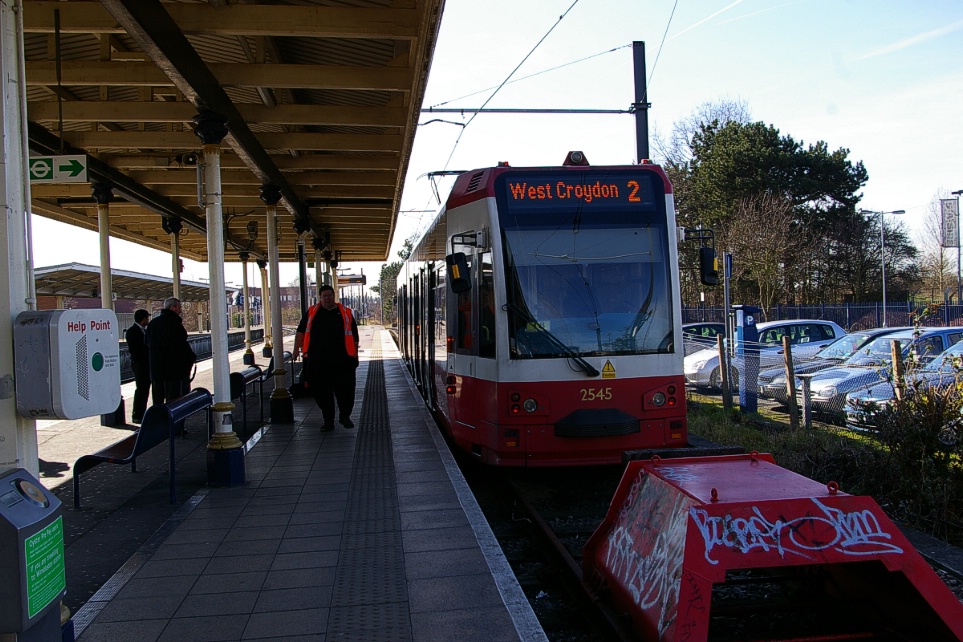
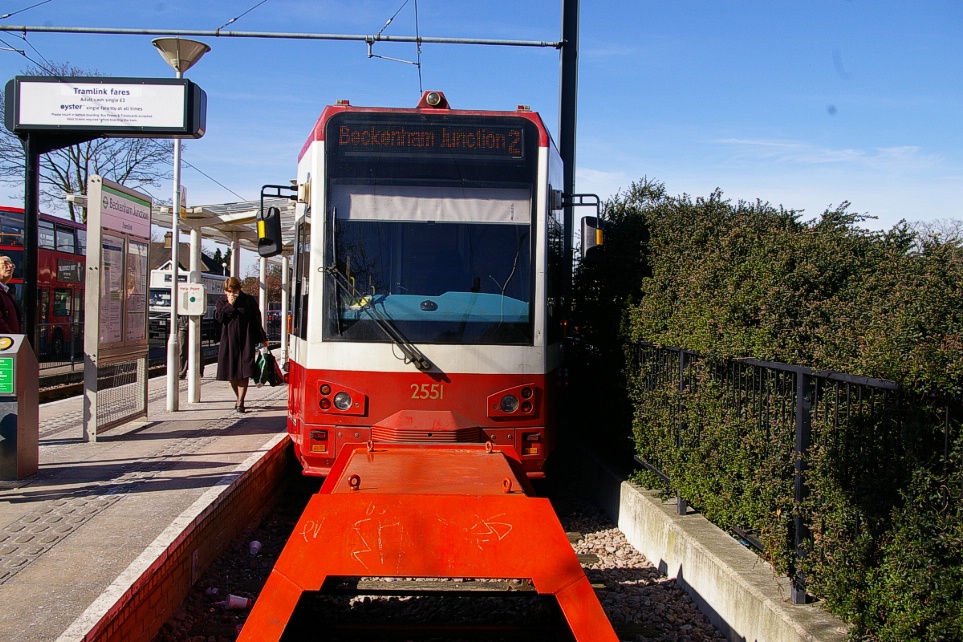
Almost another kilometre from Beckenham Road is the Beckenham Junction stop where the line splits into two tracks for the station.
End of track at Beckenham Junction.
|

Route 2 at Beckenham Junction.
|
Fares and Fare Collection

London's fare system can seem quite confusing at first, as each mode has its own fare plus there are fare zones. This is somewhat simplified witht he use of Travelcards valid for the zones needed, or with the use of the Oyster Card, a smart card that simplifies transit fares and admissions to some attractions around town.

Single fare for zones 1-6.
|
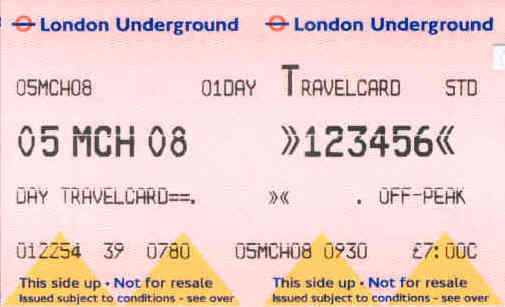
One day Travelcard for zones 1-6.
|
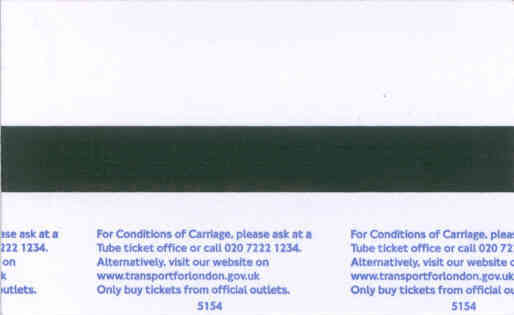
Rear side of Travelcard.
|
Tram stops are unmanned and have fare vending machines.
A single fare is £2.30 (about C$3.70), and tickets may be used for onward travel on a connecting bus service.
When using an Oyster Card, the fare is only £1.35 (about C$2.20). Multiple trips within a 24 hour period using an Oyster Card will cap at £4.20 (about C$6.80).
7-day passes are available for £18.80 (about C$30.25). Monthly passes are £72.20 (about C$117), and annual passes for £752 (about C$1210).
Accessibility
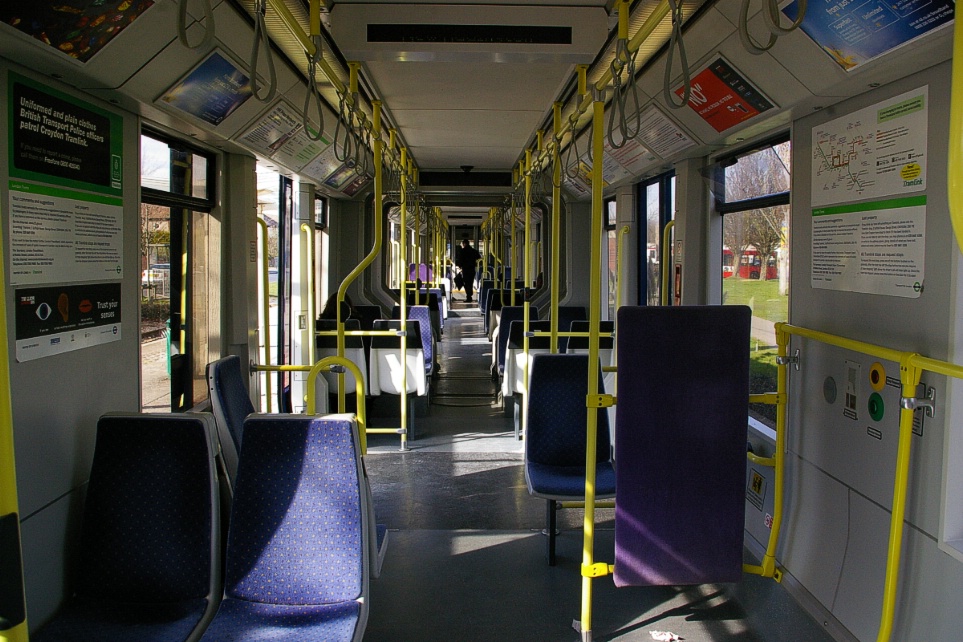
All stops have level boarding to trams. The Bombardier trams have low floors for 76% of the interior space, covering the area between the front-most and rear-most doors. The new Stadler Rail trams are 100% low floor.
Other Notes
Tram stops are all about 32 metres long with platforms at least 2 metres wide.
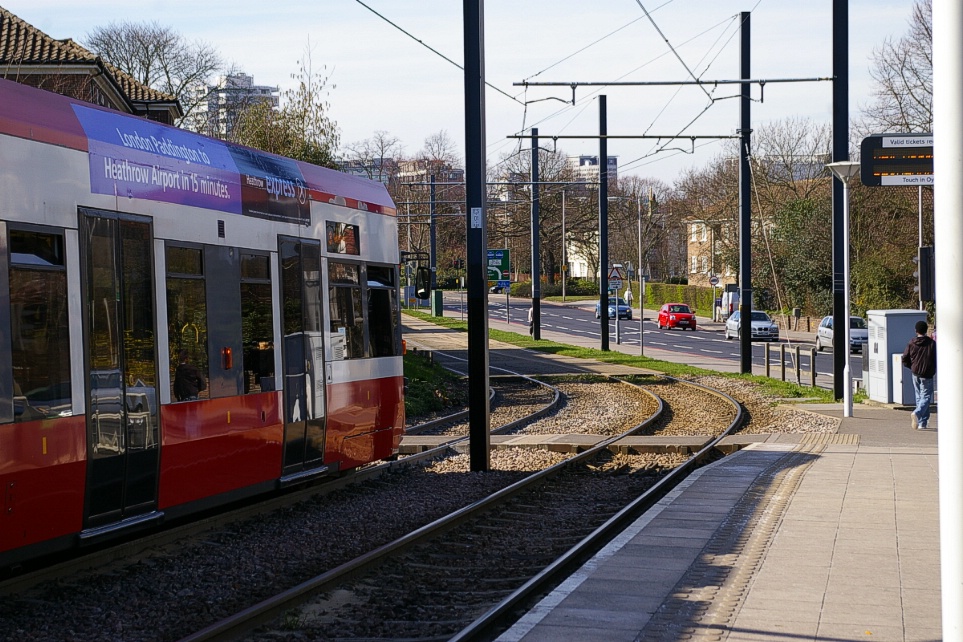
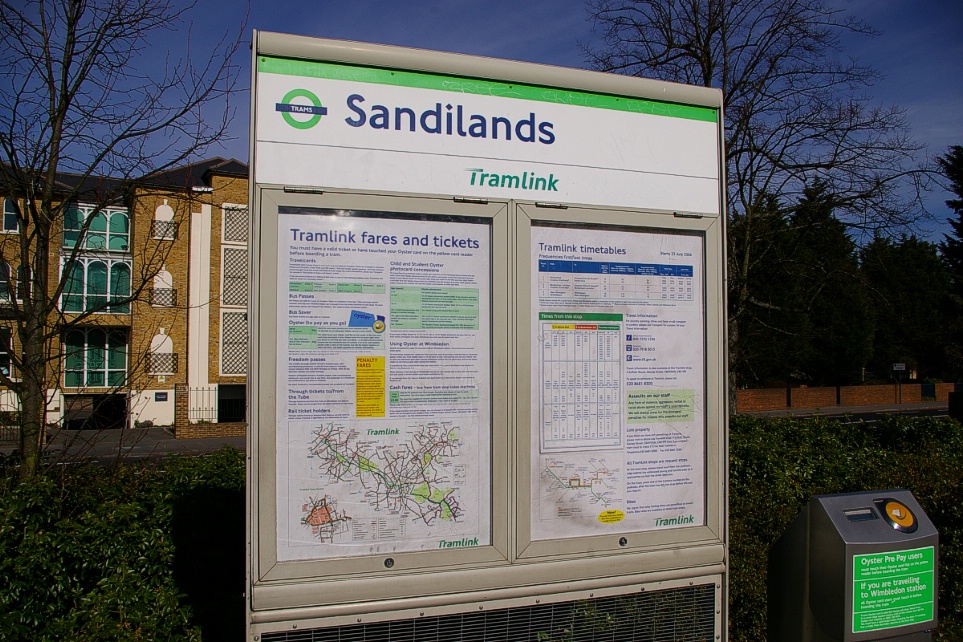
All are fully accessible, with CCTV and a Passenger Help Point, a Passenger Information Display (displaying the estimated time of the next two arrivals, or other emergency information), a ticket machine, and a notice board such as the one pictured to the right.
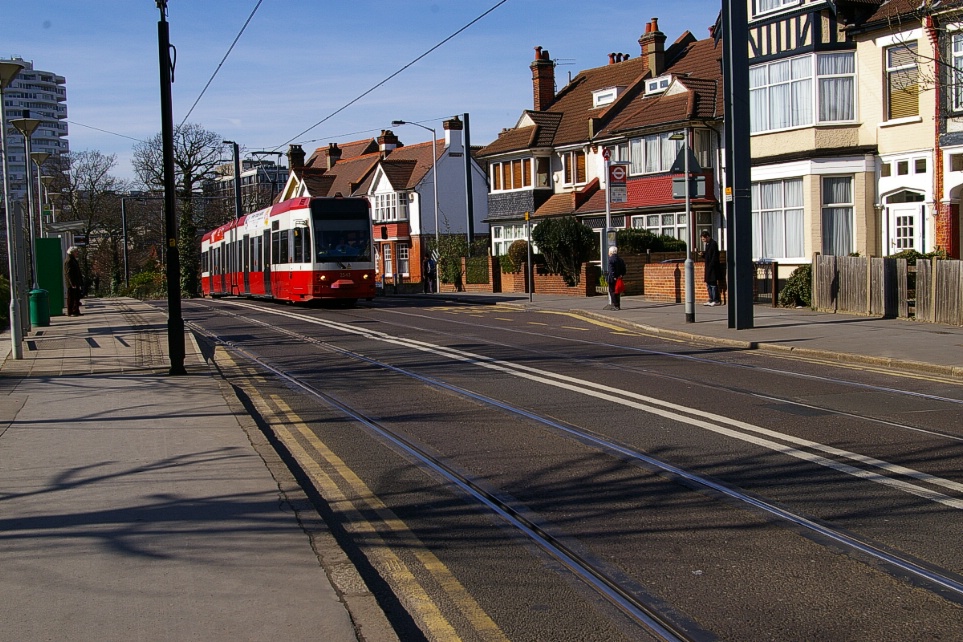
Most of the photographs on this page were taken in 2006 when the trams had a red and white livery. More recently, this has been updated to a blue, green, and white colour scheme:

|
Road traffic is controlled with traffic lights, while tram traffic is controlled with a position signal light displaying a vertical bar when it is clear to proceed, and a horizontal bar when the tram should stop.
The same type of signal is used to indicate the position of a track switch with diagonal bars.
Current and Planned Expansion
Various plans have been proposed for extending the east end parts of the line as well as double-track portions that are currently single-tracked. Nothing definate has been decided at this point.
As mentioned above, additional service will be provided on existing track by the addition of a new route in June 2012.